Trusted by over 1 million+ WordPress sites
Finally, an Advanced Google Analytics Plugin for WordPress
that’s Easy and
Powerful
ExactMetrics is the most comprehensive Google Analytics plugin for WordPress. Here are the features that make ExactMetrics the best plugin in the market.
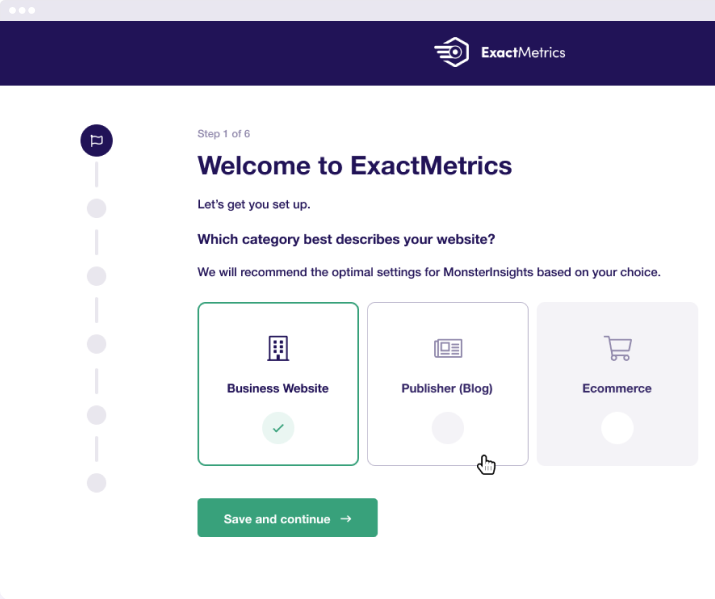
Most Accurate Tracking
Properly setup powerful Google Analytics tracking features with just a few clicks (without hiring a developer).
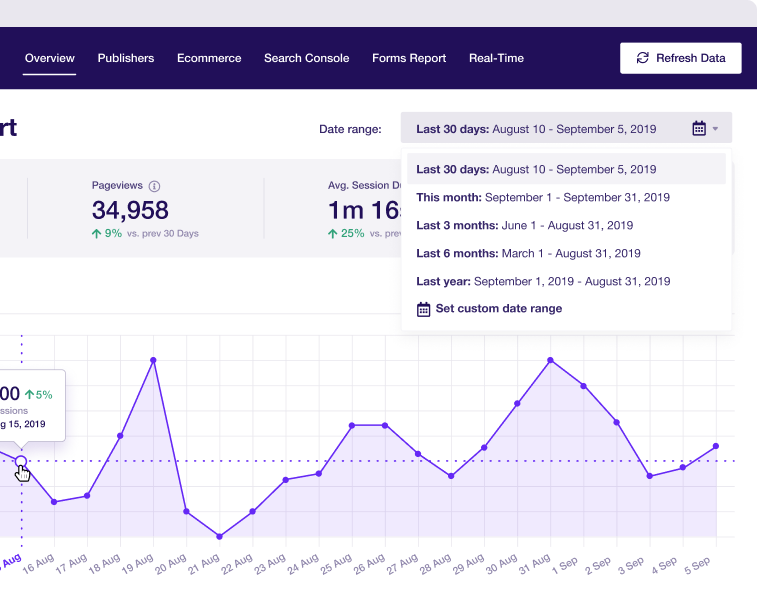
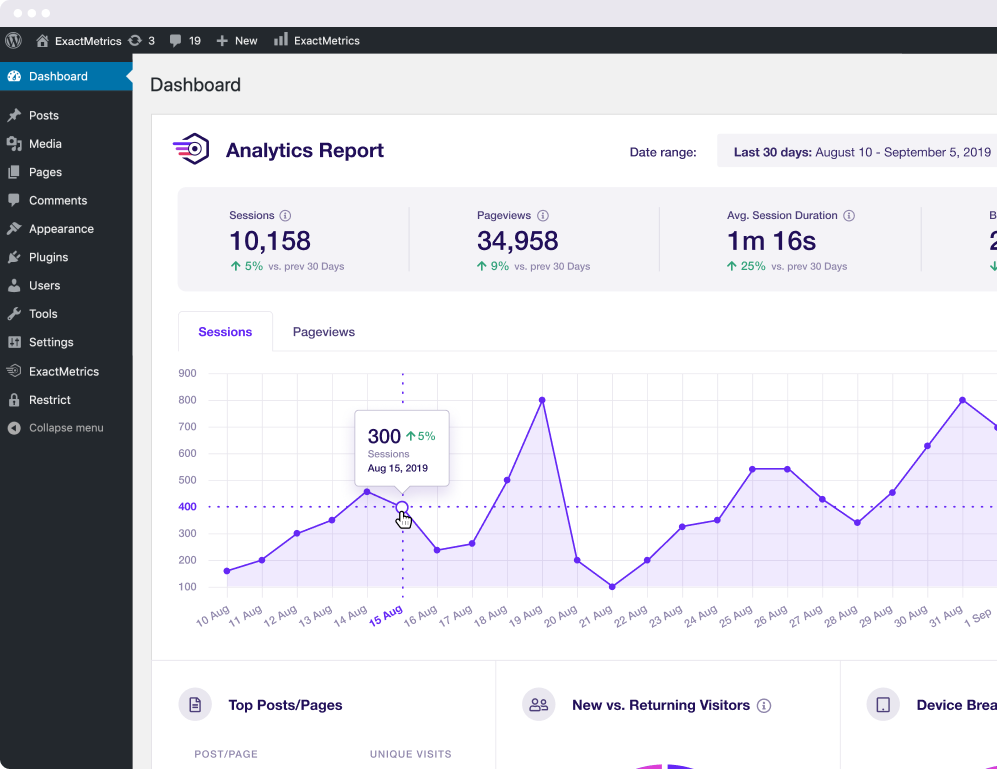
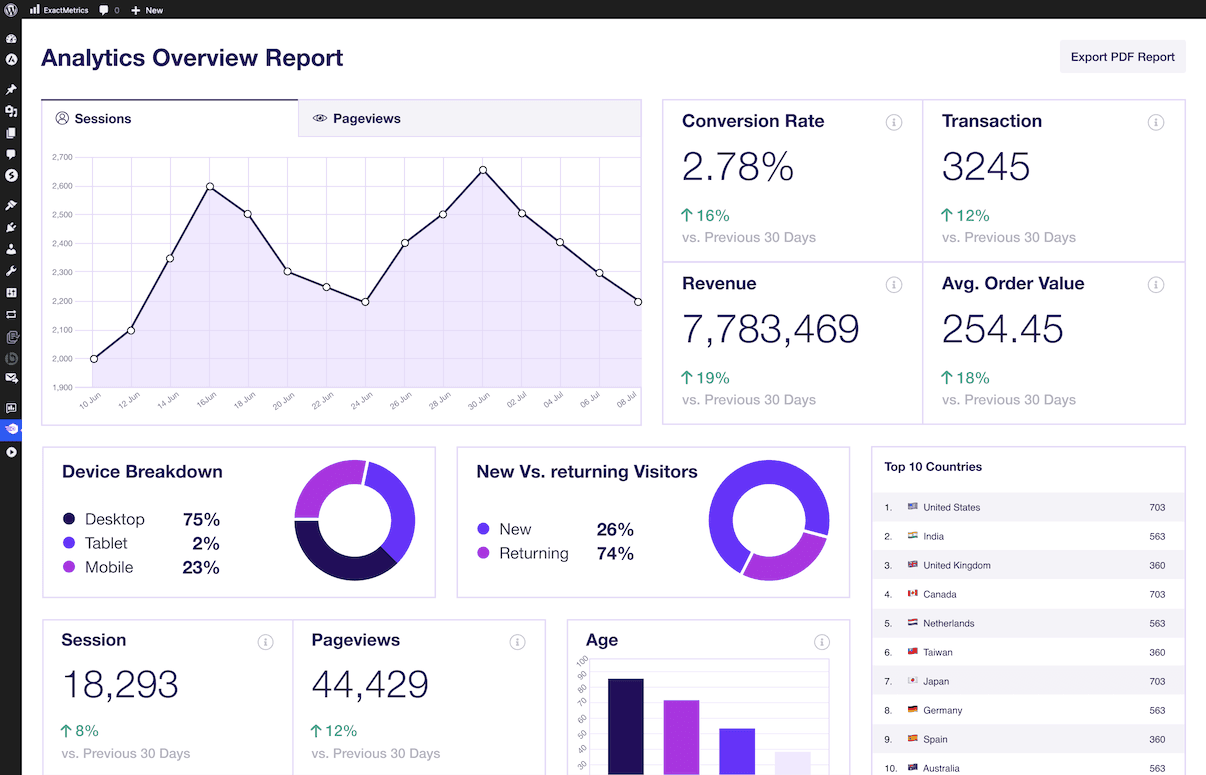
Easy Analytics Dashboard
See your Google analytics reports right inside your WordPress dashboard with actionable insights.
Real-time Stats
See who is viewing your website, what they're doing, where they're coming from, how they found your site, and more.
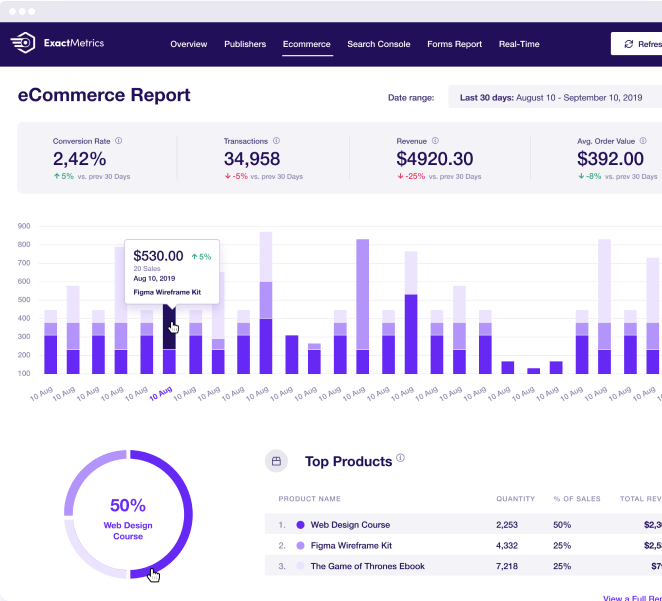
eCommerce Tracking
Setup Google Analytics eCommerce tracking for WooCommerce, Easy Digital Downloads, MemberPress, MemberMouse, Restrict Content Pro, GiveWP, and LifterLMS.
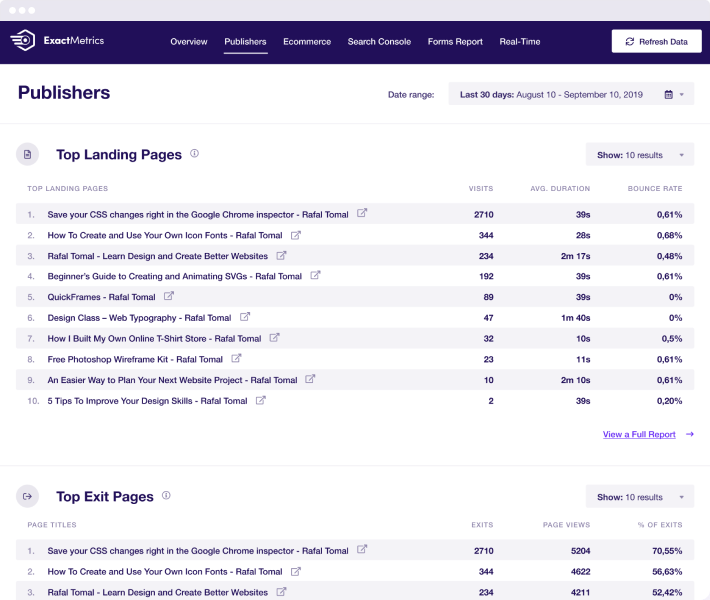
Page Level Insights
Get detailed insights for each post, page, and products, so you can see the most popular areas and sections of your site.
Affiliate Ad Tracking
Automatically track clicks on your affiliate links, and other external links with our enhanced link attribution
GDPR / CCPA Compliant
Automatically make Google Analytics compliant with GDPR, CCPA, and other privacy regulations.
Custom Dimensions
Custom tracking for authors, categories, tags, searches, custom post types, users, and other WordPress events.