Do you have a membership site, an online forum, or an education or training website, or a website that otherwise has protected content that your users need to log-in to view?
That’s great news– because with ExactMetrics’ User Tracking feature you can track each user who has logged into your WordPress website with their User ID.
The behavior of each specific logged-in User on your WordPress website can be tracked via ExactMetrics’ User ID function and will be visible in Google Analytics in the User Explorer, and also a custom dimension if setup.
Please note that the User ID is the WordPress User ID as seen below, not the username, email or real name of the individual. This is because Google Analytics doesn’t allow any personally identifiable information (PII) to be added to Google Analytics as per their Terms of Service.
Prerequisites: To get started, you’ll need:
- ExactMetrics Plus license key or higher activated on your WordPress site
- Google Analytics connected.
Step 1: Enable User Tracking in ExactMetrics
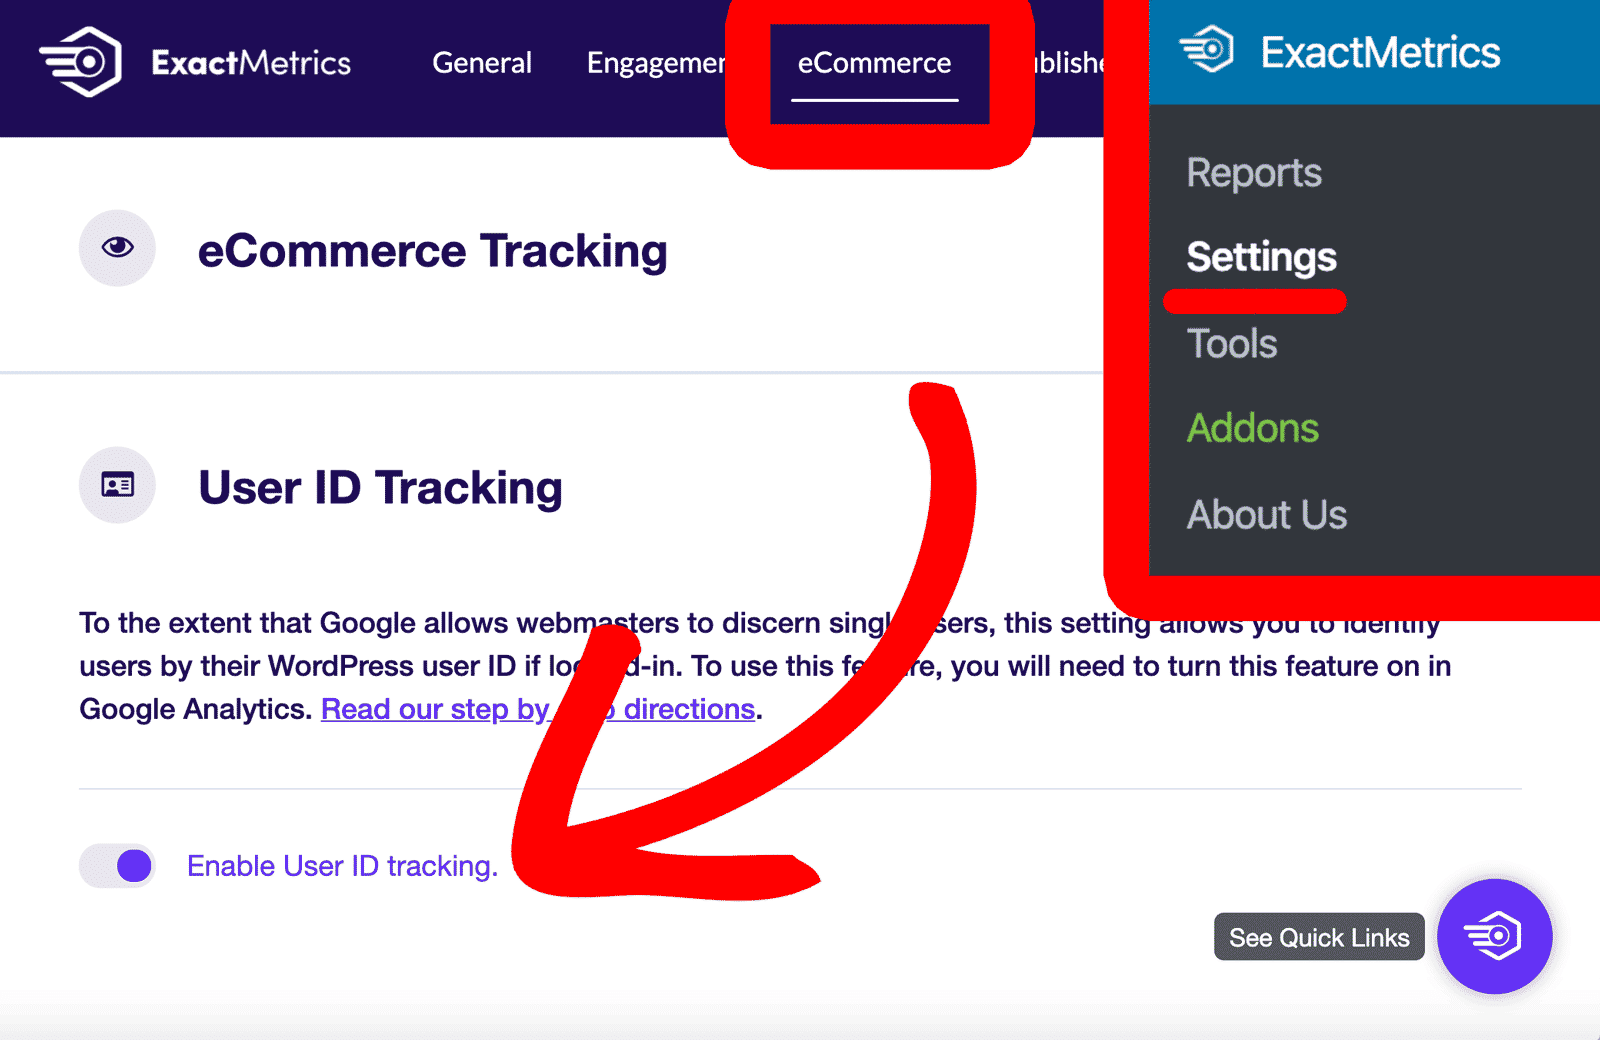
First, go to ExactMetrics » Settings » eCommerce in your WordPress dashboard and find the User ID Tracking section. You might need to click the arrow on the right to reveal the entire section.
Click the Toggle to Enable User ID tracking in ExactMetrics. This will auto-save your new setting.
Step 2: Enable User Tracking in Google Analytics
User ID tracking is enabled by default in a Google Analytics property.
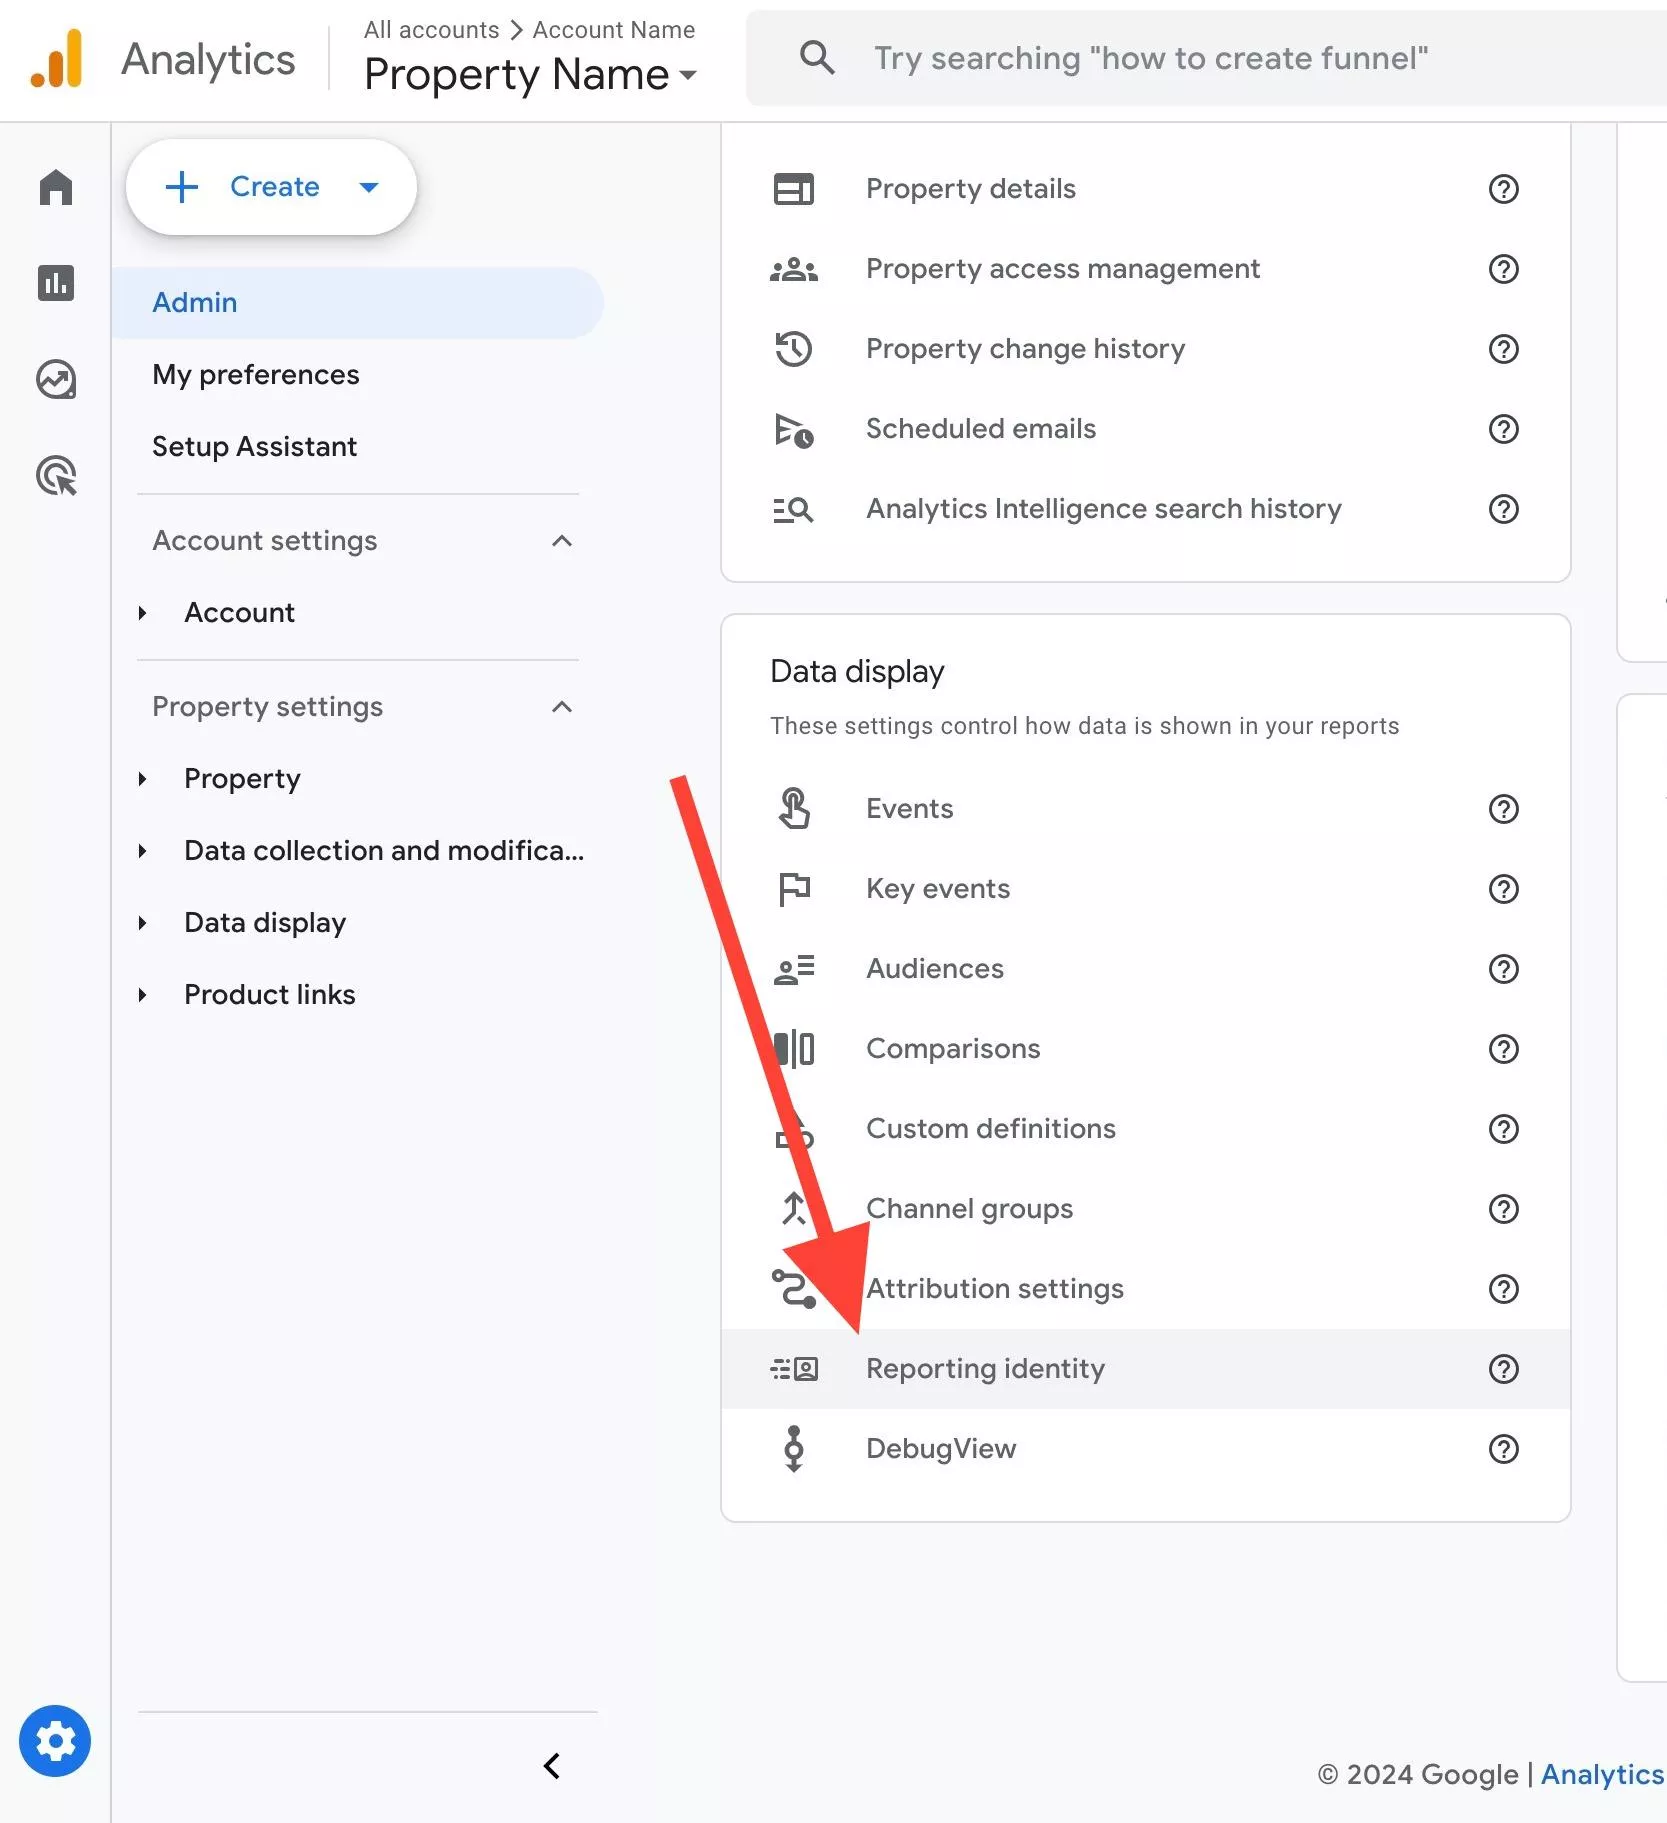
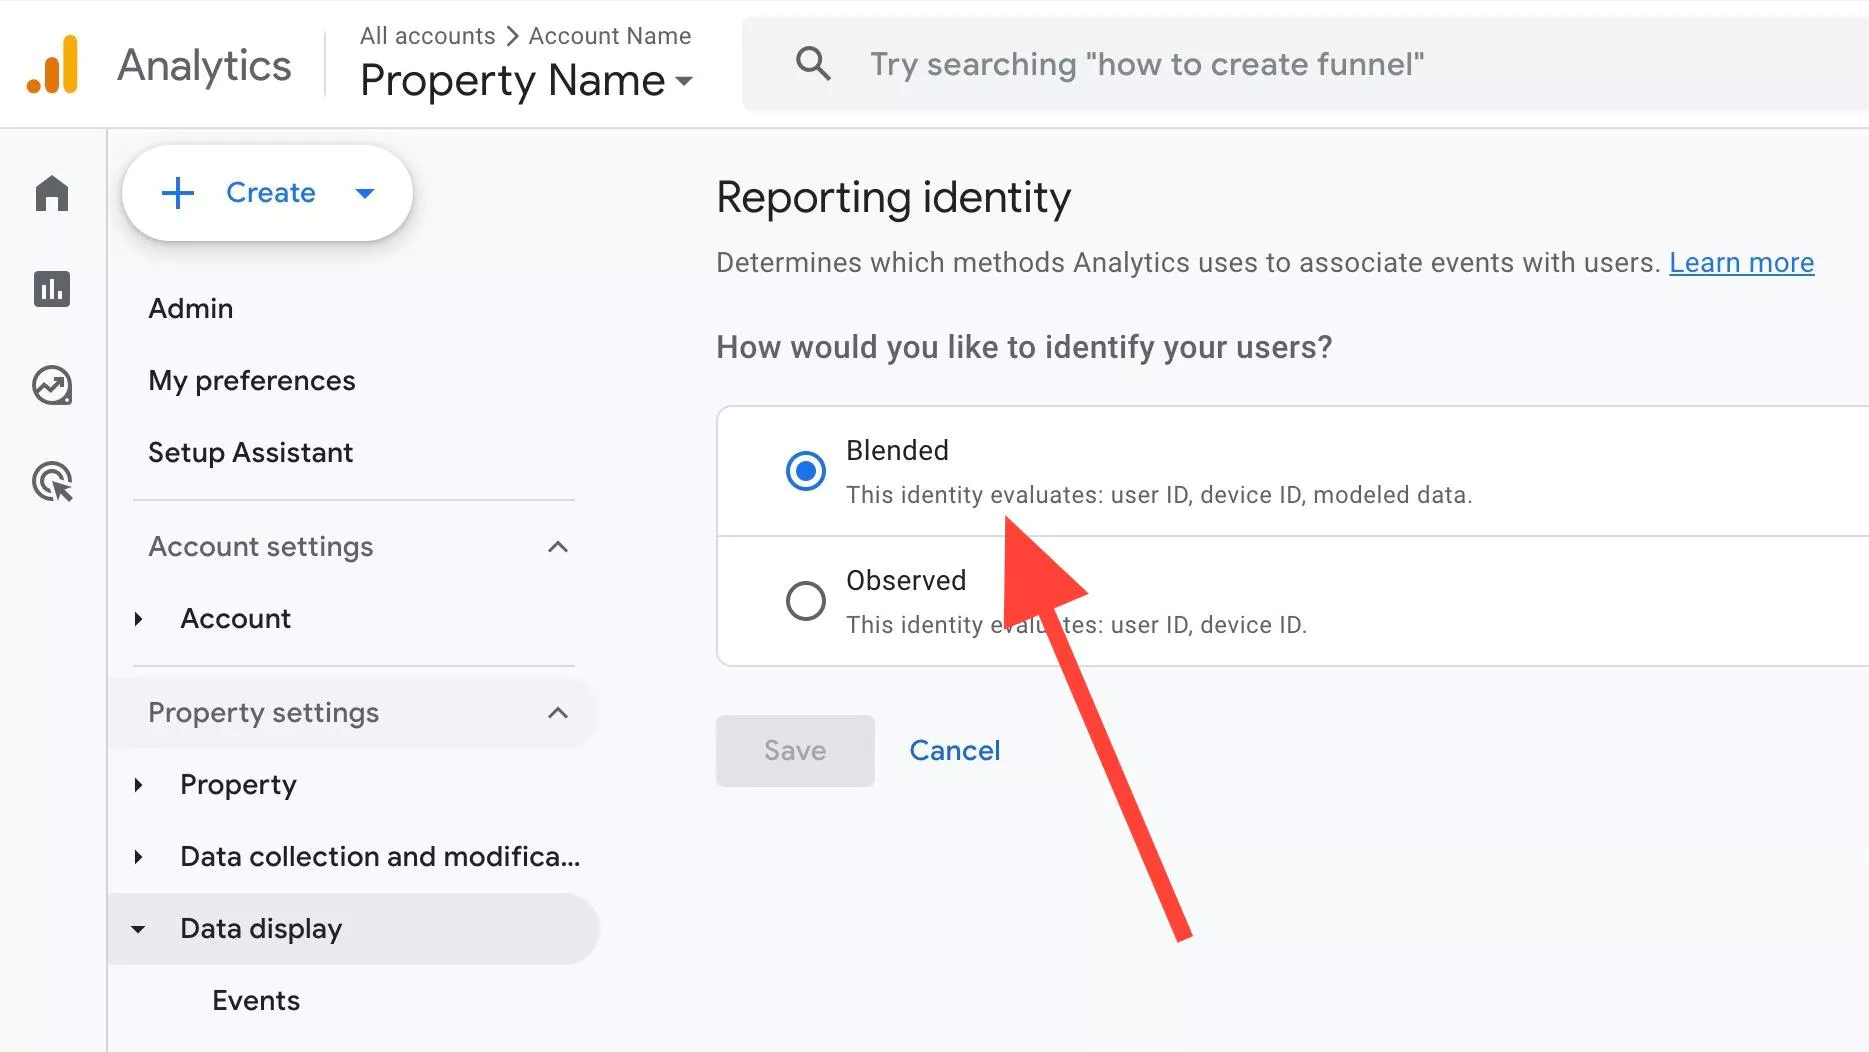
Within your Google Analytics account, at Admin » Reporting Identity, you will see two options:
- Blended
- Observed
Both options will attempt to record a User ID if available, and as a fallback, a client ID will be used.
We recommend leaving the Blended option selected.
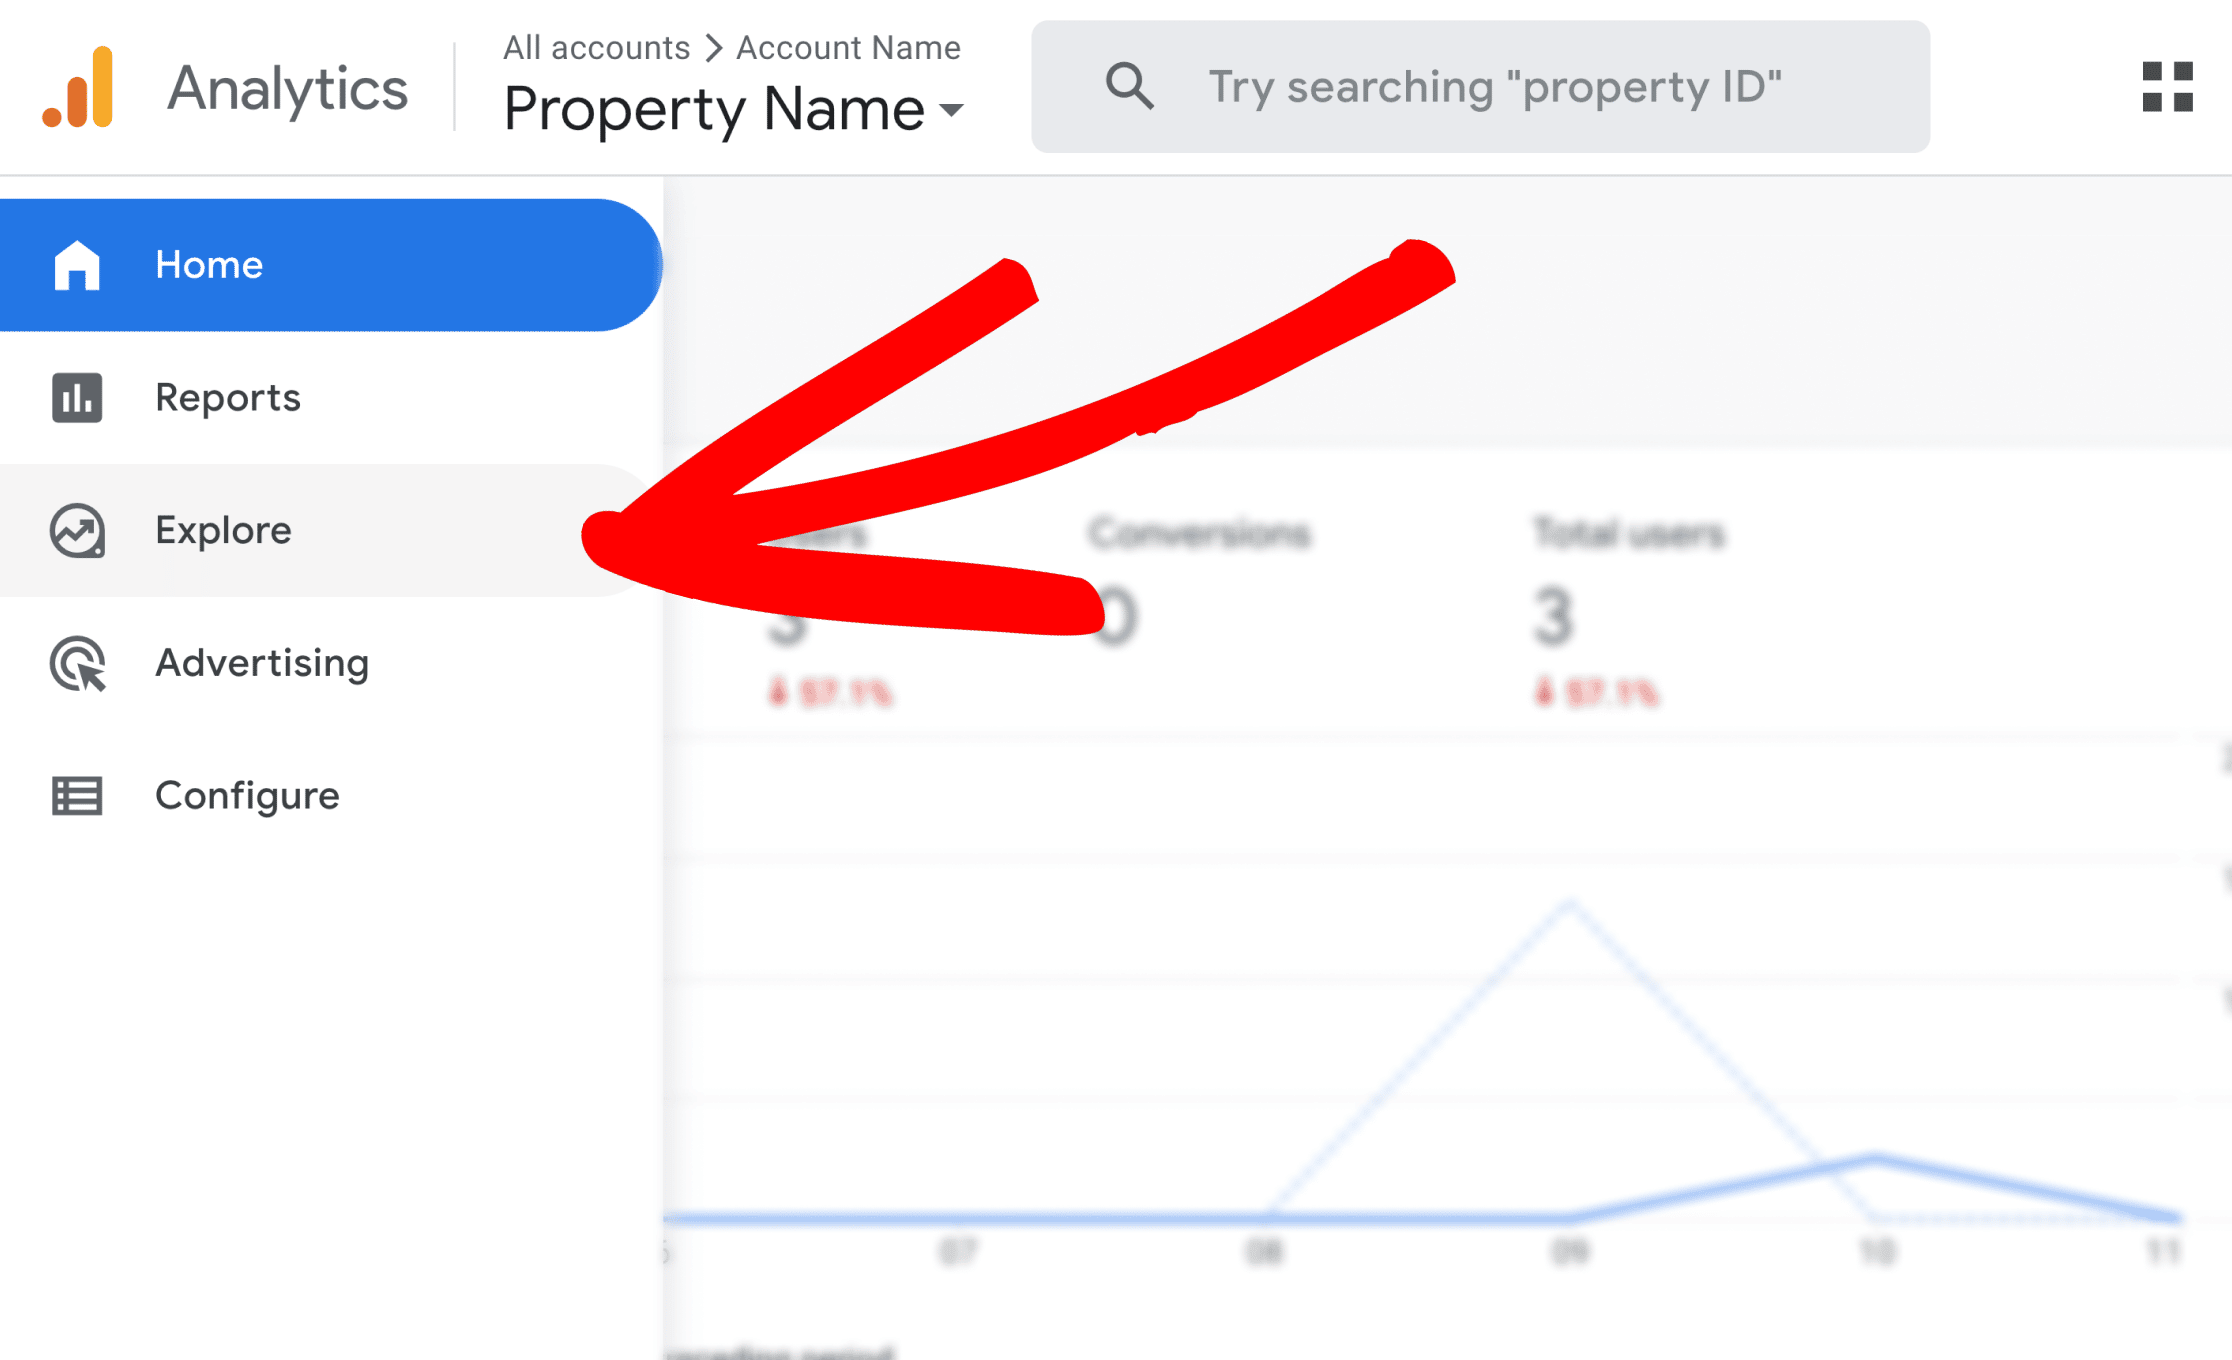
Once you’ve confirmed that User ID tracking is enabled, if you haven’t yet already, go to the Explore page and create a User Explorer custom report, where you’ll be able to view your User ID data.
To know which WordPress User is associated with each ID you will need to go to your WordPress dashboard and click on Users » All Users.
When you hover your cursor over the user you want to find the ID for you can see a URL appear at the bottom of your browser.
In that URL, it says “user_id=”. The number after that is the user’s ID number in Google Analytics, above.
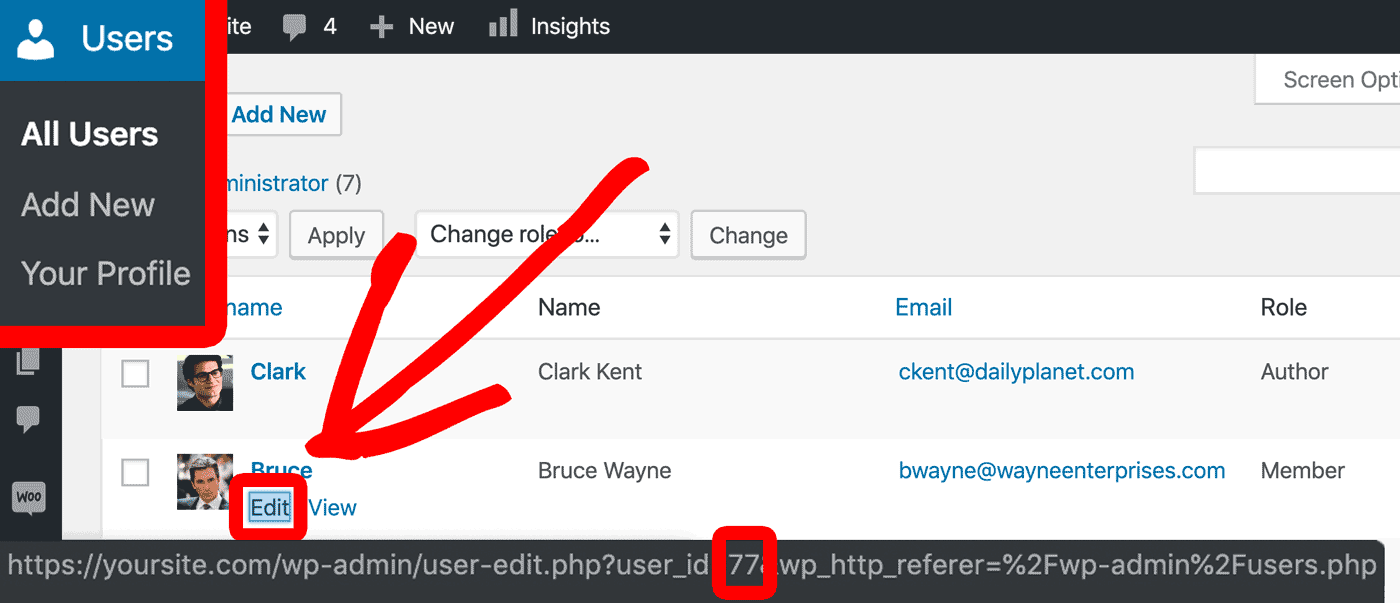
You can also click the Edit link under the username. Now the User ID will appear in the browser web address on the edit page:

Now, you know how to track each logged-in WordPress user who has an account on your WordPress LMS or Membership site!
Next, please see our guide on how to get started with the ExactMetrics eCommerce addon, or our Getting Started with ExactMetrics: Guide and Checklist for Advanced Metrics for even more step-by-step guides for very advanced metrics setups.

