Your website is an incredibly important part of your business. Is it just as protected as the rest of your business? In order for your site to be safe, you absolutely need to know how to back up WordPress.
Nobody expects a hacker to gain access to their site, an update to go very wrong, or just plain human error to undo a bunch of your hard work. The reality is, though, that it happens! If you have a backup, fixing the problem is really pretty simple. Without a backup, it’s not simple at all.
The best part is, you can set up a backup schedule that runs automatically, so you don’t even have to think about it! In this article, we’ll show you how to back up WordPress using our favorite backup plugin, Duplicator.
How WordPress Backups Work
WordPress backups are really pretty simple. Your entire site is just a big set of files, just like you’d find in your file explorer on your computer. There are files that contain your design, files that contain your content, files that contain plugins, and more.
Creating a WordPress backup is as simple as just saving a copy of all those files somewhere where you can access them just in case. Then, if something should happen to your website, you can just restore that saved copy and have a working site again.
Of course, the saved copy of your site should be in a secure storage space that you trust.
Then, put very simply, you can upload those saved files at any time to get that version of your website back.
How to Back Up WordPress
For this tutorial, we’re going to use our favorite WordPress backup plugin: Duplicator.
Duplicator Pro is the best backup plugin for WordPress. It can create scheduled backups, or help you move your whole website. It’s easy to use, fast, and full of helpful features.
With Duplicator, you can:
- Schedule unlimited backups
- Choose from different recovery points
- Securely encrypt your site files
- Save your files directly to Google Drive, Dropbox, and other popular storage locations
- And more!
In our tutorial, we’ll be using the Pro version of Duplicator. If you’re a business owner or blogger with just one or two websites and no need for hourly backup scheduling, you can use their Basic version for just $49.50 per year. Duplicator does have a free version that you’re welcome to try, but you’ll need to remember to back up your site on your own. We highly recommend grabbing a license so that you can schedule it and forget it!
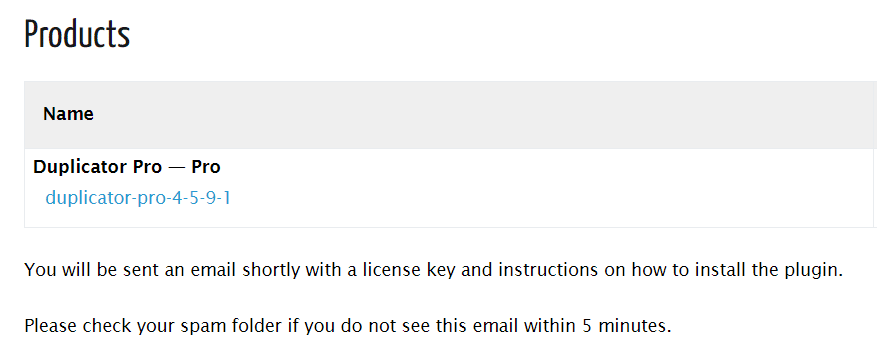
To get started, grab your Duplicator license. On the checkout confirmation page, scroll down to find the link for your download:
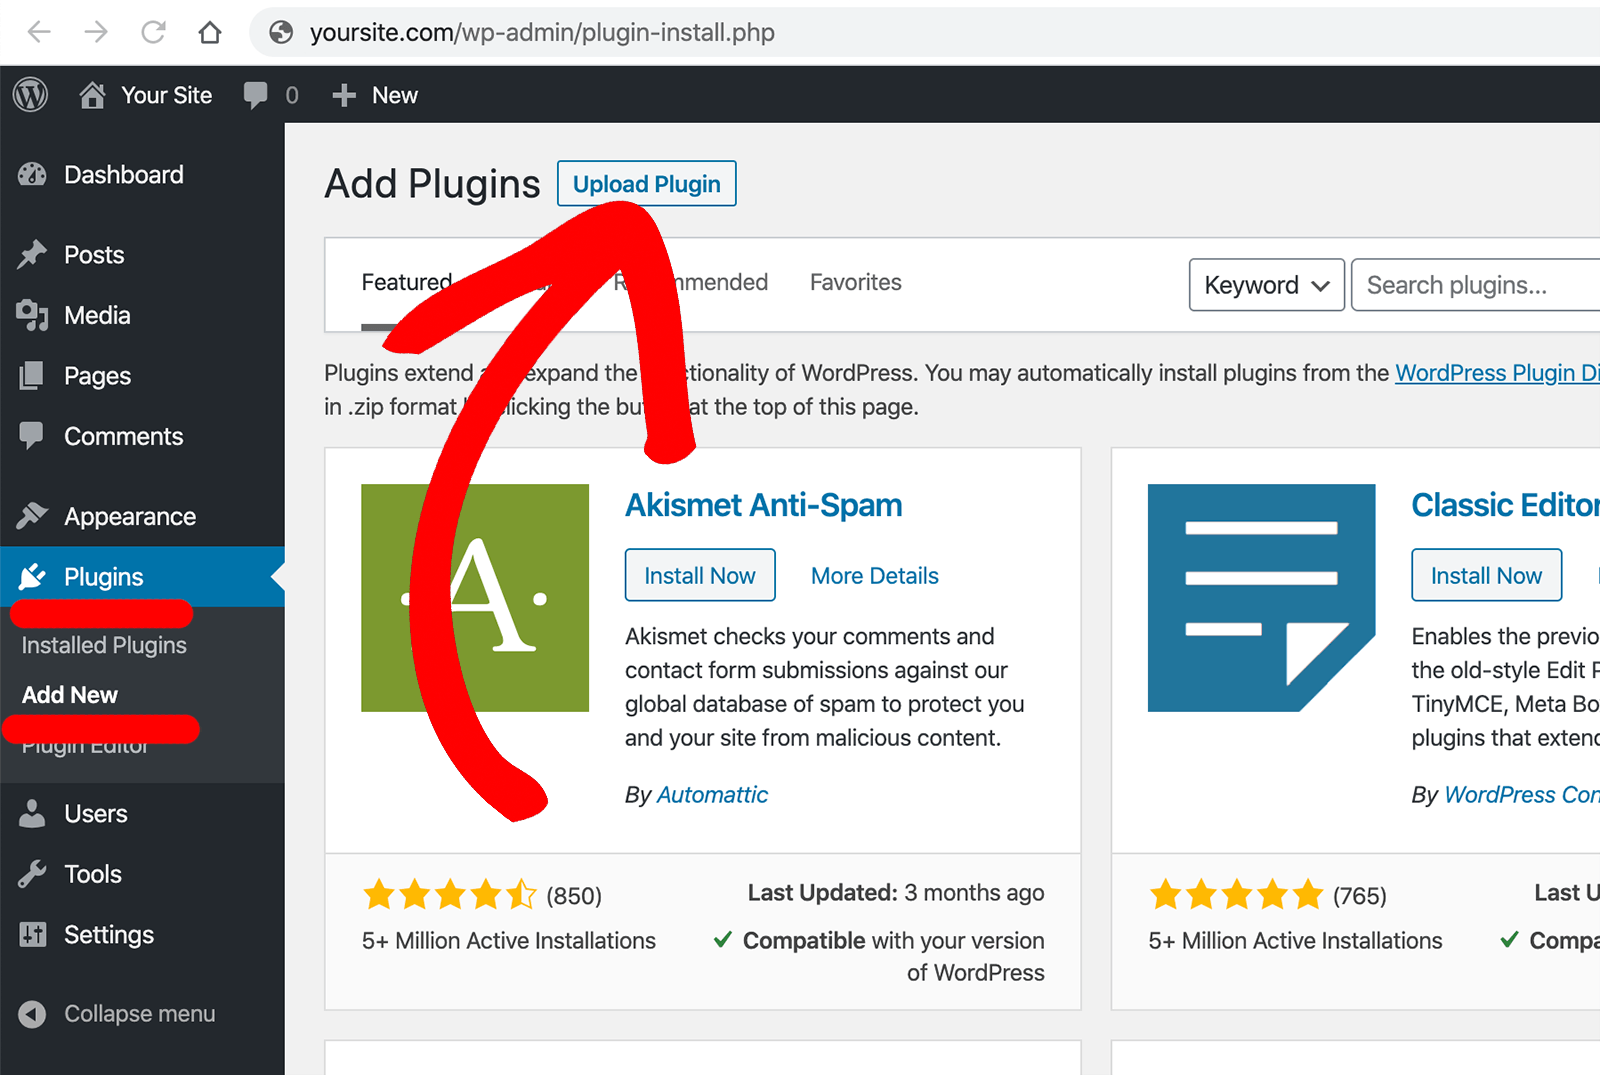
Once you’ve downloaded the file, head to Plugins » Add new and click the Upload Plugin button:
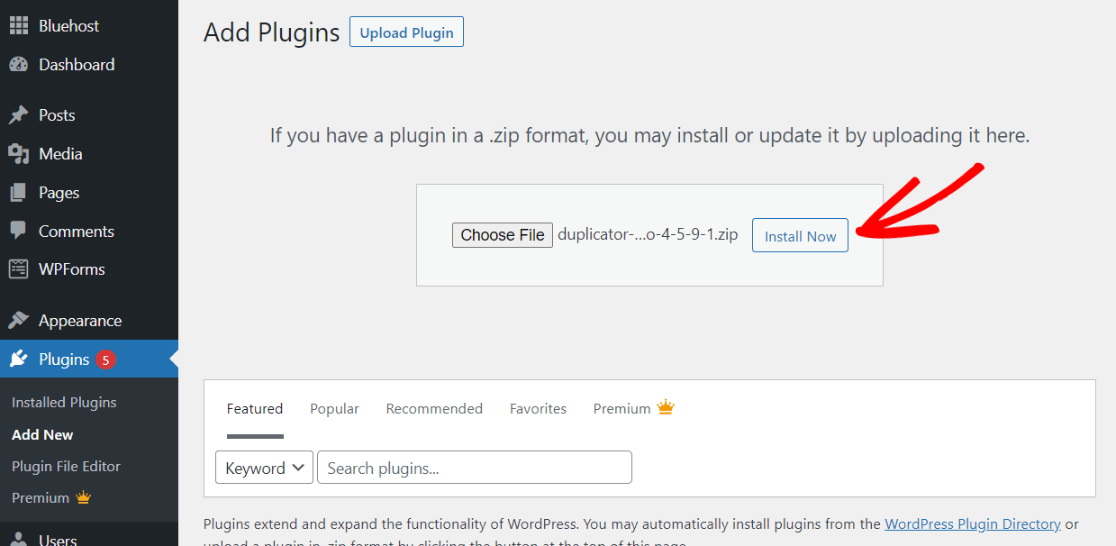
Choose your Duplicator file and click Install Now:
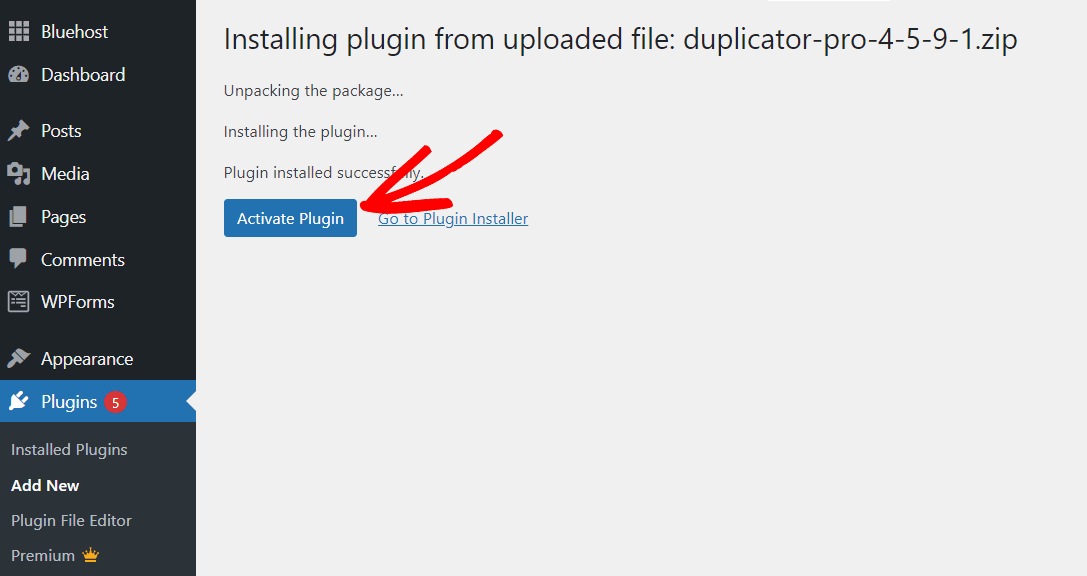
When it’s done installing, go ahead and click Activate Plugin:
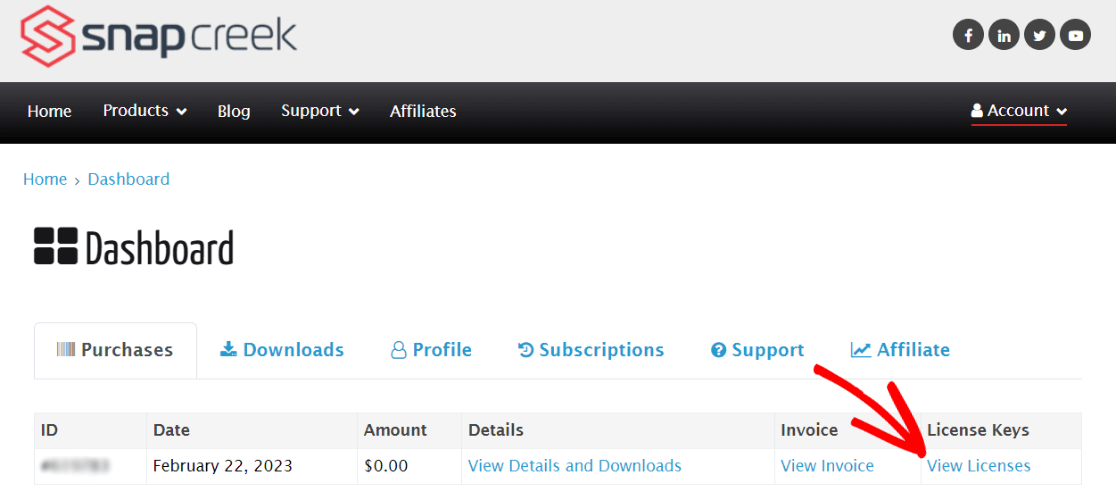
Next, you’ll want to activate the plugin with your license key. To find your license key, visit your Duplicator account page:
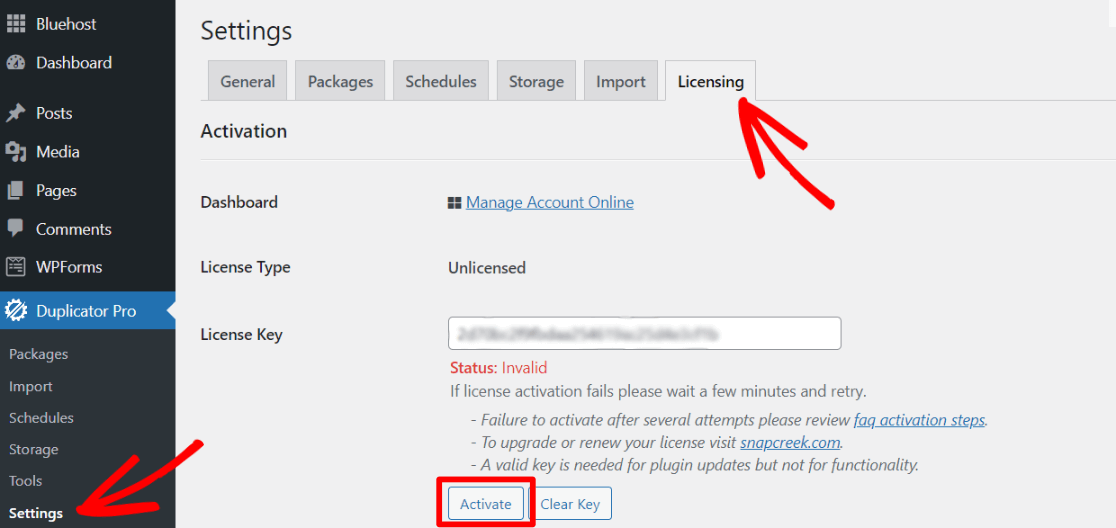
Once you’ve copied your license number, head to your WordPress dashboard and open Duplicator Pro » Settings. On that page, click on the Licensing tab. Paste your license key in and hit Activate.
Congrats, Duplicator Pro is installed and ready to go! It’s time to create your first backup.
Back up a WordPress Site: Tutorial
Step 1: Set up Storage
To begin, you’ll want to connect with a place to store your backups. The automatic storage location in the Duplicator plugin is set to local, which just means your files will be saved on your server with your current site files. While this is a good way to have a basic backup available, you’ll want to have your backups saved somewhere off your own server as well.
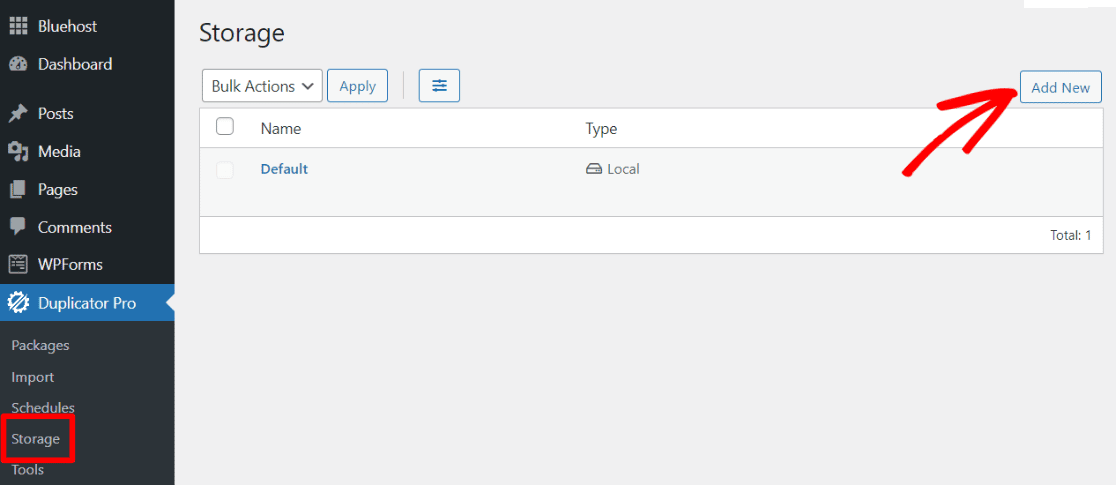
So, head to Duplicator Pro » Storage, then click Add New:
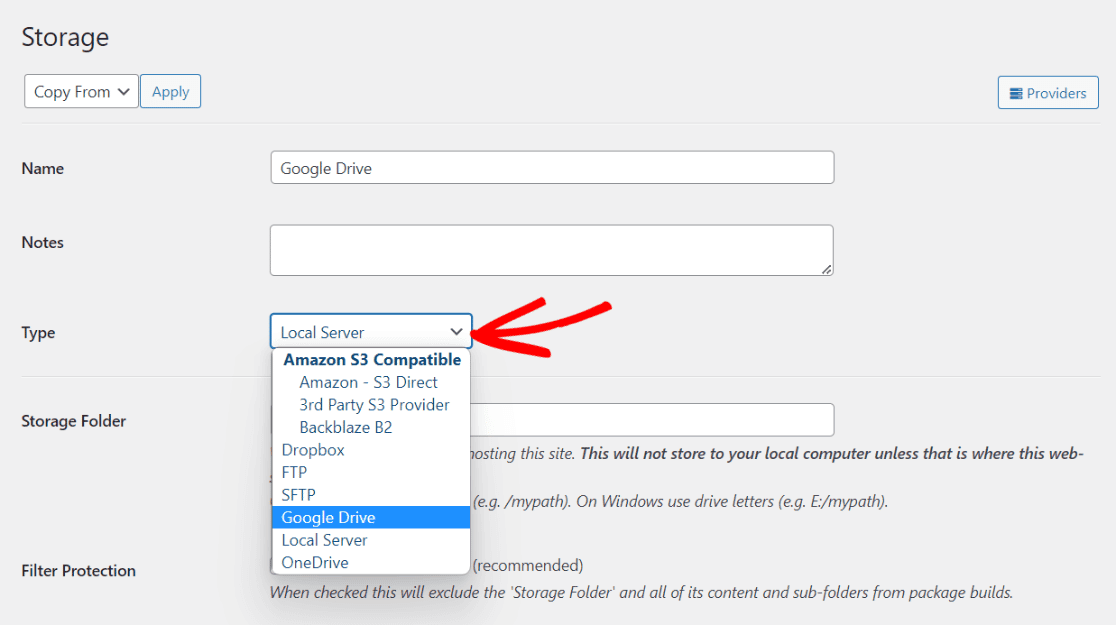
On the next screen, you can choose which provider you want to connect with in the dropdown. For this tutorial, we’ll be connecting to Google Drive:
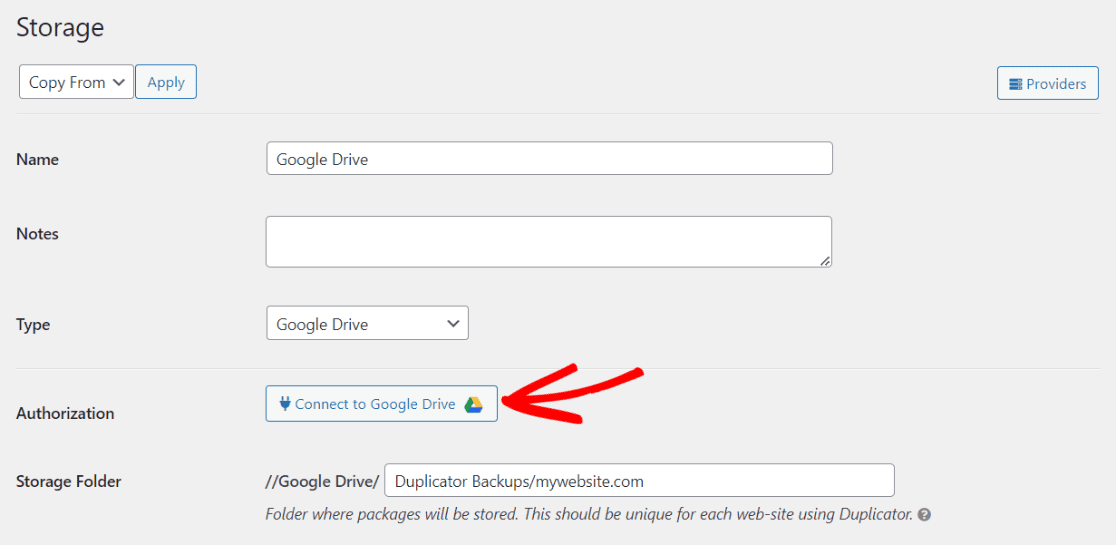
Once you select your preferred storage provider, the next step to connect to that provider will appear. For Google Drive, we need to click the Connect to Google Drive button:
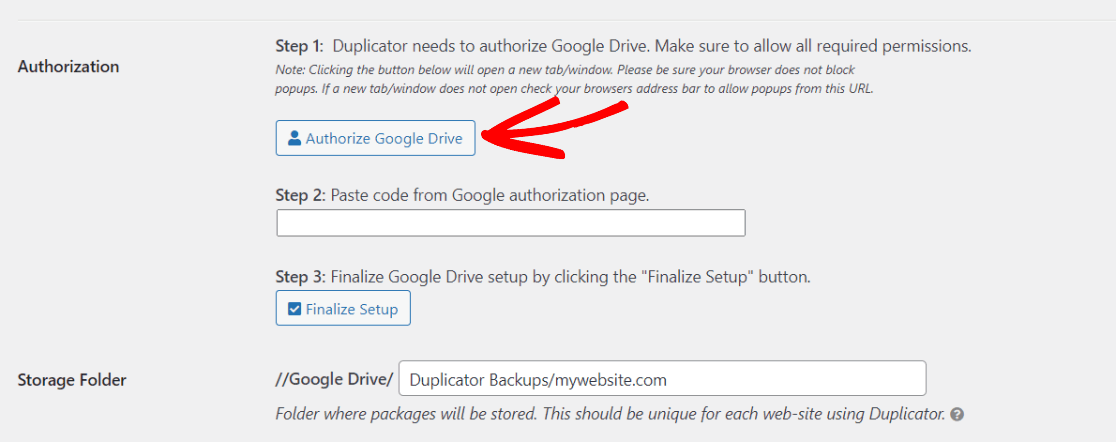
Then, click Authorize Google Drive:
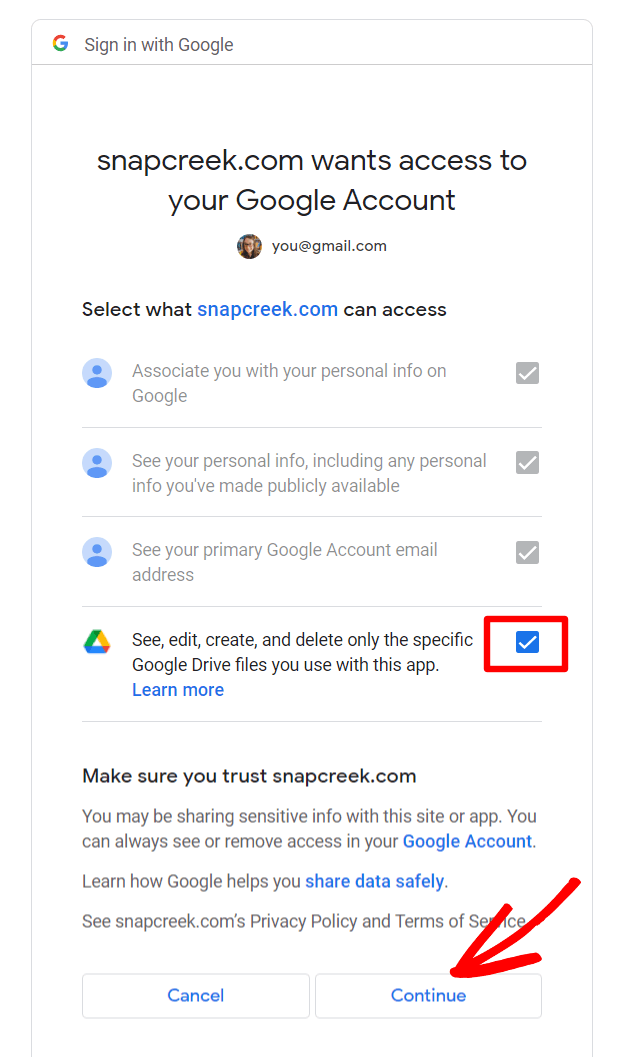
That’ll take you to the authorization checkboxes for Google Drive. Make sure they’re all checked, then click the Continue button:
Finally, you’ll get your authorization code on a plain text page. Copy the code:

Go ahead and paste the code into the code box in Duplicator, then click Finalize Setup. That will complete your setup and you’ll see that everything is connected:
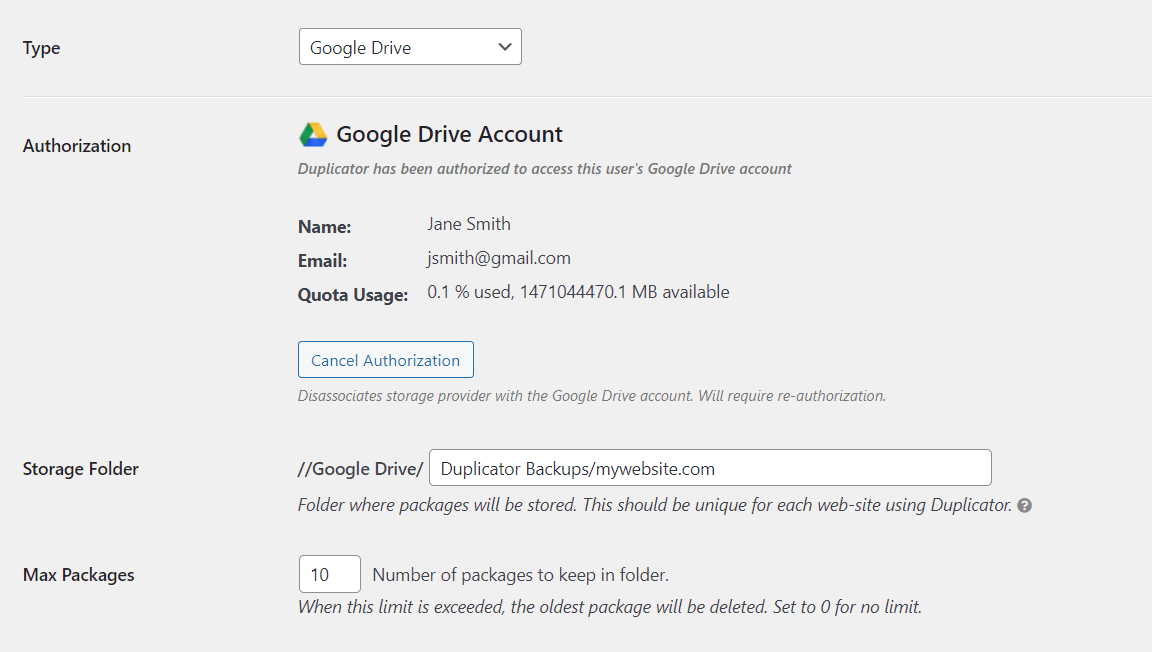
Go ahead and update the storage folder if you’d like. Make sure to click the Save button at the bottom of the page if you do update it.
Step 2: Set a Backup Schedule
Now that our backup location is set, we’ll create a backup schedule. To do that, head to Duplicator Pro » Schedule then click Create New Schedule:
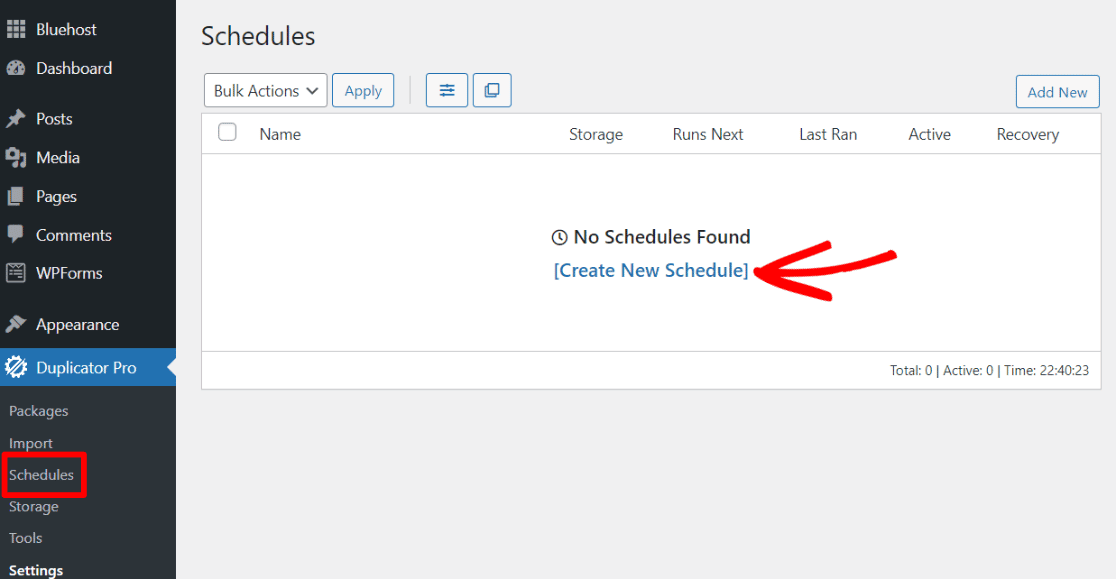
On the settings page, you can choose:
- A name for your backup schedule
- The package template (Default is fine)
- Storage type (in our case, Google Drive)
- How often the backup runs and on what day
- Whether or not the schedule is enabled
When all your settings are set the way you want, go ahead and click Save Schedule at the bottom:
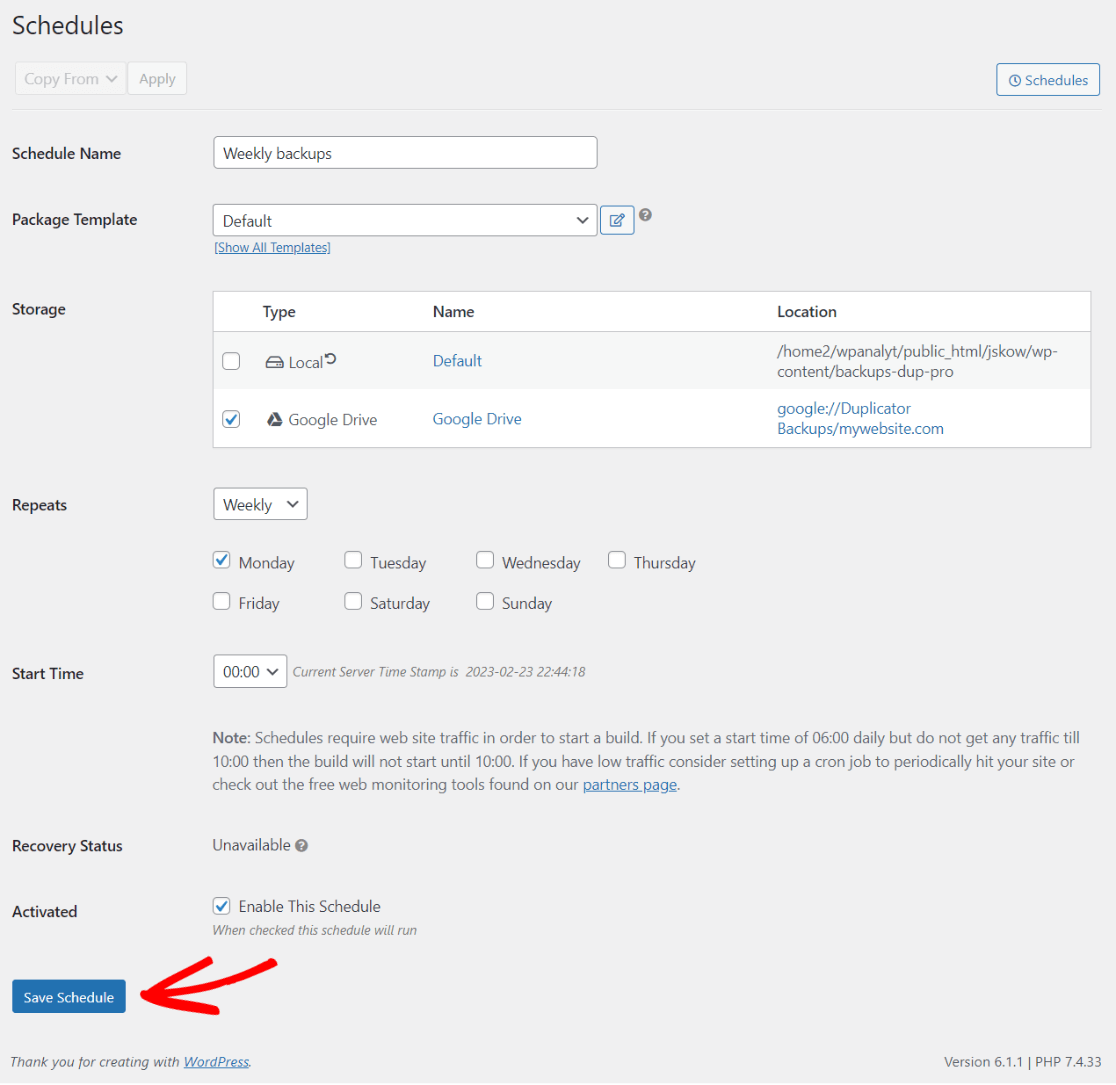
That’s it! Your scheduled backups will now run on your chosen timeline and be saved in your chosen location.
Now you know how to back up your website, but do you know how to properly set up Google Analytics to see all the best stats that’ll help you grow your business? Make sure to check out our article on How to Add Google Analytics to Your WordPress Site.
Not using ExactMetrics yet? What are you waiting for?
Don’t forget to follow us on Twitter and Facebook to see all the latest reviews, tips, and Google Analytics tutorials.


