Do you want to know how your visitors interact with your website? When you add Google Analytics to WordPress, you can see how people find your site, which posts and pages they view, which devices they use to view your site, and much more.
Google Analytics provides invaluable insights into your website’s performance, helping you make data-driven decisions to grow your business or blog.
However, setting up Google Analytics is not straightforward for beginners. Properly configuring Analytics can require coding skills, which can be tricky, especially for new users.
But there’s an easier way for WordPress users, thanks to ExactMetrics. It’s the best premium WordPress Analytics plugin that lets you configure Google Analytics without coding. ExactMetrics simplifies the setup process, allowing you to integrate Google Analytics and track your website’s performance quickly.
In this article, we’ll guide you step-by-step on how to add Google Analytics to your WordPress site using ExactMetrics.
Why Should You Use Google Analytics?
Google Analytics is an essential tool for tracking and understanding your website visitors. Developed by Google, this free platform offers comprehensive insights into user behavior, helping you optimize your site to grow your business or brand.
Key Benefits of Using Google Analytics:
Visitor Tracking:
- Geographical Data: Discover where your visitors are coming from.
- Page Tracking: Identify which pages your visitors land on.
- Page Views: See the total number of views for each page.
Traffic Source Analysis:
- Understand how visitors find your website through different channels like search engines, social media, email, and referrals from other sites.
Device and Browser Insights:
- Learn which browsers and devices (desktop, mobile, tablet) your audience uses to access your site.
Engagement Metrics:
- Monitor how long visitors stay on your site and how they interact with your content.
Advanced Tracking Features:
Custom Metrics:
- Beyond basic tracking, Google Analytics allows you to measure additional interactions by setting up key events or conversions, such as form submissions or specific button clicks.
eCommerce Tracking:
- For online stores, Google Analytics can track product views, total sales, abandoned carts, and more, providing valuable insights to boost sales and improve user experience.
Campaign Tracking:
- Track the effectiveness of your marketing campaigns to see which strategies drive the most traffic and conversions.
Form Submission and Author Tracking:
- Monitor form submissions and track content performance by individual authors to understand what content resonates most with your audience.
Keyword Tracking:
- Identifying which search terms bring visitors to your site helps you optimize your content for better search engine performance.
While Google Analytics offers extensive tracking capabilities, setting up advanced features and interpreting the data can be complex. This guide will walk you through the process, making it easier to leverage these powerful insights for your WordPress site.
Let’s get into it!
How to Add Google Analytics to WordPress
Now that you understand why Google Analytics is essential for your website let’s look at how you can add it to your WordPress site.
In the following steps, we’ll guide you through setting it up using ExactMetrics, making the process simple and straightforward even for beginners:
- Step 1: Download the ExactMetrics Plugin
- Step 2: Create a Google Analytics Account
- Step 3: Install ExactMetrics on Your Website
- Step 4: Open the Setup Wizard
- Step 5: Connect Google Analytics
- Step 6: Adjust Google Analytics Settings
- Step 7: View Your Google Analytics Reports
Step 1: Download ExactMetrics
ExactMetrics is the best premium WordPress analytics plugin. With ExactMetrics, there’s a whole list of things you can set up and monitor in Google Analytics and your WordPress dashboard without touching a line of code.
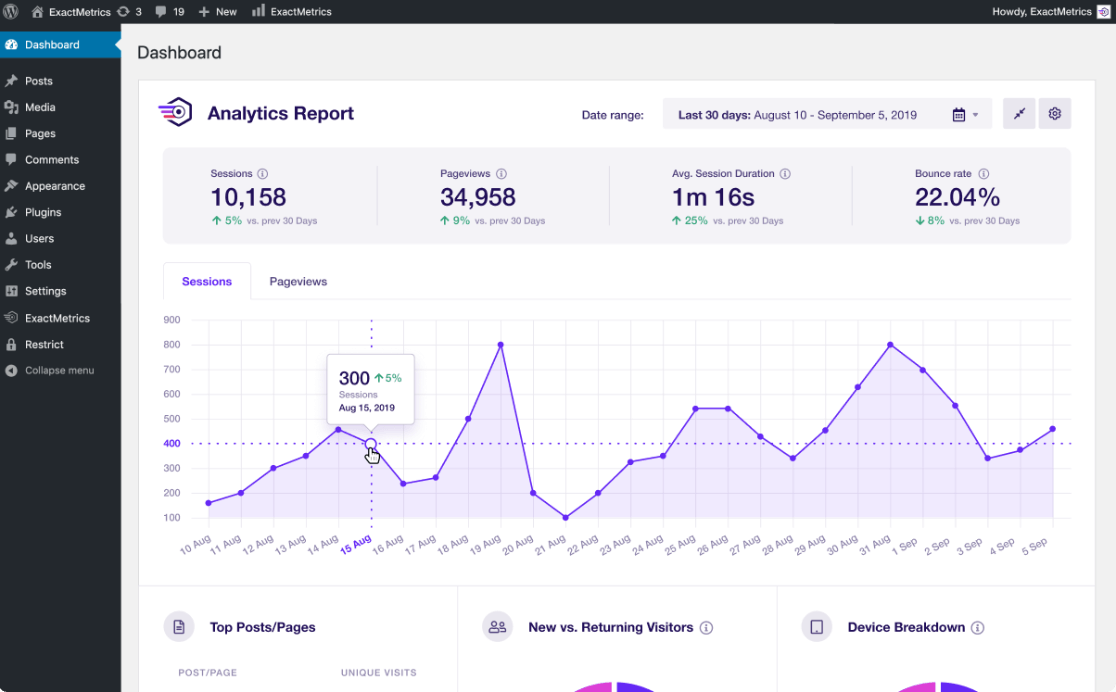
You get advanced tracking right out of the box with an extremely user-friendly interface and Google Analytics reports right inside your WordPress dashboard.
Here are some of ExactMetrics’ most popular features:
- Custom event tracking one-click eCommerce tracking
- Conversion tracking for Google Ads and Microsoft (Bing) Ads
- Custom dimensions
- Advanced form tracking and integration with popular form builders like Formidable Forms, Ninja Forms, Gravity Forms, and WPForms.
- EU Compliance
- Display popular posts and advanced author tracking
- Affiliate and outbound link tracking
- Social media tracking
- Media and video play tracking
- And more…
To start, head to the Pricing page and choose the level that’s right for your site and your goals.
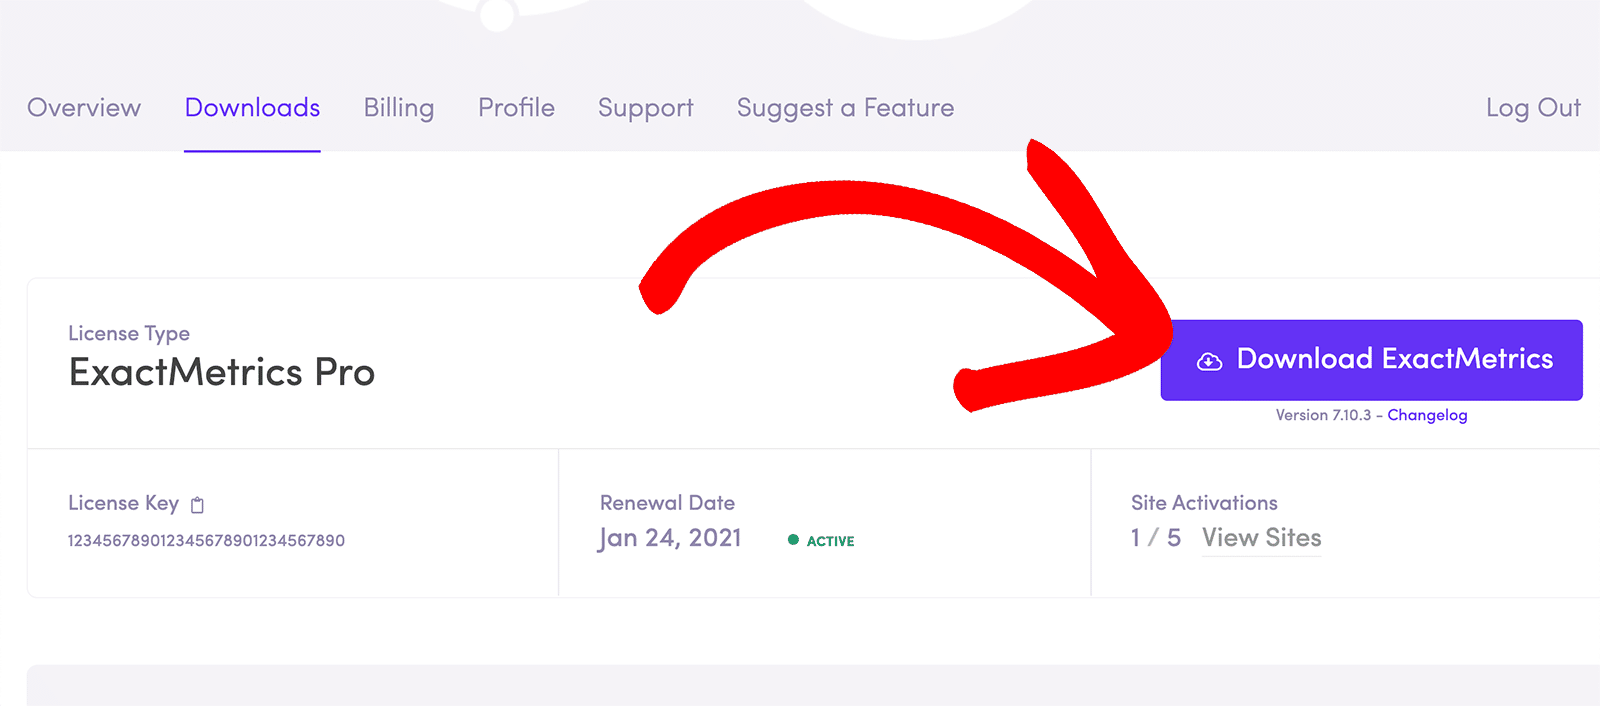
Then, to install the plugin, go to the ExactMetrics website and log in to your account. Once logged in, go to the Downloads tab from your account area.

Now click on Download ExactMetrics and download the ZIP file of the plugin.
Step 2: Create a Google Analytics Account
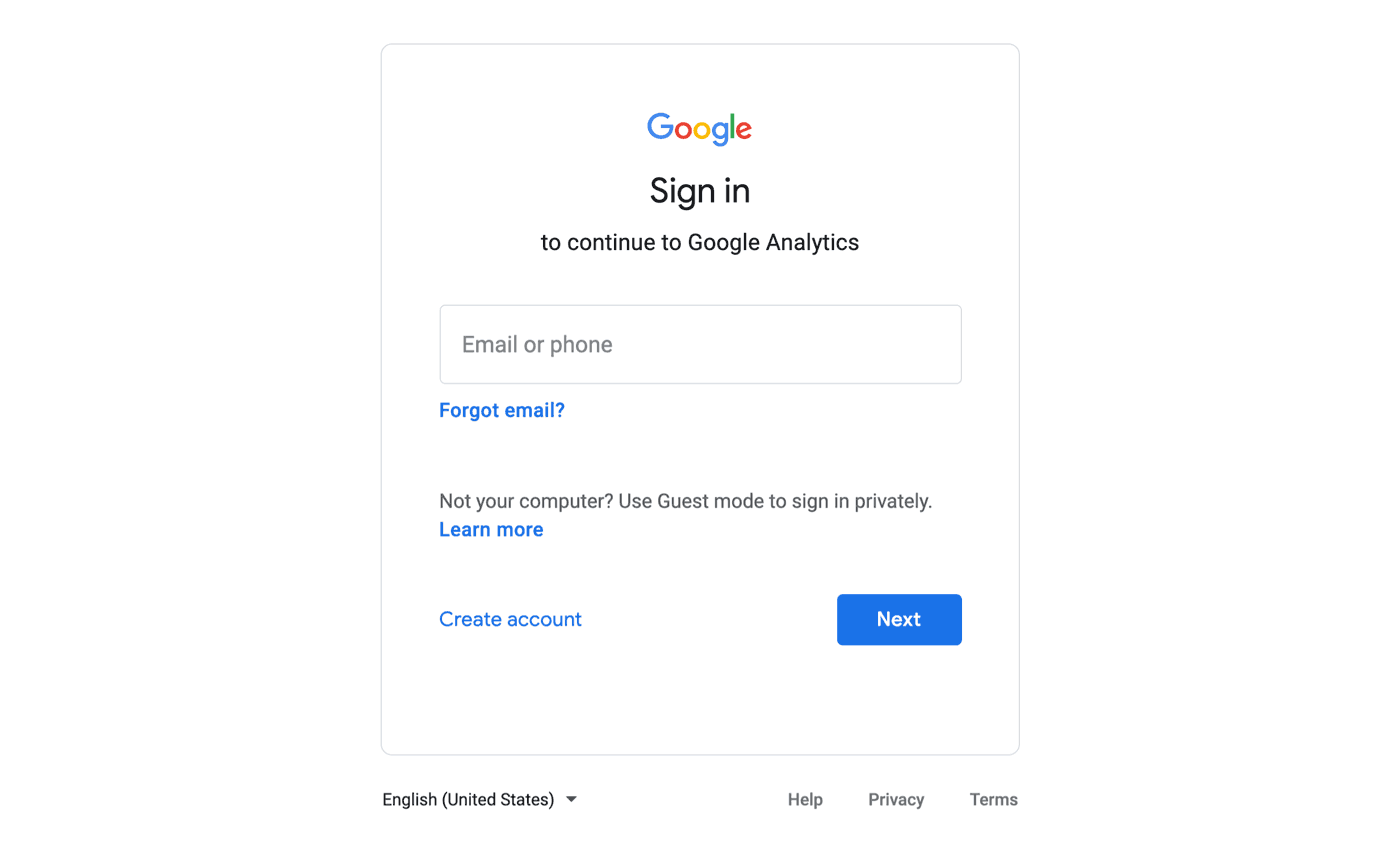
The first step is to create a Google account if you don’t already have one. To start, go to the Google Analytics website and press Sign in to Analytics or the Start for free button.

Enter your existing Google email address or phone number to log in. Or, you can click on Create account to create a new account.
Once you’re logged in to your Google account, the next step is to sign up for Google Analytics. Click Start measuring to get started.

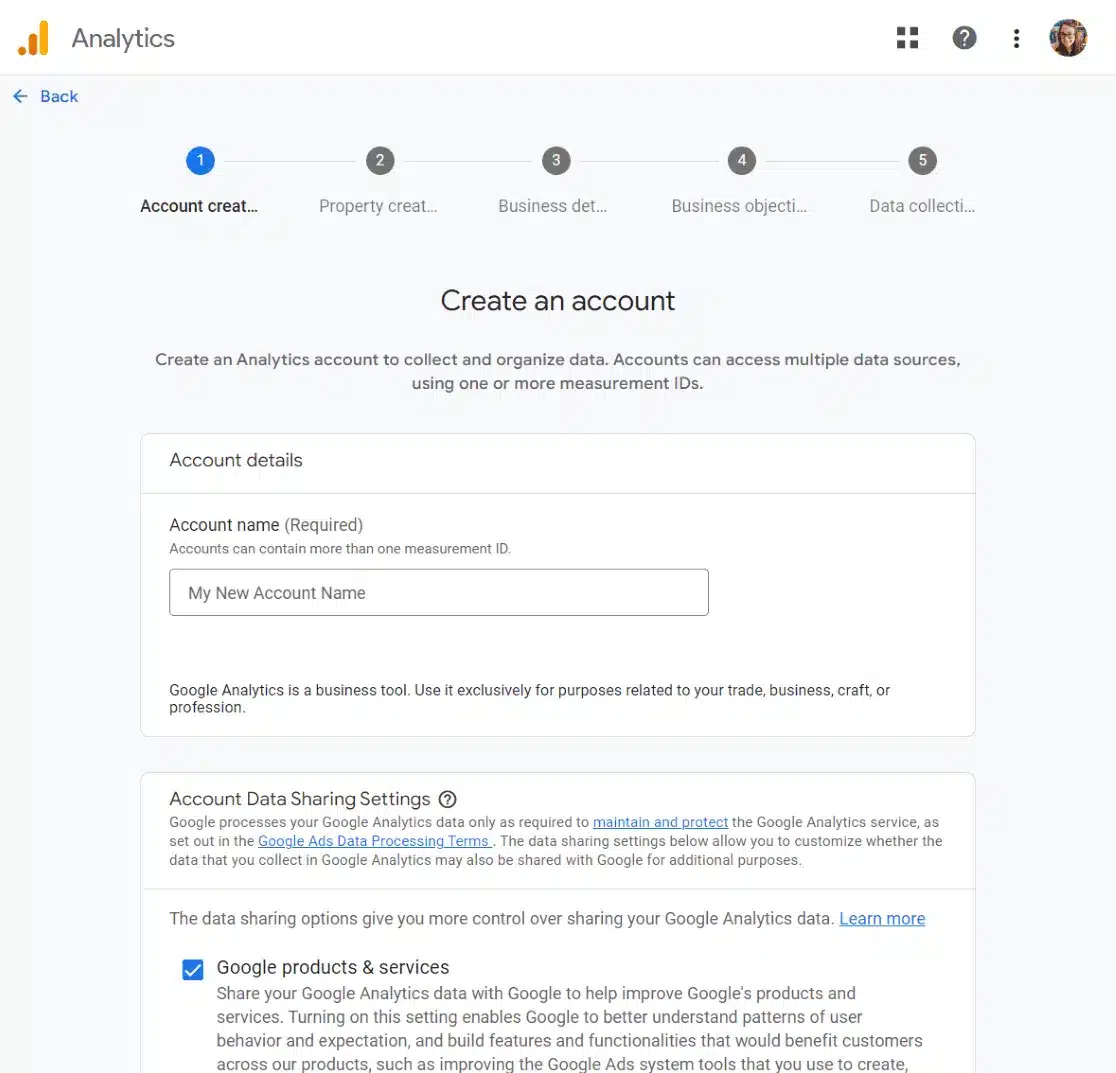
Now, enter an Account name for your Google Analytics account. Make sure you’ve checked all the options listed under Account Data Sharing Settings. Then scroll down and click Next.
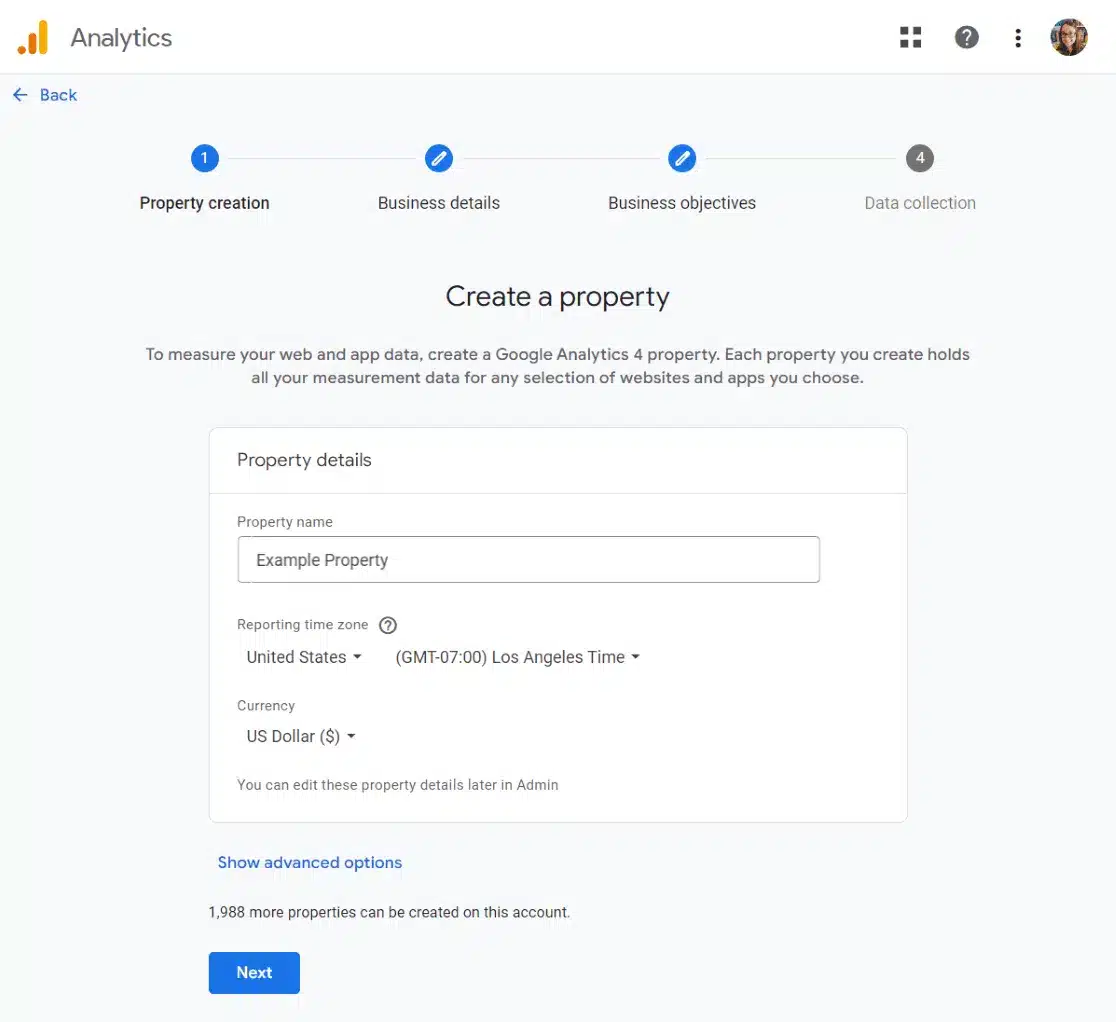
Next, you’ll enter a name for your Property. Most people choose the name of their business or website. Choose your time zone and currency, then click Next.
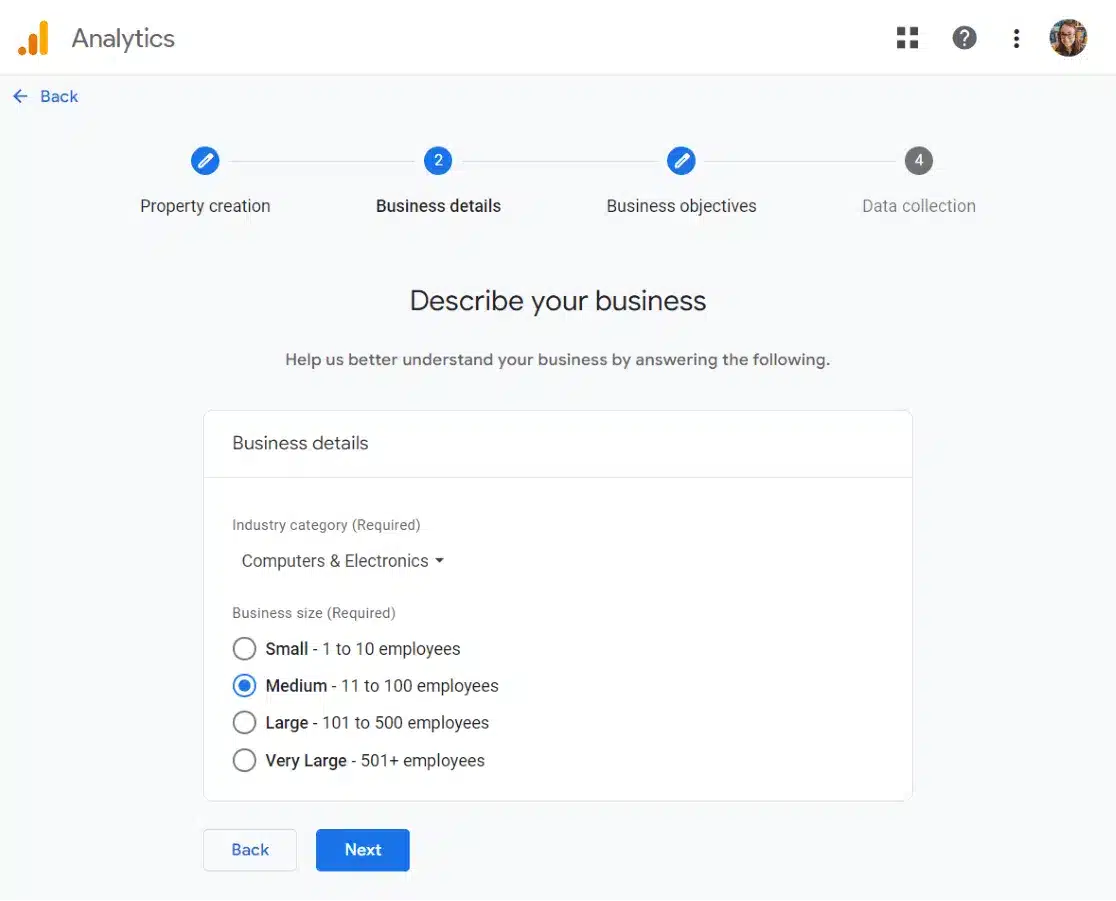
The third step in creating a Google Analytics account is to provide some business information. Choose your category and business size. Click Next.
Lastly, you’ll choose your business objectives. In order to get all of the Google Analytics reports populated in your account, we recommend choosing Get baseline reports.

Once you’ve selected, click Create.
That’s it! Your Google Analytics account is now up and running. Next, we’ll show you how to add Google Analytics to your WordPress website.
Step 3: Install ExactMetrics on Your Website
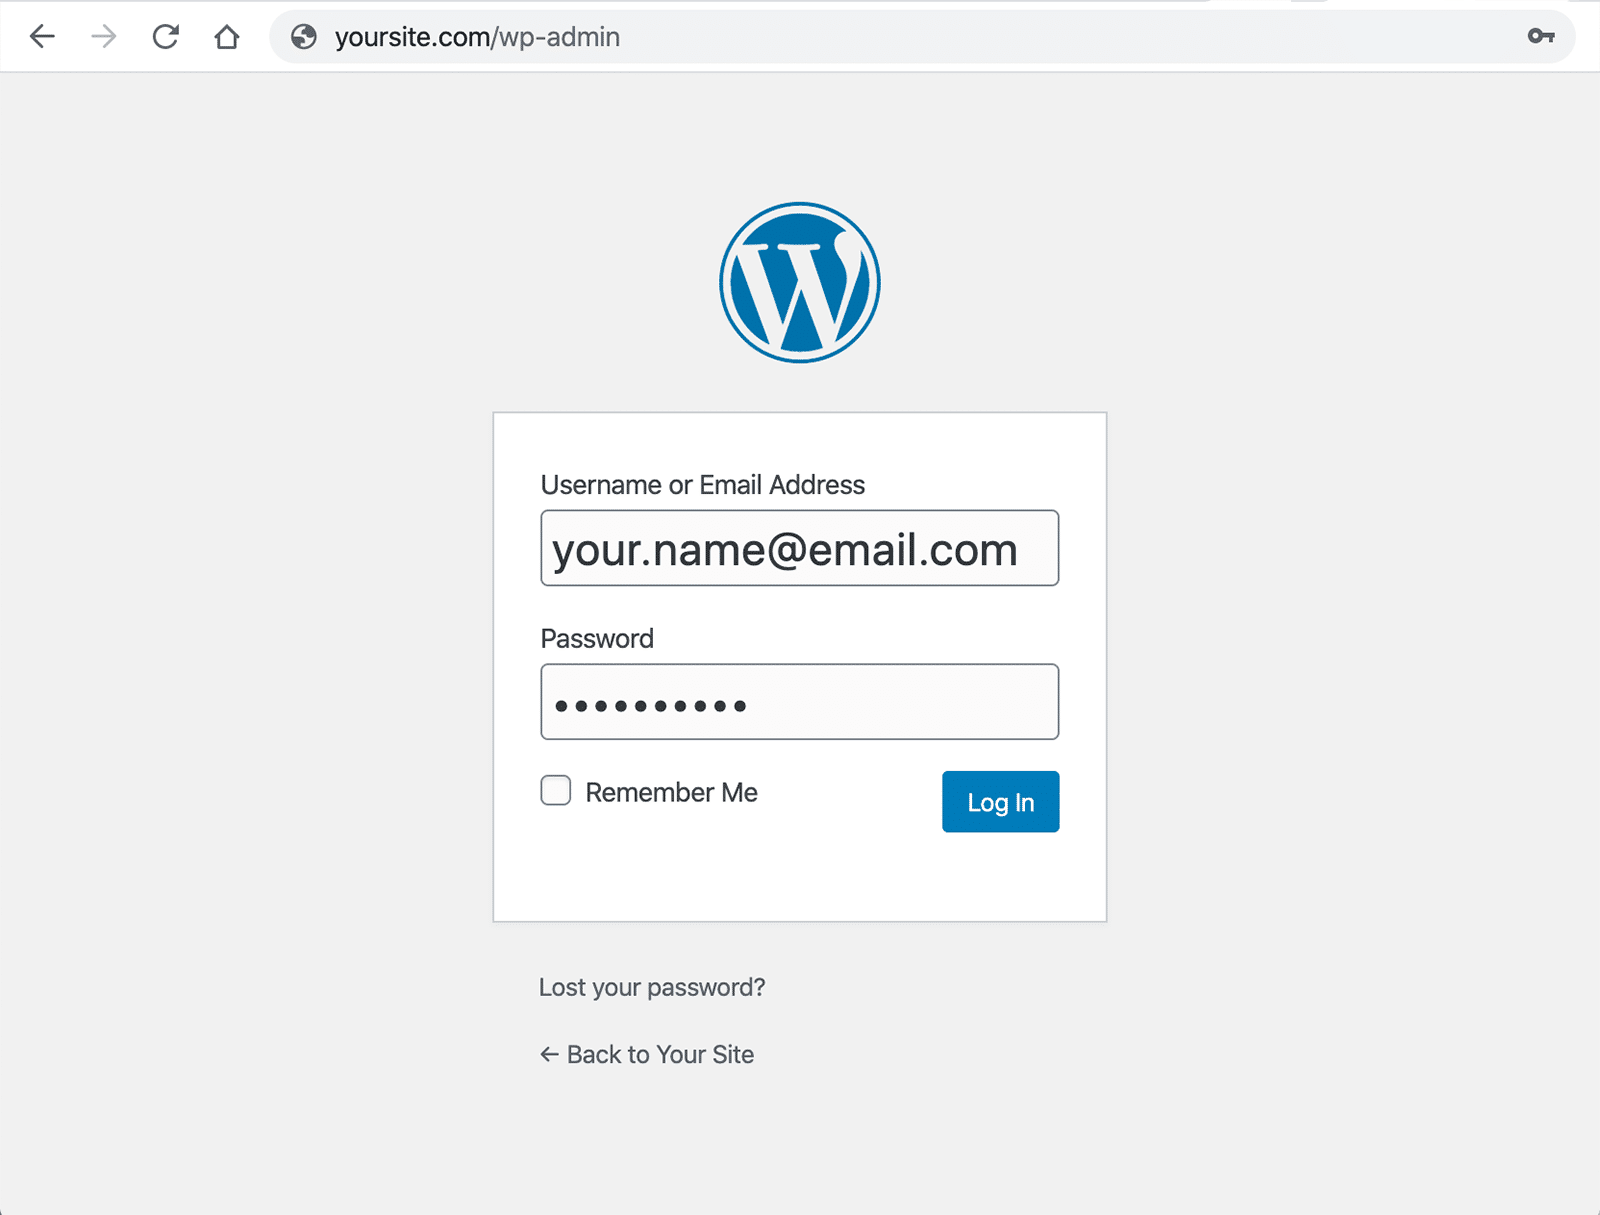
Head to the WordPress site where you want to install ExactMetrics and log in.
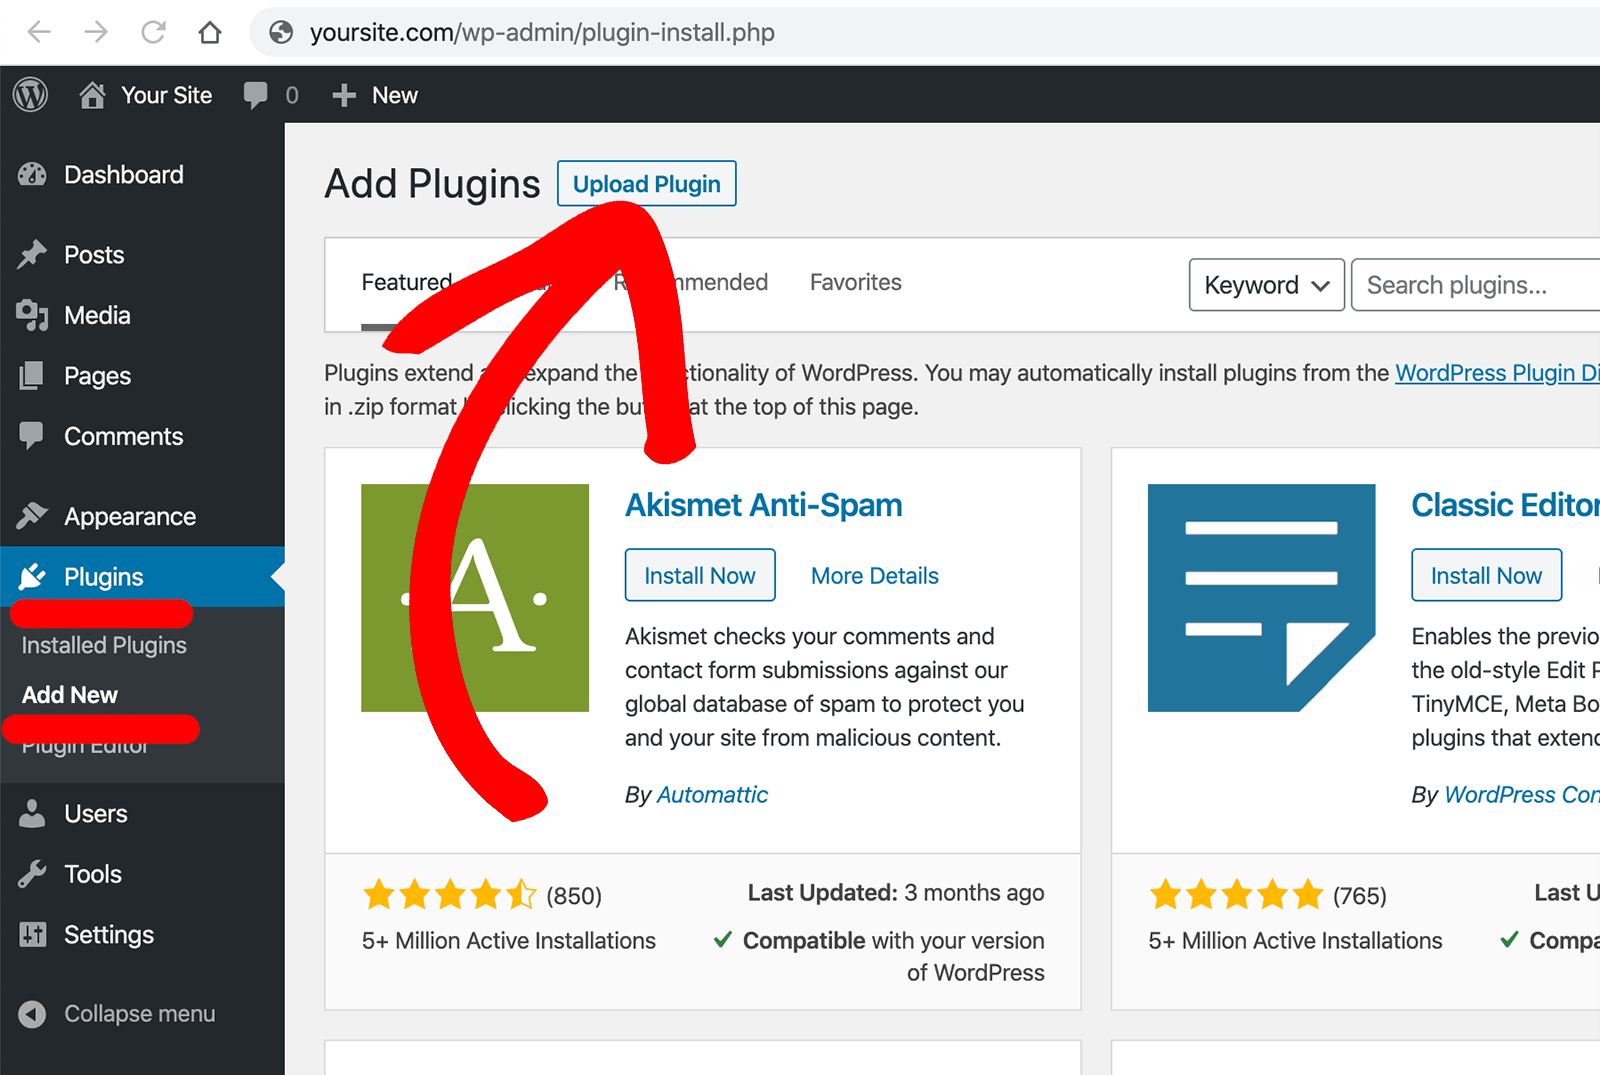
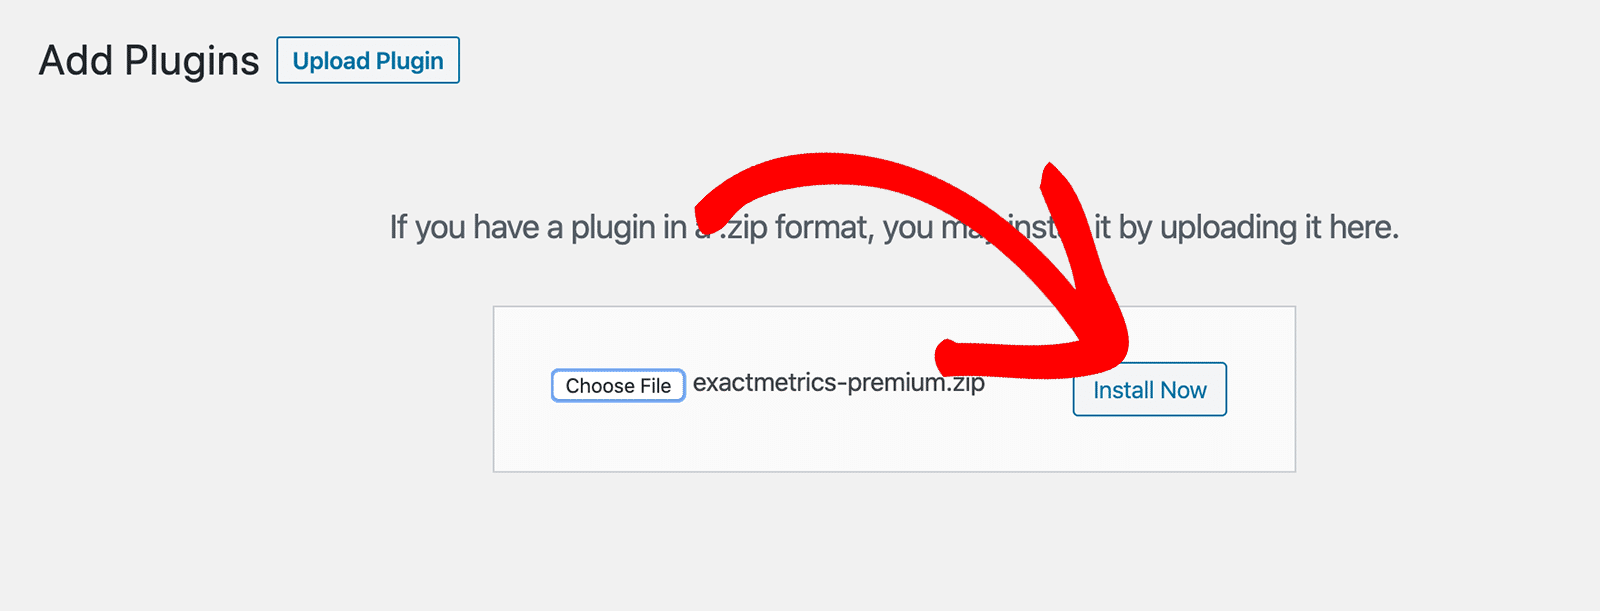
Then, navigate to Plugins and click Add New. At the top, you’ll see an option to Upload Plugin. Click on it to install ExactMetrics on your website.
Next, click Choose File and go to the folder where you downloaded the ZIP file of ExactMetrics in Step 1. Then, select the ZIP file and click Install Now to upload the plugin.
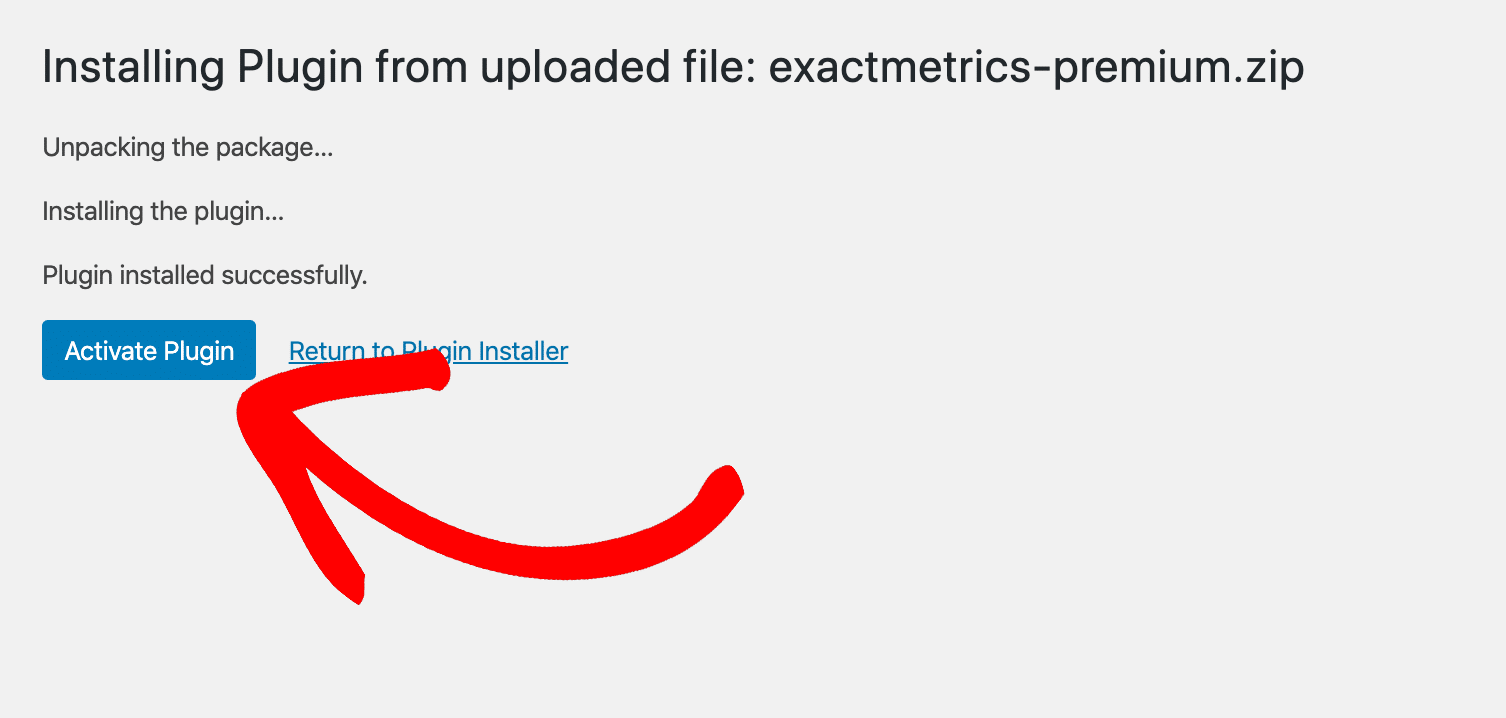
After the plugin finishes installing, click Activate Plugin to set up ExactMetrics.
Step 4: Open the Setup Wizard
Now that ExactMetrics is successfully installed on your website, you can connect it to your Google Analytics account.
ExactMetrics offers a simple setup wizard that takes you through each step and makes sure your Google Analytics is correctly set up on your site.
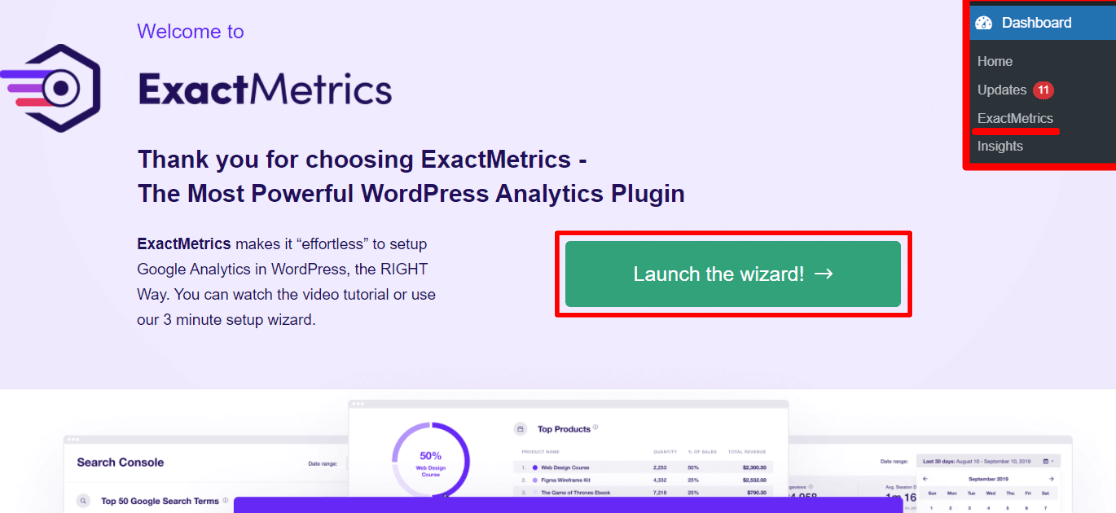
To start, click Launch Setup Wizard.
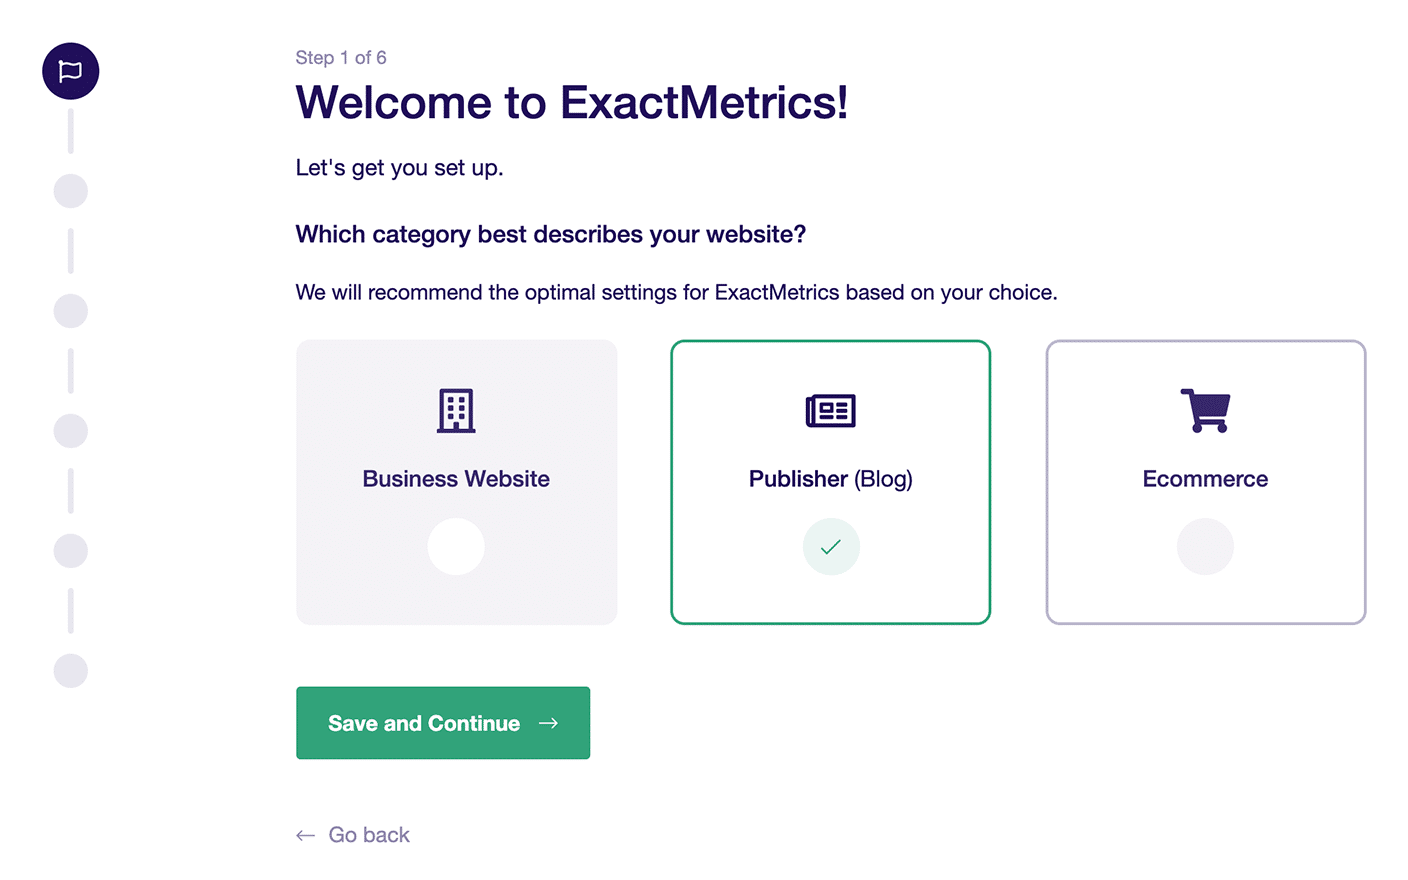
First, you’ll have to select a website type. You can choose from 3 options that best describe your site: Business Website, Publisher (Blog), or eCommerce. Based on your choice, the wizard will offer additional settings for tracking your site’s performance.
Once you’ve selected an option, click Save and Continue.
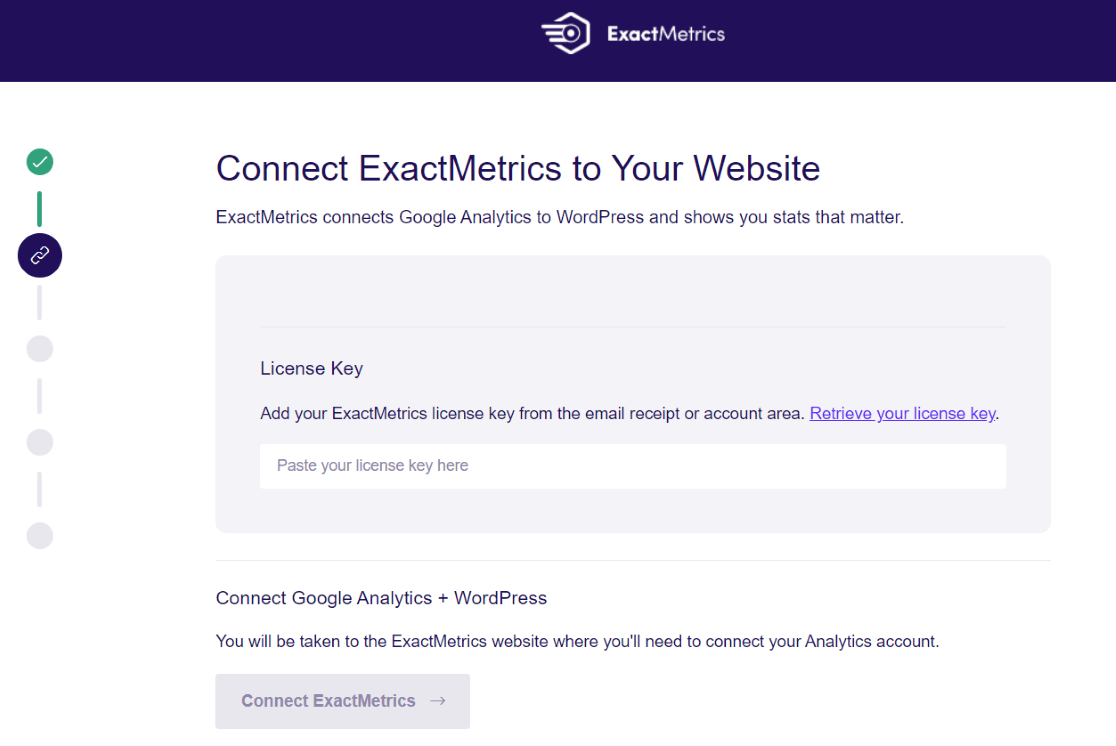
The wizard will now prompt you to enter your license key. You can find it in your email purchase receipt or inside your account area on the ExactMetrics website. Once you’ve entered it, click the Connect ExactMetrics button:
Step 5: Connect Google Analytics
Next, the setup wizard will ask you to connect your Google account. Select the account that contains your Google Analytics profile.

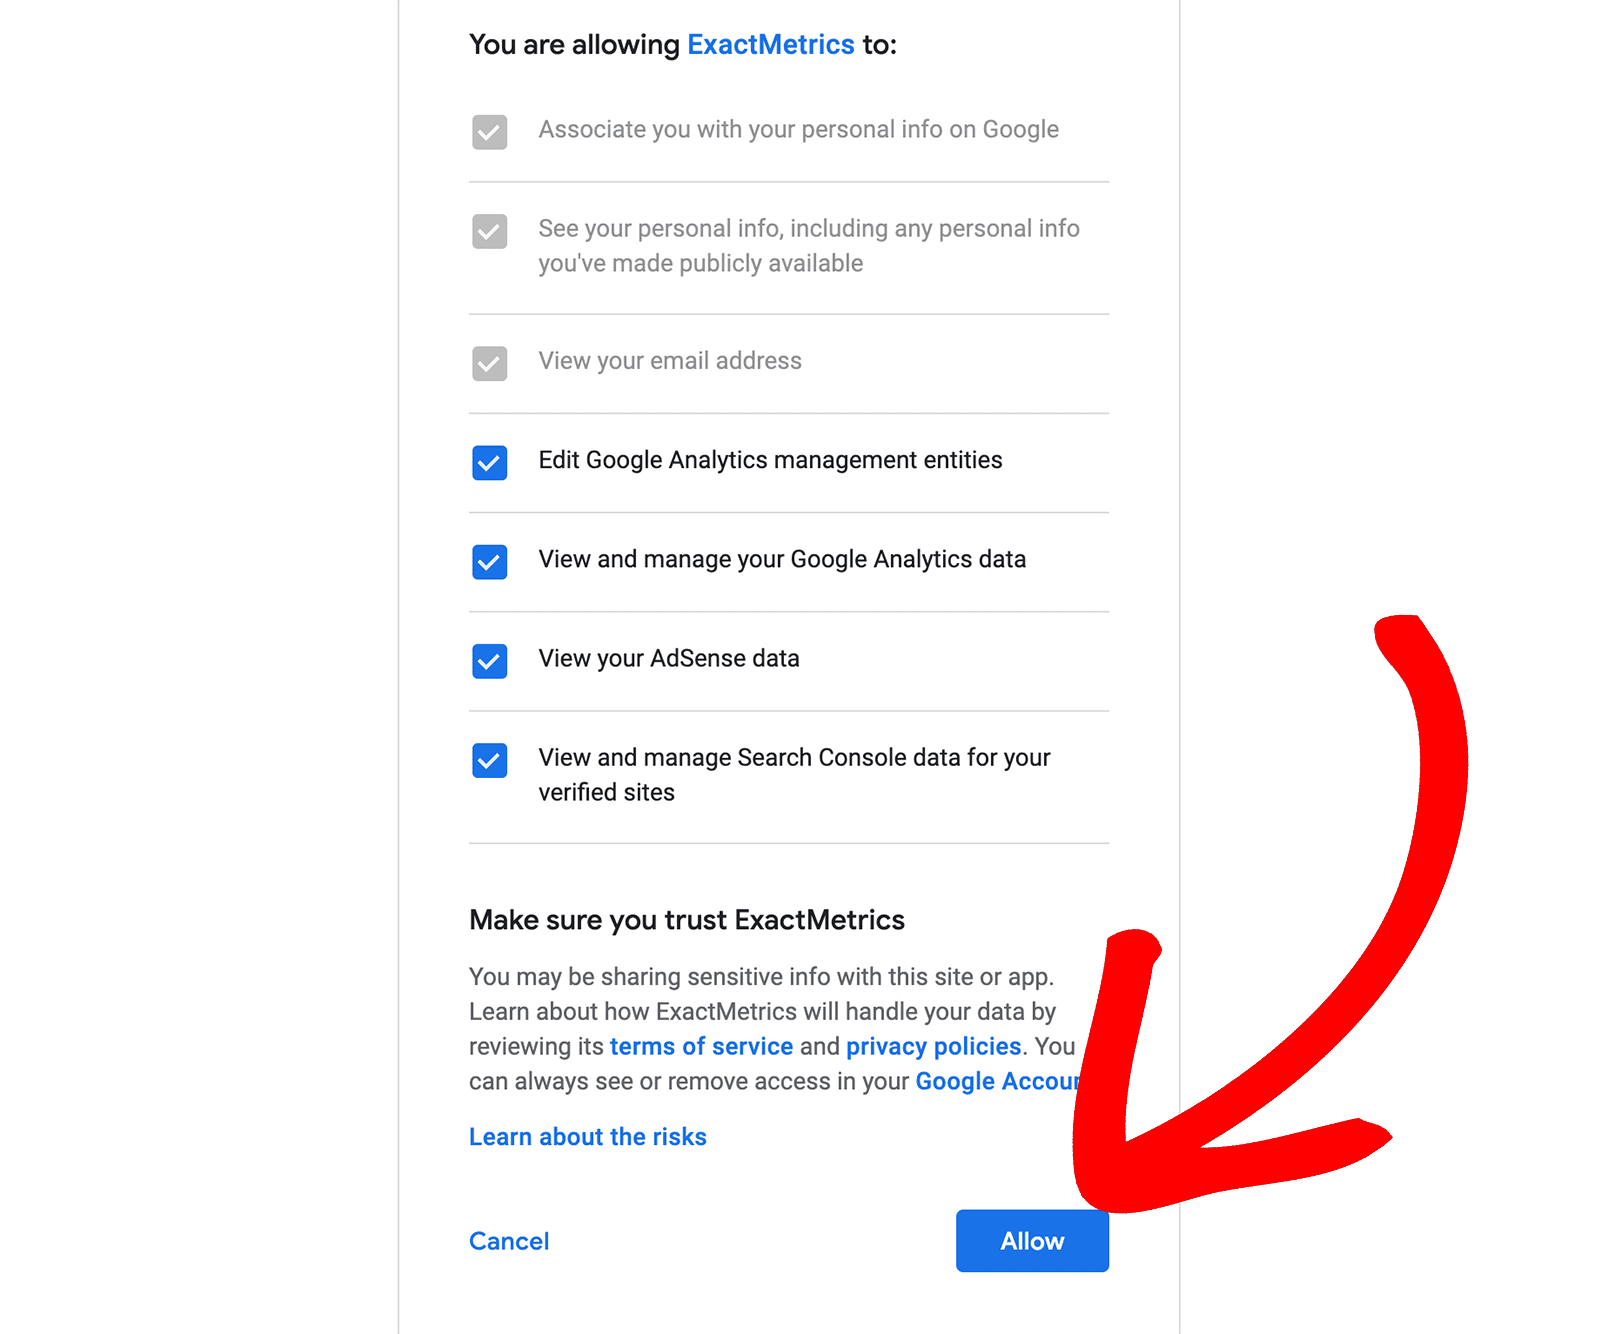
After selecting your Google account, you’ll need to give ExactMetrics permission. It’s important to allow all the permissions, or the plugin will not function properly.
Make sure all the options are selected, and then click Allow.
Now, you’ll have to select a profile to finish connecting your Google Analytics. If you have multiple websites connected to your Google Analytics account, make sure to select the right website property for tracking.
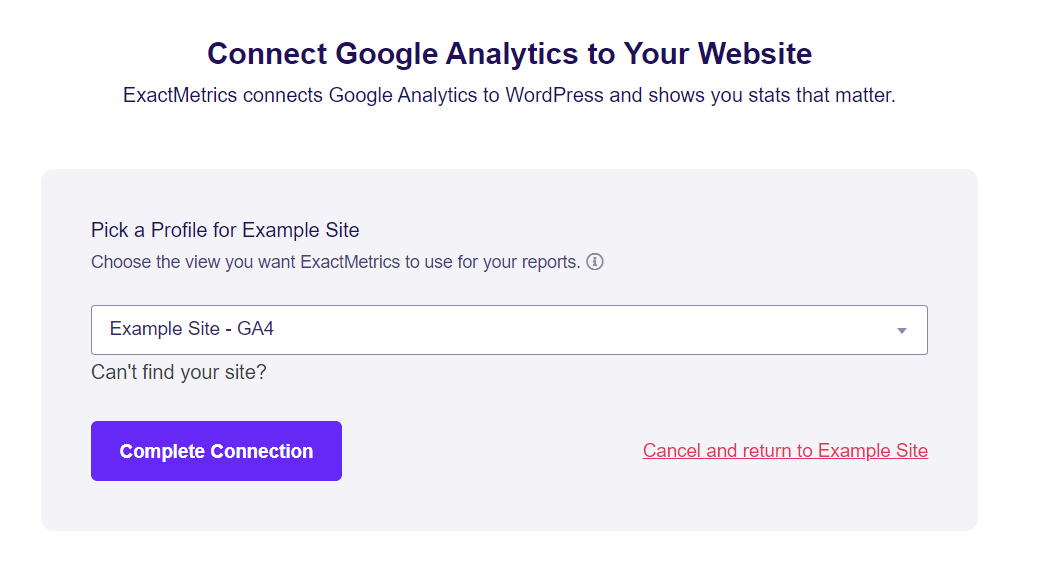
Once you’ve selected the correct profile, you can click on Complete Connection.
ExactMetrics will then offer some recommended settings based on the website type you selected earlier.
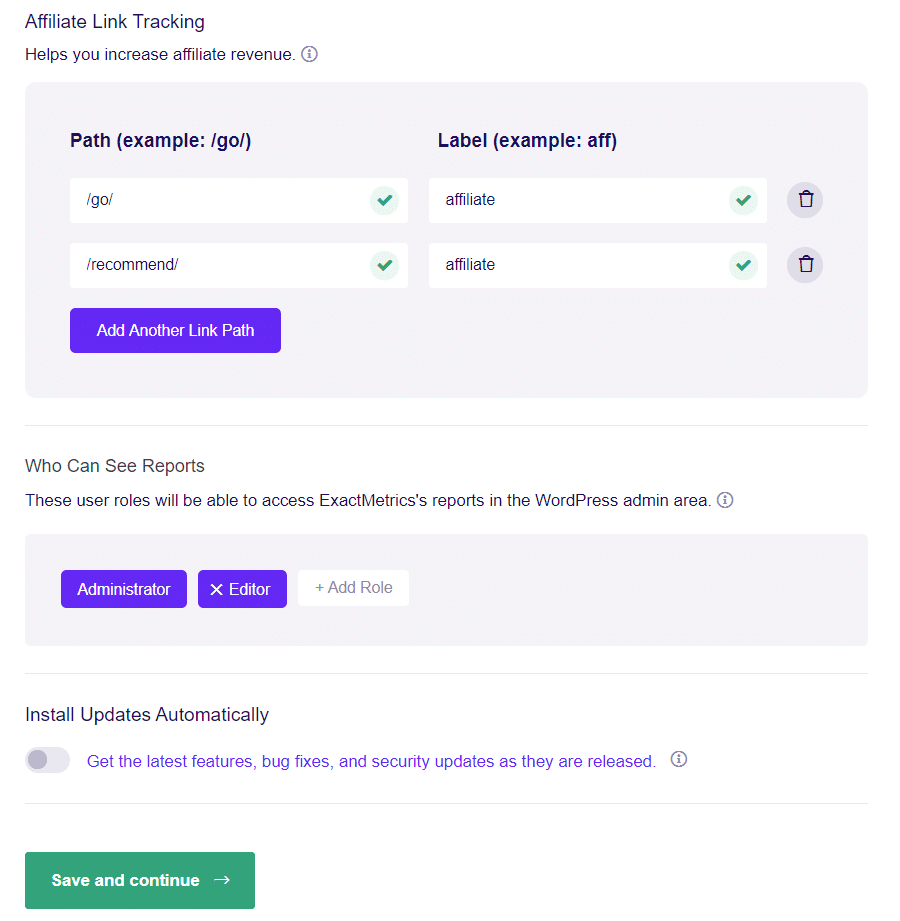
For instance, it will enable Events Tracking and Enhanced Link Attribution by default. By default, the plugin will also track common file type downloads.
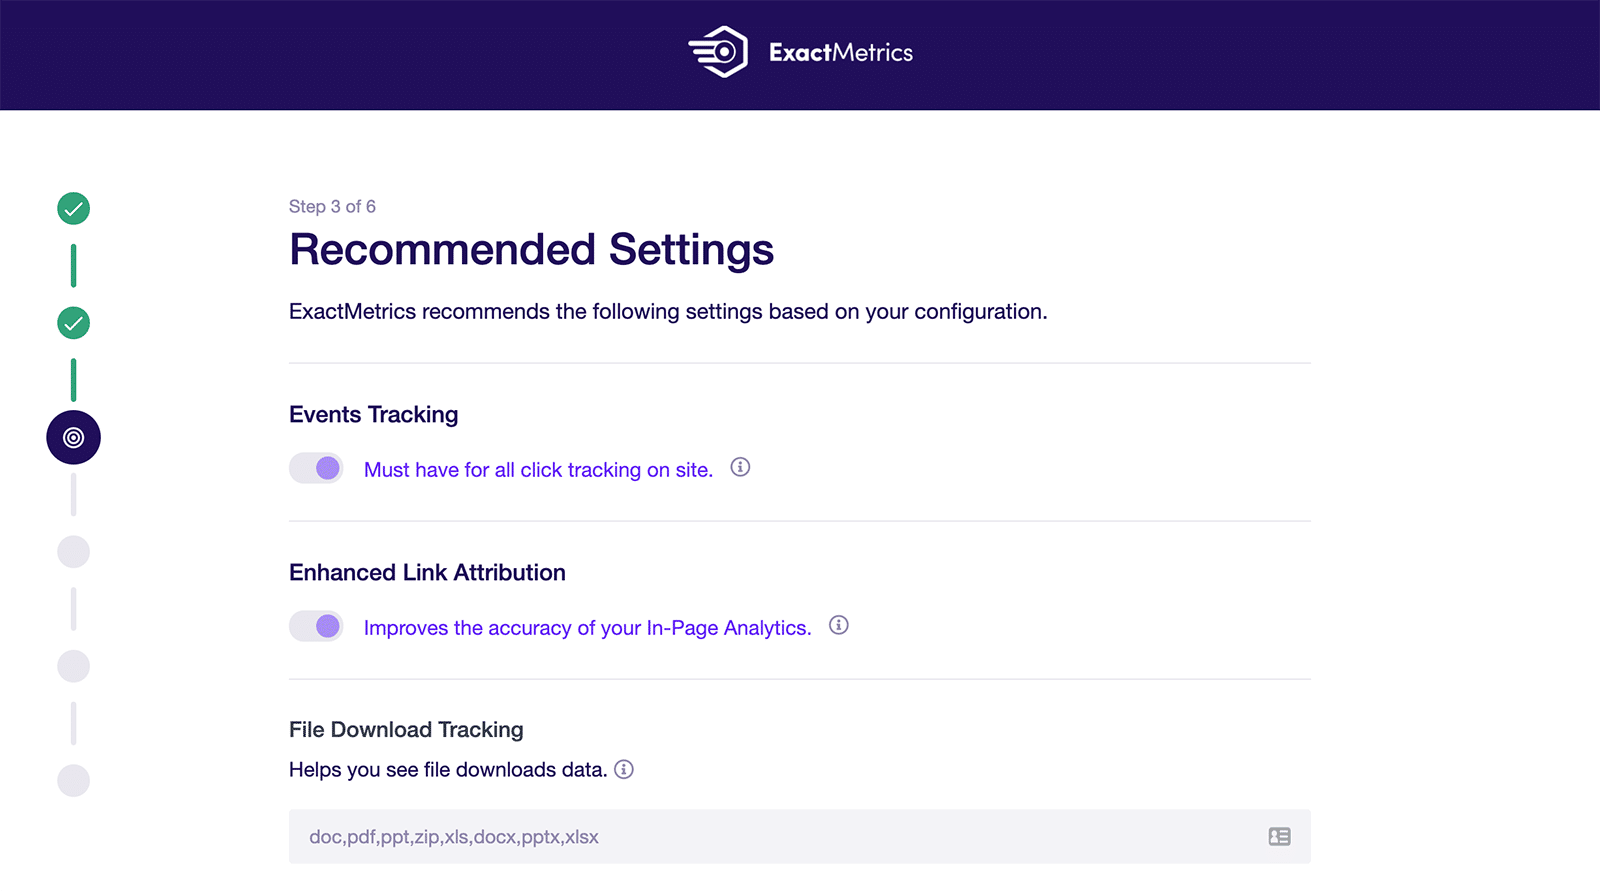
If you scroll down, you’ll see more settings. These include Affiliate link tracking, which already has two paths set, but you can add more to affiliate links to track in WordPress.
You can also select the user roles that can view ExactMetrics reports in WordPress.
Once you’re satisfied with the settings, click Save and continue.
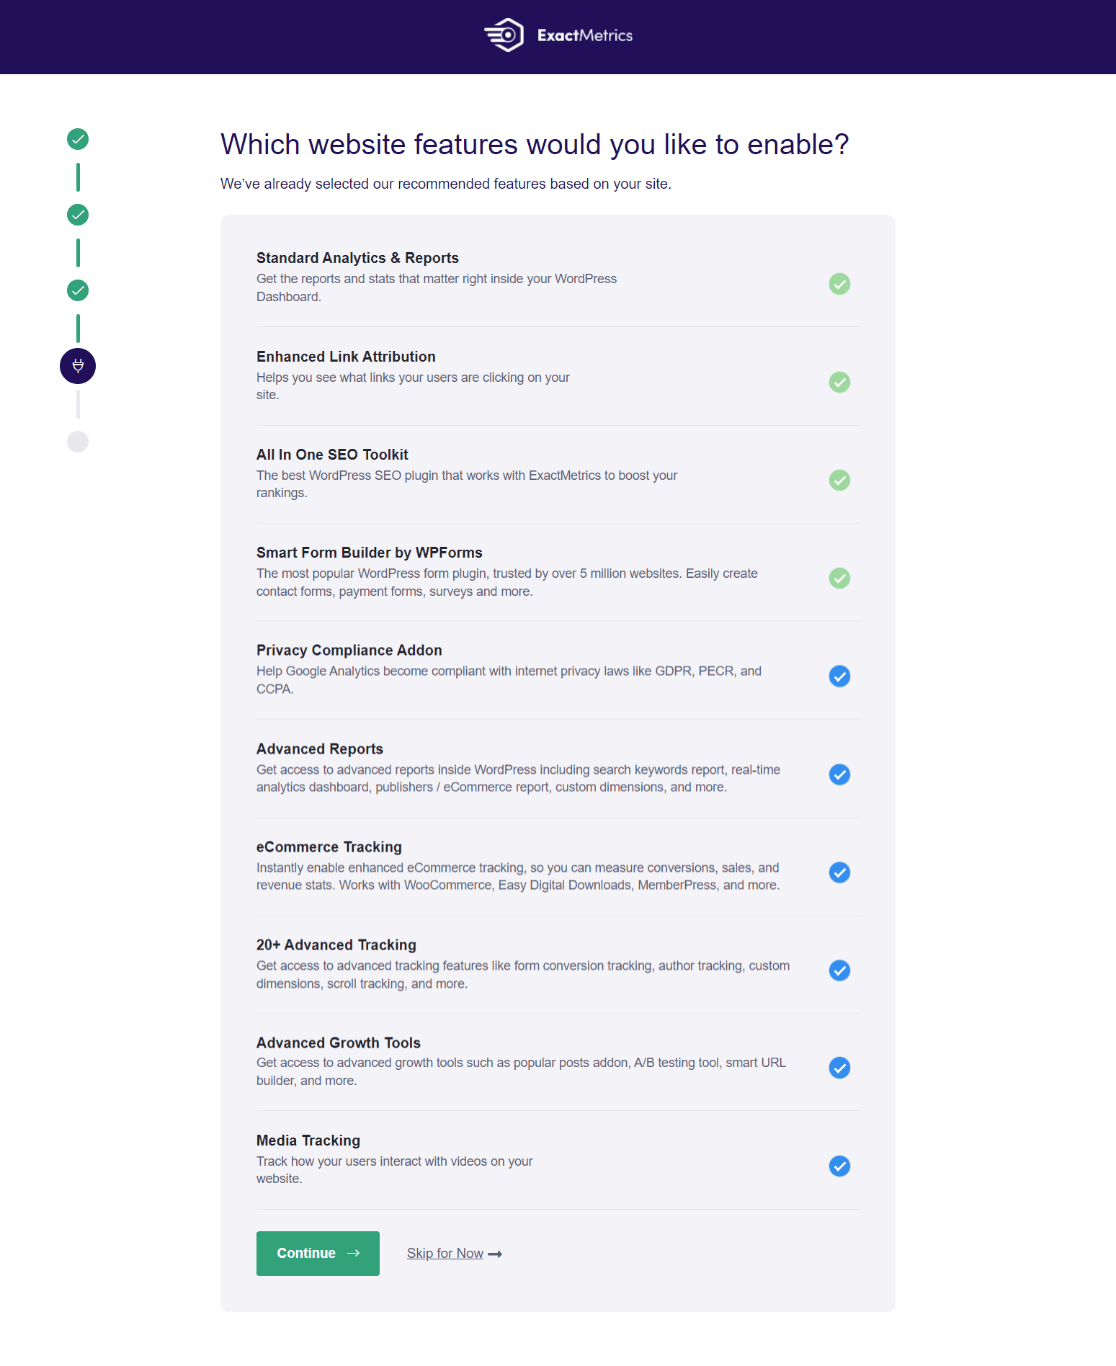
In the next step, ExactMetrics will recommend tracking features, addons, and helpful plugins. Choose the ones you want for your site and click Continue.
In the final step in the setup wizard, click Finish Setup & Exit Wizard.
That’s it! You’ve successfully connected Google Analytics to your WordPress website.
Do remember that it could take up to 24 hours for the plugin to gather the data and show you reports in your WordPress dashboard.
Step 6: Adjust Google Analytics Settings
Turn off Enhanced Measurement
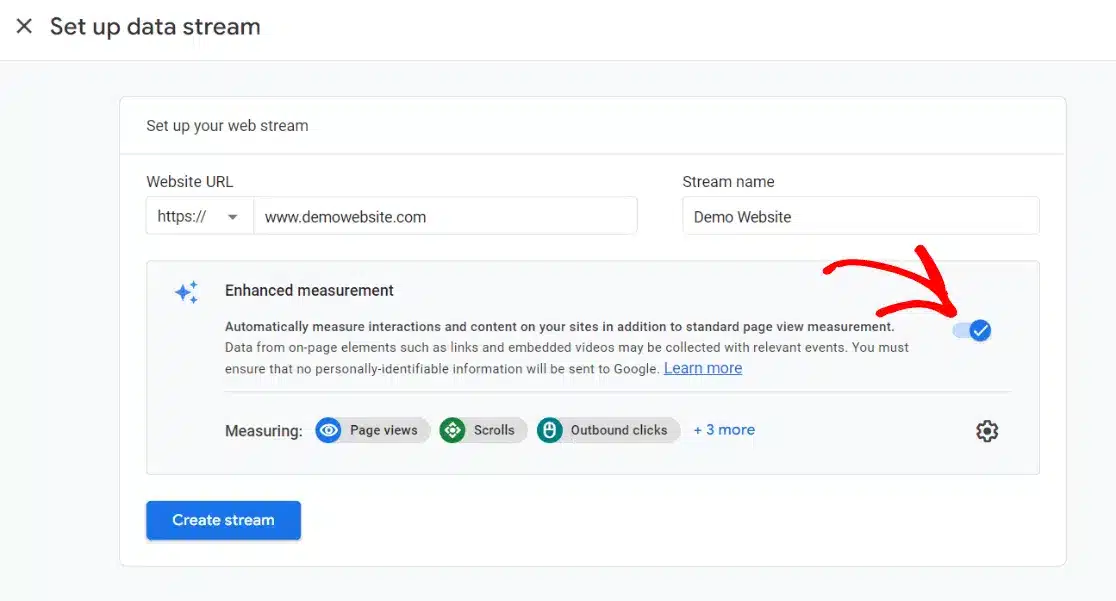
ExactMetrics automatically creates your data stream in Google Analytics, but if you have already created your own, you’ll need to turn off Enhanced Measurement. In your Analytics account, go to Admin » Data Streams and click on your data stream.

Then, click to toggle off Enhanced measurement.
After you click the switch, a popup will ask if you want to turn it off. Click Turn off.
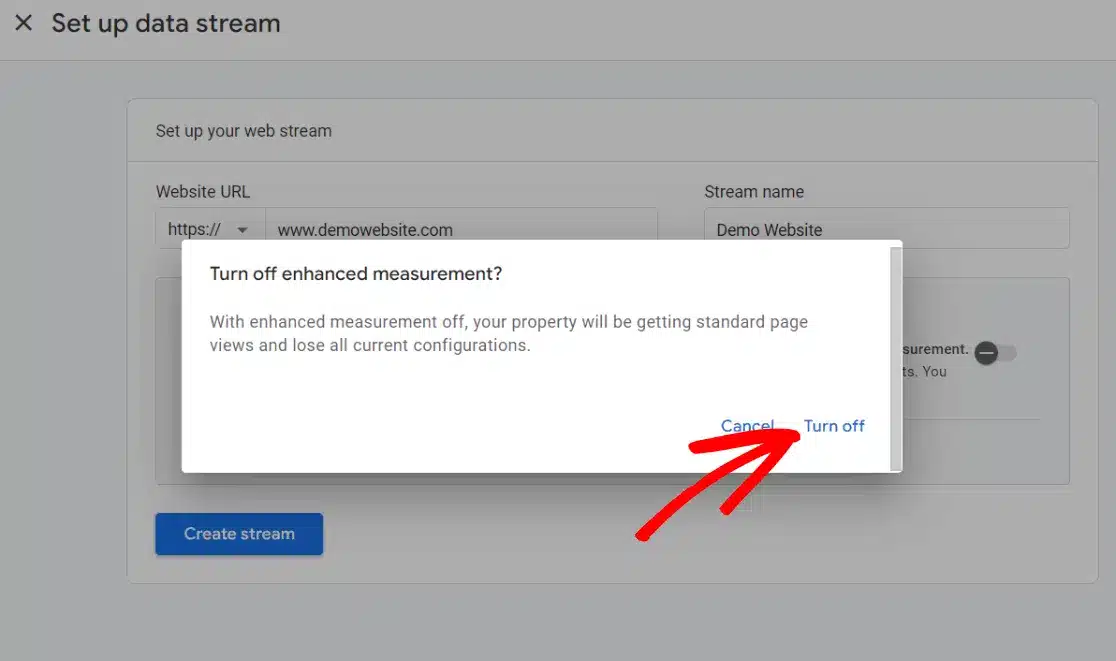
ExactMetrics adds lots of custom, enhanced tracking, and leaving this setting turned on in Google Analytics can actually give you skewed, incorrect data. So, make sure this setting is turned off!
Change Data Retention
Google Analytics will set your event data retention to 2 months by default. If you want to use your data in custom reports beyond 2 months, which most people do, you need to change this.
Go to Admin » Data Settings » Data Retention:
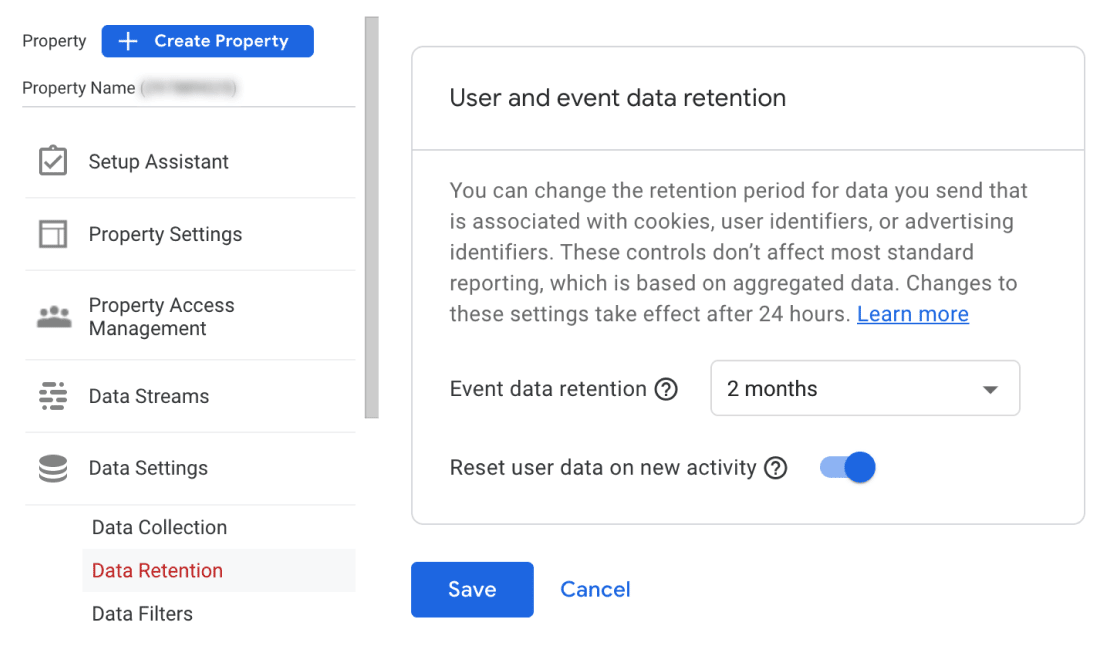
Use the dropdown menu to change the setting to 14 months and press the Save button.
That’s it! You’ve successfully configured and added Google Analytics to WordPress!
Step 7: View Your Google Analytics Reports
Now that you’ve completed the setup process for adding Google Analytics, you’ll be able to start viewing your site’s reports in WordPress (after a few hours – up to 24).
Just head to your WordPress dashboard and click on ExactMetrics » Reports (You can also view a quick summary in ExactMetrics’ dashboard widget).
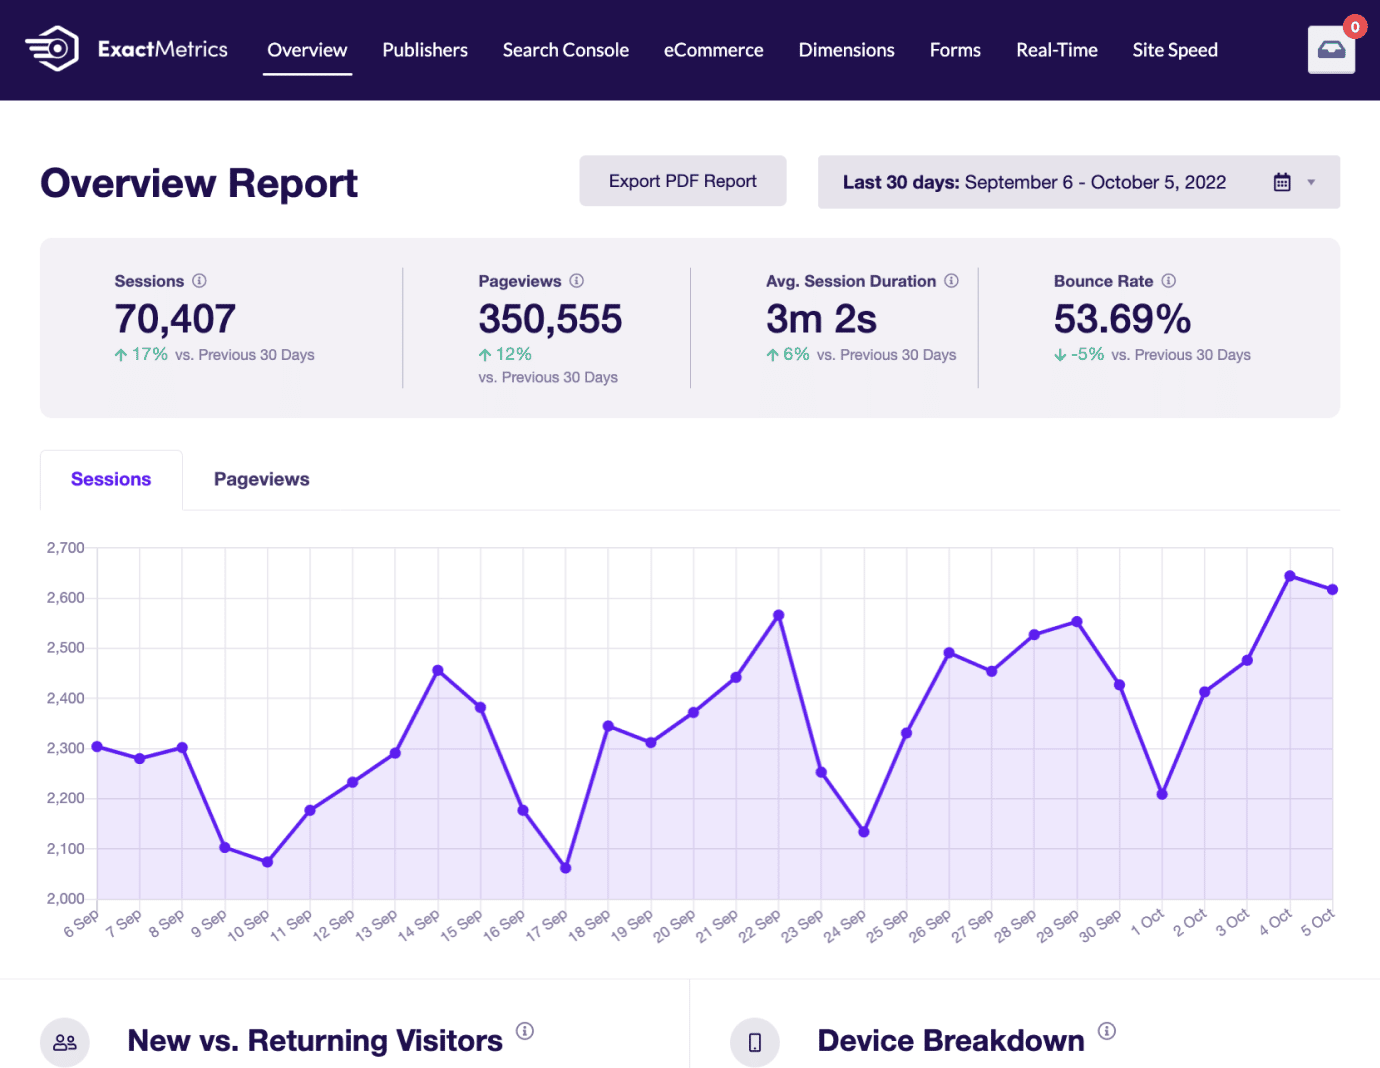
You can use the tabs at the top to view all the other reports available. Check out: How to Find Your Google Analytics Reports in ExactMetrics for more information about your new Google Analytics reports inside ExactMetrics.
How to add Google Analytics to WordPress FAQs:
How to Add Google Analytics to WordPress
Step 1: Download the ExactMetrics Plugin.
Step 2: Create a Google Analytics Account.
Step 3: Install ExactMetrics on Your Website.
Step 4: Open the Setup Wizard.
Step 5: Connect Google Analytics.
Step 6: Adjust Google Analytics Settings.
Step 7: View Your Google Analytics Reports.
What is the best Google Analytics WordPress plugin?
ExactMetrics is the best Google Analytics plugin for WordPress. It simplifies the setup process, requiring no coding skills, and integrates seamlessly with your WordPress dashboard. ExactMetrics offers an intuitive interface and detailed reports, making it easy to use and understand your website’s analytics.
Can I add Google Analytics to WordPress for free?
Yes, you can add Google Analytics to WordPress for free. Simply install the free version of ExactMetrics by searching for “ExactMetrics” in your WordPress dashboard under Plugins » Add New.
How do you add Google Analytics to WordPress without a plugin?
To add Google Analytics to your WordPress site without a plugin, insert the Google Analytics tracking code into your site’s header file. Place the code just before the closing </head> tag. Alternatively, you can use Google Tag Manager, but it has a steep learning curve and may not be suitable for beginners.
We hope you liked our article on how to add Google Analytics to your WordPress site. If this guide was useful, then you might also want to read our article on How to Track Google Analytics Keywords (Step-by-Step).
Don’t forget to follow us on X and Facebook to learn about the latest guides on Google Analytics and WordPress.


ExactMetrics has made viewing my Google Search Console reports easier and less-confusing for me.
Thanks for this article.
Thank you so much for this in depth article. I would definitely use ExactMetrics. Really great plugin.
It’s one of the best plugin for WordPress.
Thanks for this – adding anything Google is frustrating and time consuming so it’s good to have the steps laid out. It makes it easier to start using ExactMetrics!
Thank you for sharing this article because this is so useful for me to share my customer.
I love the idea behind Google Analytics. You all make it possible for creators to understand what their viewers enjoy seeing most from them. Also, thank you for meticulously reviewing the post before publishing it and providing enough detail.
Easy to understand steps!