Looking for a great way to re-engage with your visitors after they leave your website? Try WordPress push notifications!
Setting up push notifications on your WordPress website is easy and quick, and it can help you increase your engagement and ultimately grow your business or brand.
Follow our easy step-by-step tutorial to get started now.
A Quick Intro to WordPress Push Notifications
Have you been seeing a lot of pop-ups asking if you’d like to receive notifications from websites lately? If you click the “Allow” button, you’ll now see clickable push notifications from that website.
Websites use push notifications differently, depending on their goals. Some might send out their latest blog posts or other content, some might alert you if you’ve abandoned a cart, and others might send automated welcome campaigns to educate new subscribers about products or services.
One of the best things about push notifications is that website visitors have to opt in to get your messages. It’s entirely their decision to receive them. That means that your push notification audience is full of people who want to hear from you, making them more likely to engage with your messaging.
There are so many great ways to use push notifications!
On your mobile device, these notifications show up alongside all your other notifications. On your desktop, they show up in different spots depending on your operating system and browser.
To set up push notifications, you’ll need a great push notification plugin. For this tutorial, we’re going to use PushEngage.
WordPress Push Notifications Tutorial
Let’s start our tutorial by installing the best push notifications plugin for WordPress: PushEngage.
With PushEngage, you can segment your users into different groups, set up automated drip campaigns, send offline notifications, remind customers about cart abandonment, and much more.
PushEngage offers a free plan to get started. But if you’re looking to send unlimited notifications each month and use advanced features like custom segmentation, then it’s better to select a premium pricing plan.
With that, let’s get started.
Step 1: Sign Up with PushEngage
Head to pushengage.com to get started. You can go ahead and click the Get Started for Free Now button to begin.
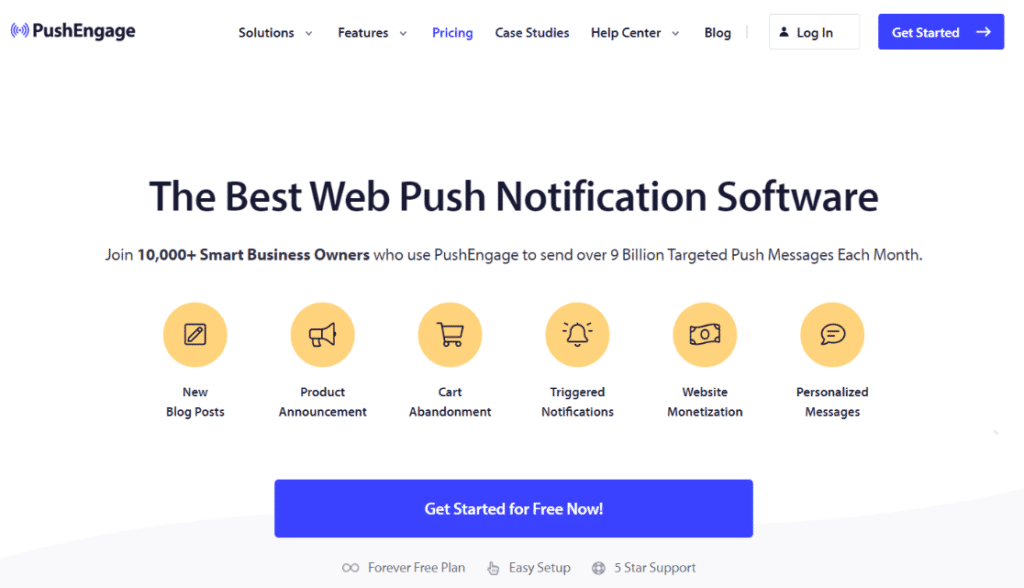
Once you’ve created an account on the next screen, you’ll be taken to your dashboard:

We’ll leave the dashboard for now to install the plugin.
Step 2: Install the PushEngage Plugin
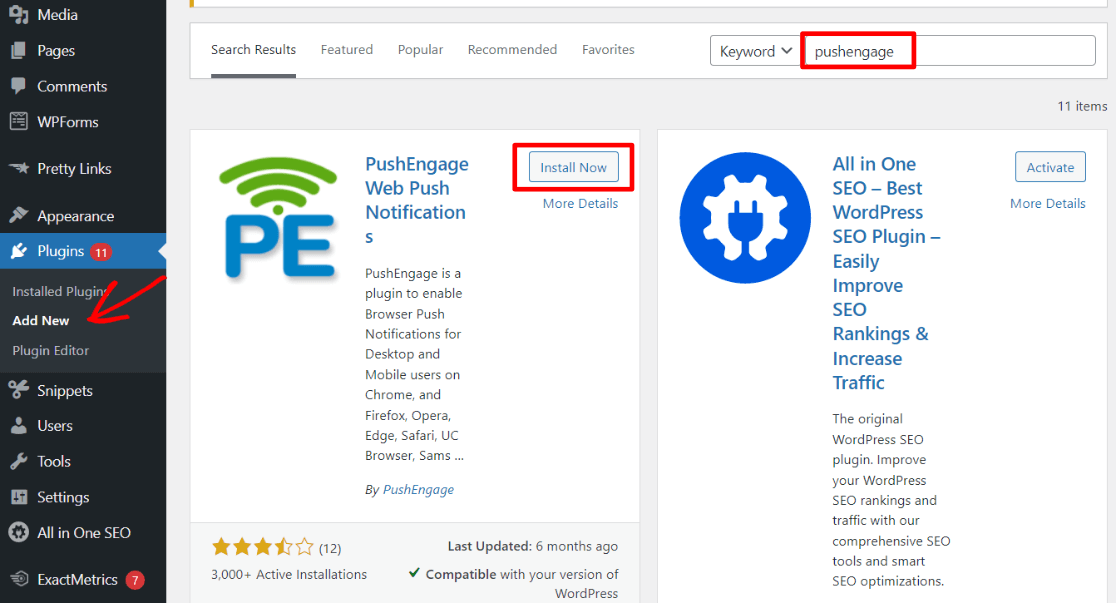
Open your WordPress dashboard, then navigate to Plugins » Add New. Search for PushEngage, then click Install Now.
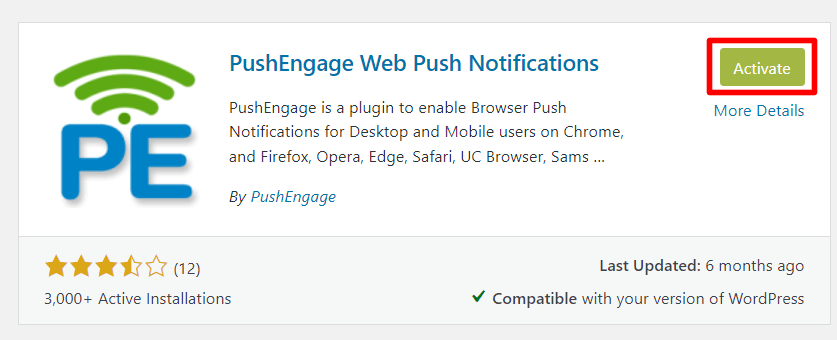
Once it’s installed, make sure to click Activate.
Once the plugin is active, go to PushEngage in your WordPress sidebar and toggle to the Setup tab.
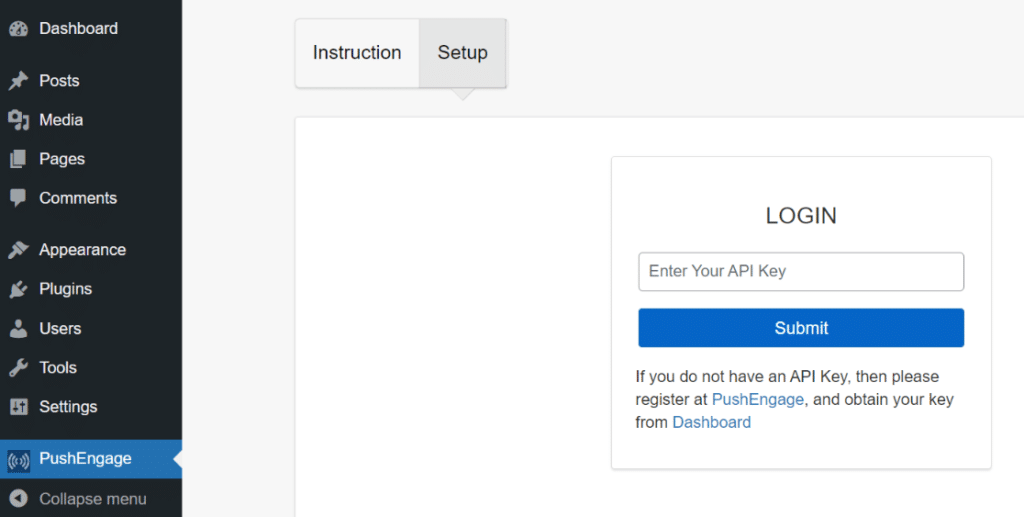
Now, we need to head back to PushEngage to create our API key.
Step 3: Create an API Key
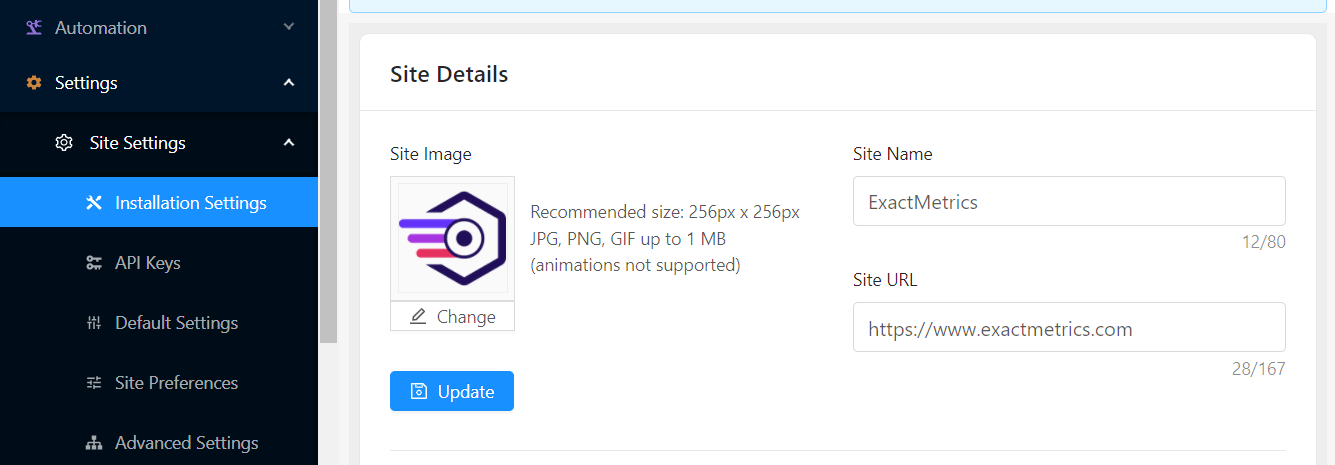
Back in your PushEngage dashboard, head to Settings » Site Settings » Installation Settings.
Now while you’re here, you can set up your Site Details section at the top with a Site Image (probably a logo), Site Name, and Site URL.
Now, go to Settings » Site Settings » API Keys and click the Generate a new API Key button.
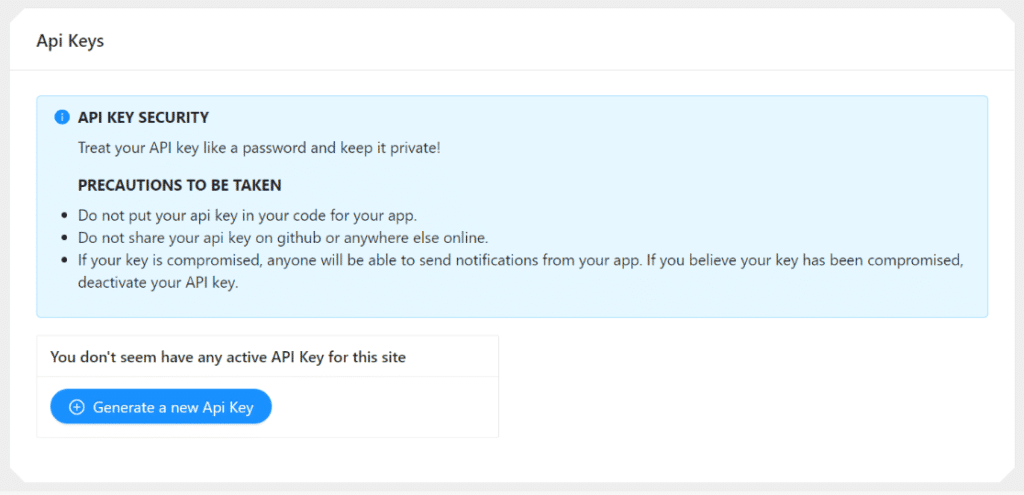
Copy your API key, then head back to your WordPress tab and enter it into the plugin, then hit Submit.

Step 3: Customize Your Settings
Now, you’ll see 5 different tabs with settings to customize under each one.

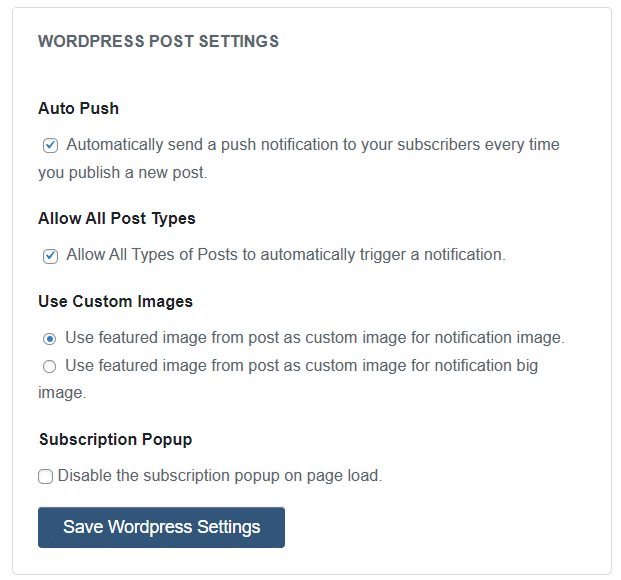
Go through each one and choose the settings you want for your site. Pay close attention to the WordPress Post Settings box under the General tab, as this is automatically set to Auto Push your new posts to your subscribers. If you don’t want that on at first, make sure to uncheck that box.
Step 4: Test Your Signup Box
After you’ve gone through all the settings and customized them for your site, you can check to make sure the signup box is appearing. Open your site in another tab or browser to make sure it’s working:

Go ahead and hit Allow to make sure you’re getting your own notifications.
Step 5: Set Up Your First Notification
In PushEngage, go to Notifications » Create » New Notification.
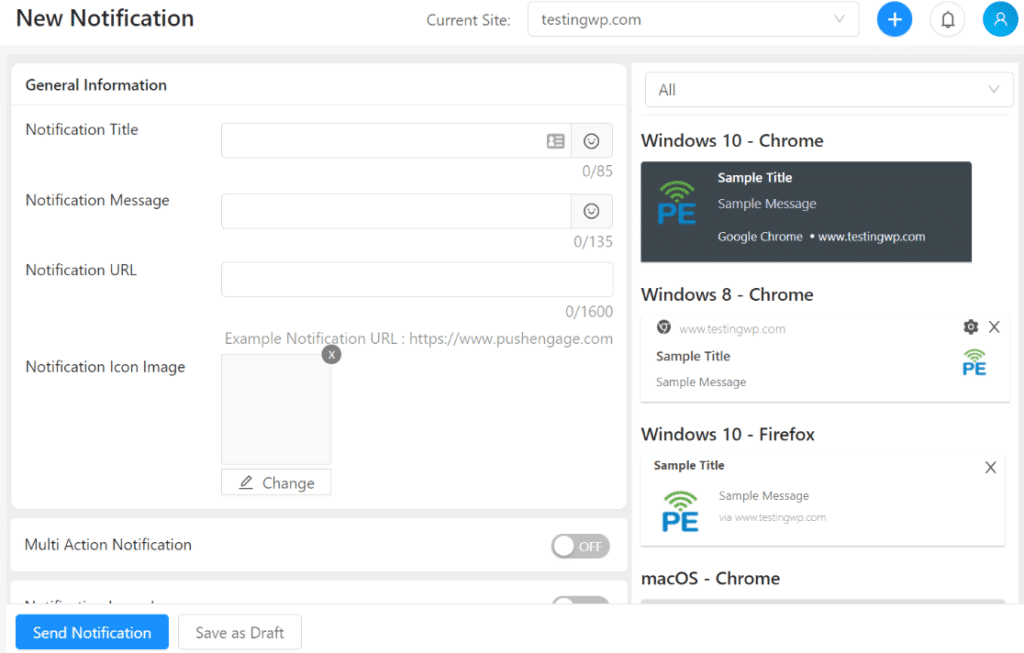
Now, go through and:
- Enter a title
- Enter a message
- Set the URL the notification will land on
- Set the image icon
- Choose if it’s a multi-action notification (with 2 buttons instead of 1)
- Choose a large image if you’d like
- Choose a time for notification duration (we suggest 2 days or so)
- Add UTM parameters to track your campaigns
- Choose from the scheduling options
After you’ve set up your notification, we highly suggest testing it to make sure it looks and acts the way you want.
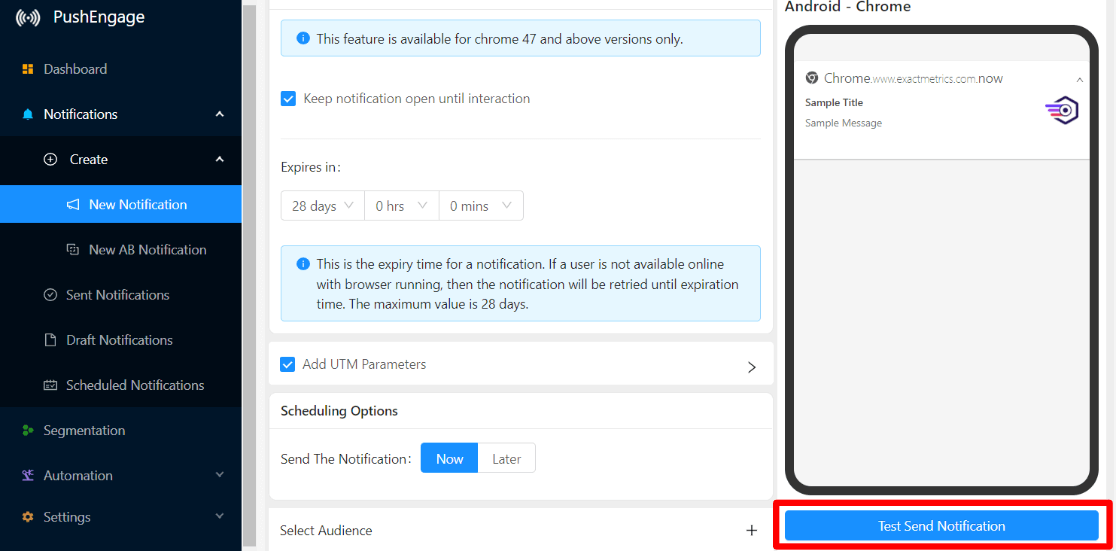
When you’re ready, go ahead and hit Send Notification.
That’s it! You’ve set up push notifications.
Want to grow your traffic and subscribers? Read 30 Epic Marketing Hacks for Explosive Traffic Growth.
Don’t forget to follow us on Twitter and Facebook to see all the latest Google Analytics tutorials.

