Users tracking site performance with Google Analytics (free) are allowed to track up to 10 million hits per month and per property.
If you’re running a high traffic site you’ll encounter problems as you hit the processing limit.
With the ExactMetrics Performance addon, you can avoid needing to upgrade to Google Analytics Premium (360) by staying within the free processing limit of Google Analytics (free), despite the traffic you get.
Prequisites:
- You are an ExactMetrics Plus user or higher.
- You’ve already installed and activated ExactMetrics.
- You’ve already connected ExactMetrics with Google Analytics.
The Performance Addon
The ExactMetrics Performance addon allows users to adjust sample rate and site speed sample rate options.
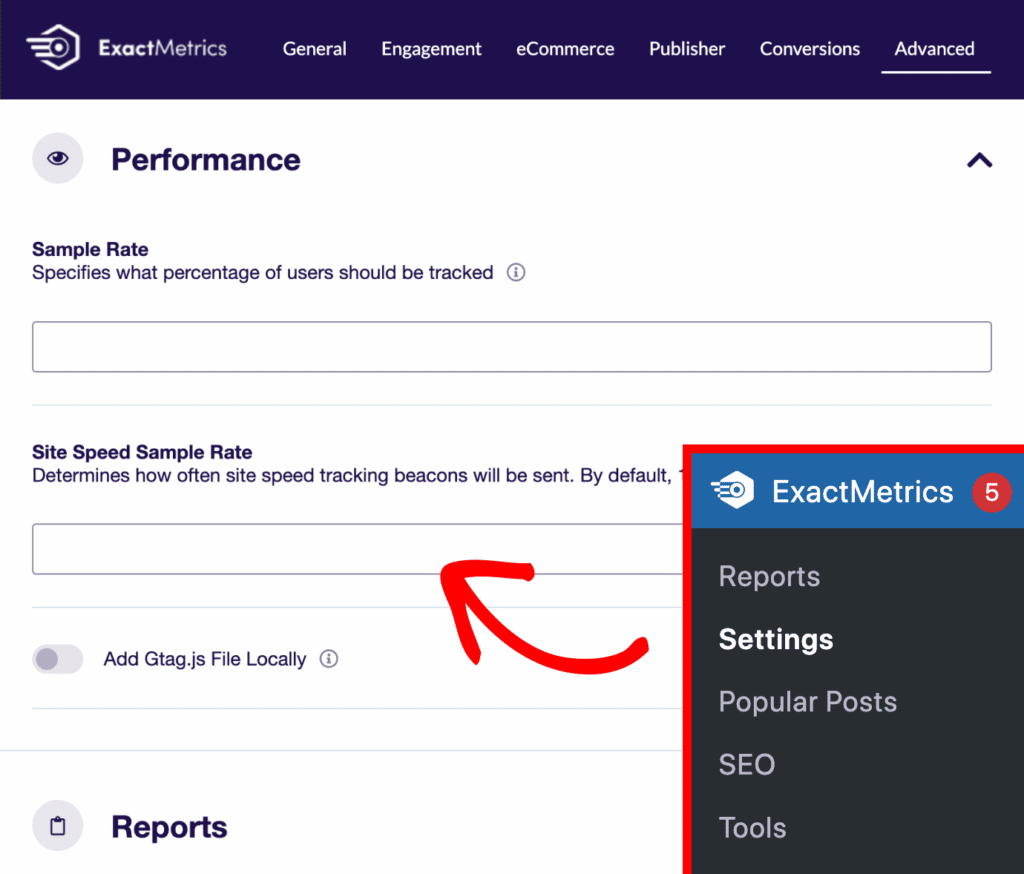
- Sample Rate: What percentage of users should be tracked.
- Site Speed Sample Rate: How often site speed tracking beacons will be sent. By default, 1% of users will automatically be tracked.
Adjusting these settings allow users to stay within the Google Analytics processing limit.
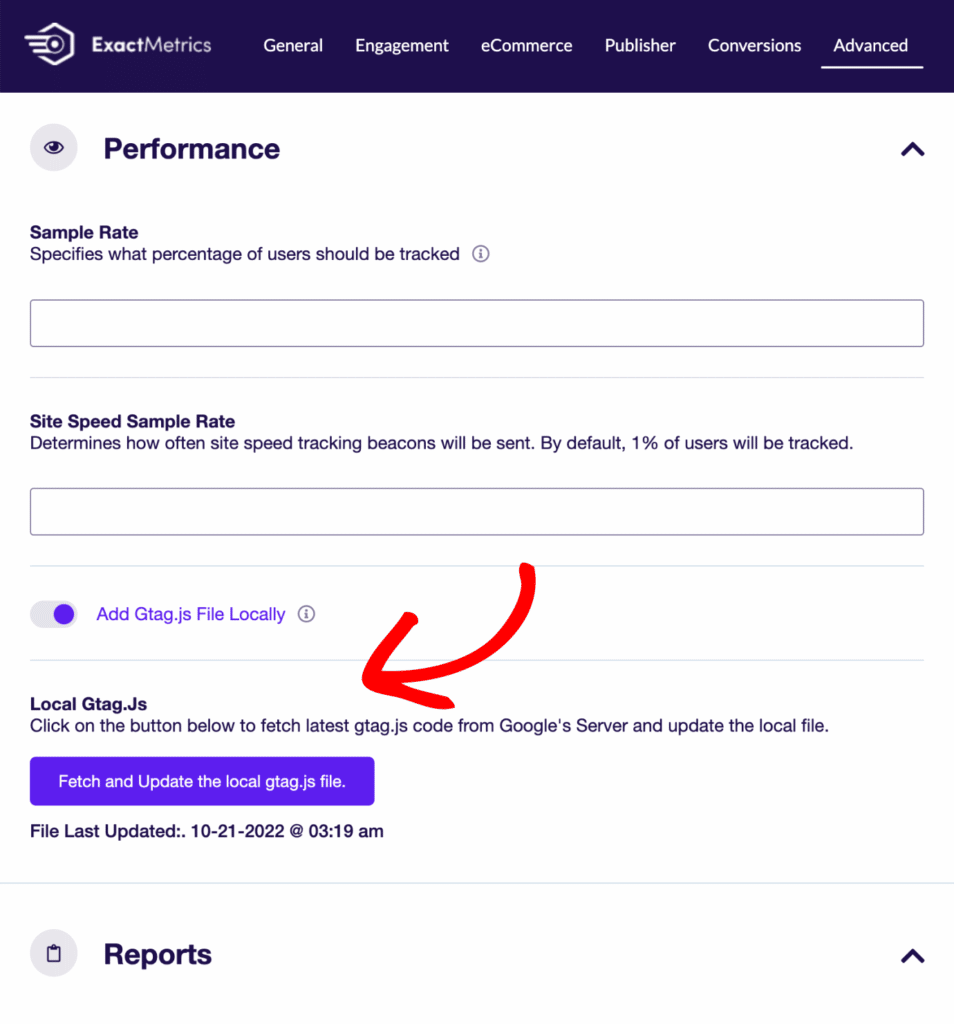
If having optimal Core Web Vitals scores is important, you can enable the Add Gtag.js File Locally setting.
Installing the Performance Addon
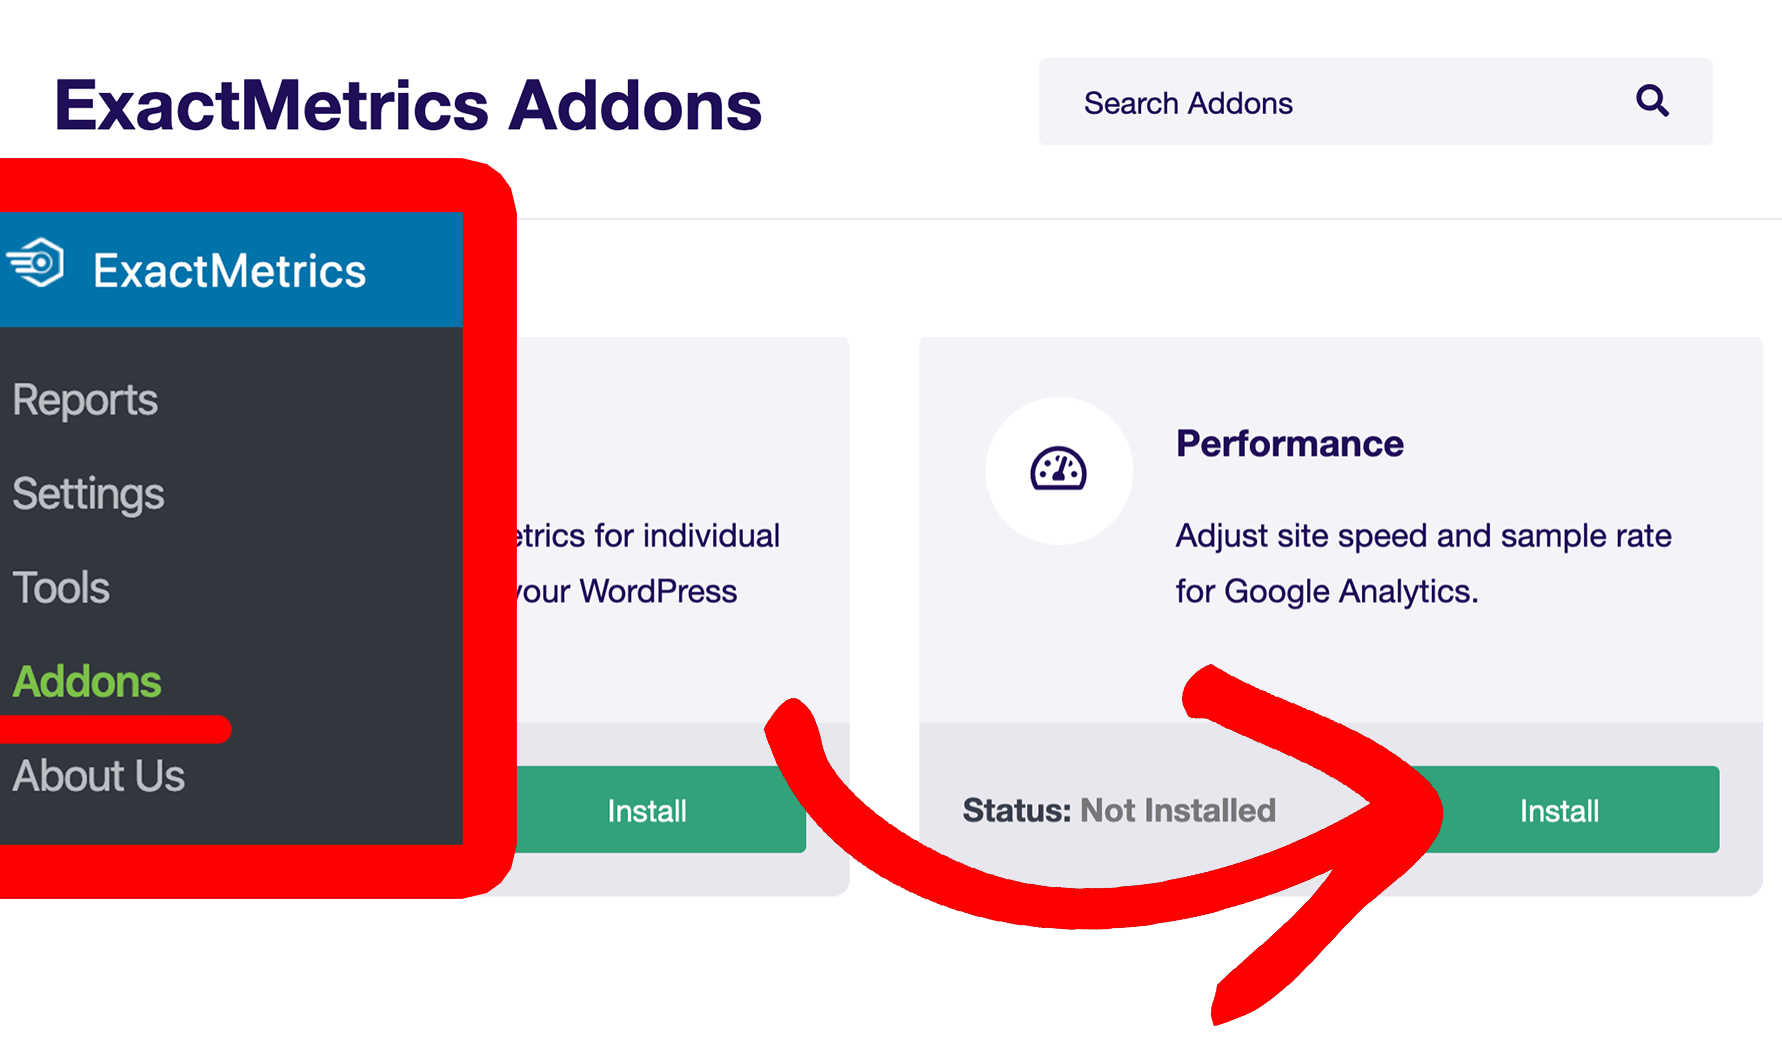
While logged into your WordPress site, go to the ExactMetrics » Addons page. Find the Performance addon and click Install.

Once the addon finishes installing, it will auto-activate. You may click Activate to manually finish installation if needed.
Once the addon is active, you’ll be able to adjust your sample rate and site speed sample rate by going to ExactMetrics » Settings » Advanced » Performance.

Enabling the Add Gtag.js File Locally setting will expose the button Fetch and Update the local gtag.js file. Click on this button to generate a gtag.js script locally on your own server.

You did it! You learned how to enable the Performance addon.
