Are you using WooCommerce, EasyAffiliate, Easy Digital Downloads, GiveWP, LifterLMS, MemberPress, or Restrict Content Pro? Are you looking to determine how effective your ads are for your online store?
The ExactMetrics PPC Tracking addon makes it easy to get started with tracking your ad conversions for Google Ads, Bing Ads, or Meta (Facebook) Ads within a few clicks.
Learn more by following this guide.
Prerequisites
- You’re an ExactMetrics Pro user or higher.
- ExactMetrics is installed and authenticated with Google Analytics.
- You’ve deactivated the Ads addon.
Installing the PPC Tracking Addon
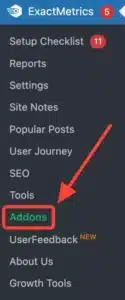
While logged into your WordPress site, head into ExactMetrics » Addons.

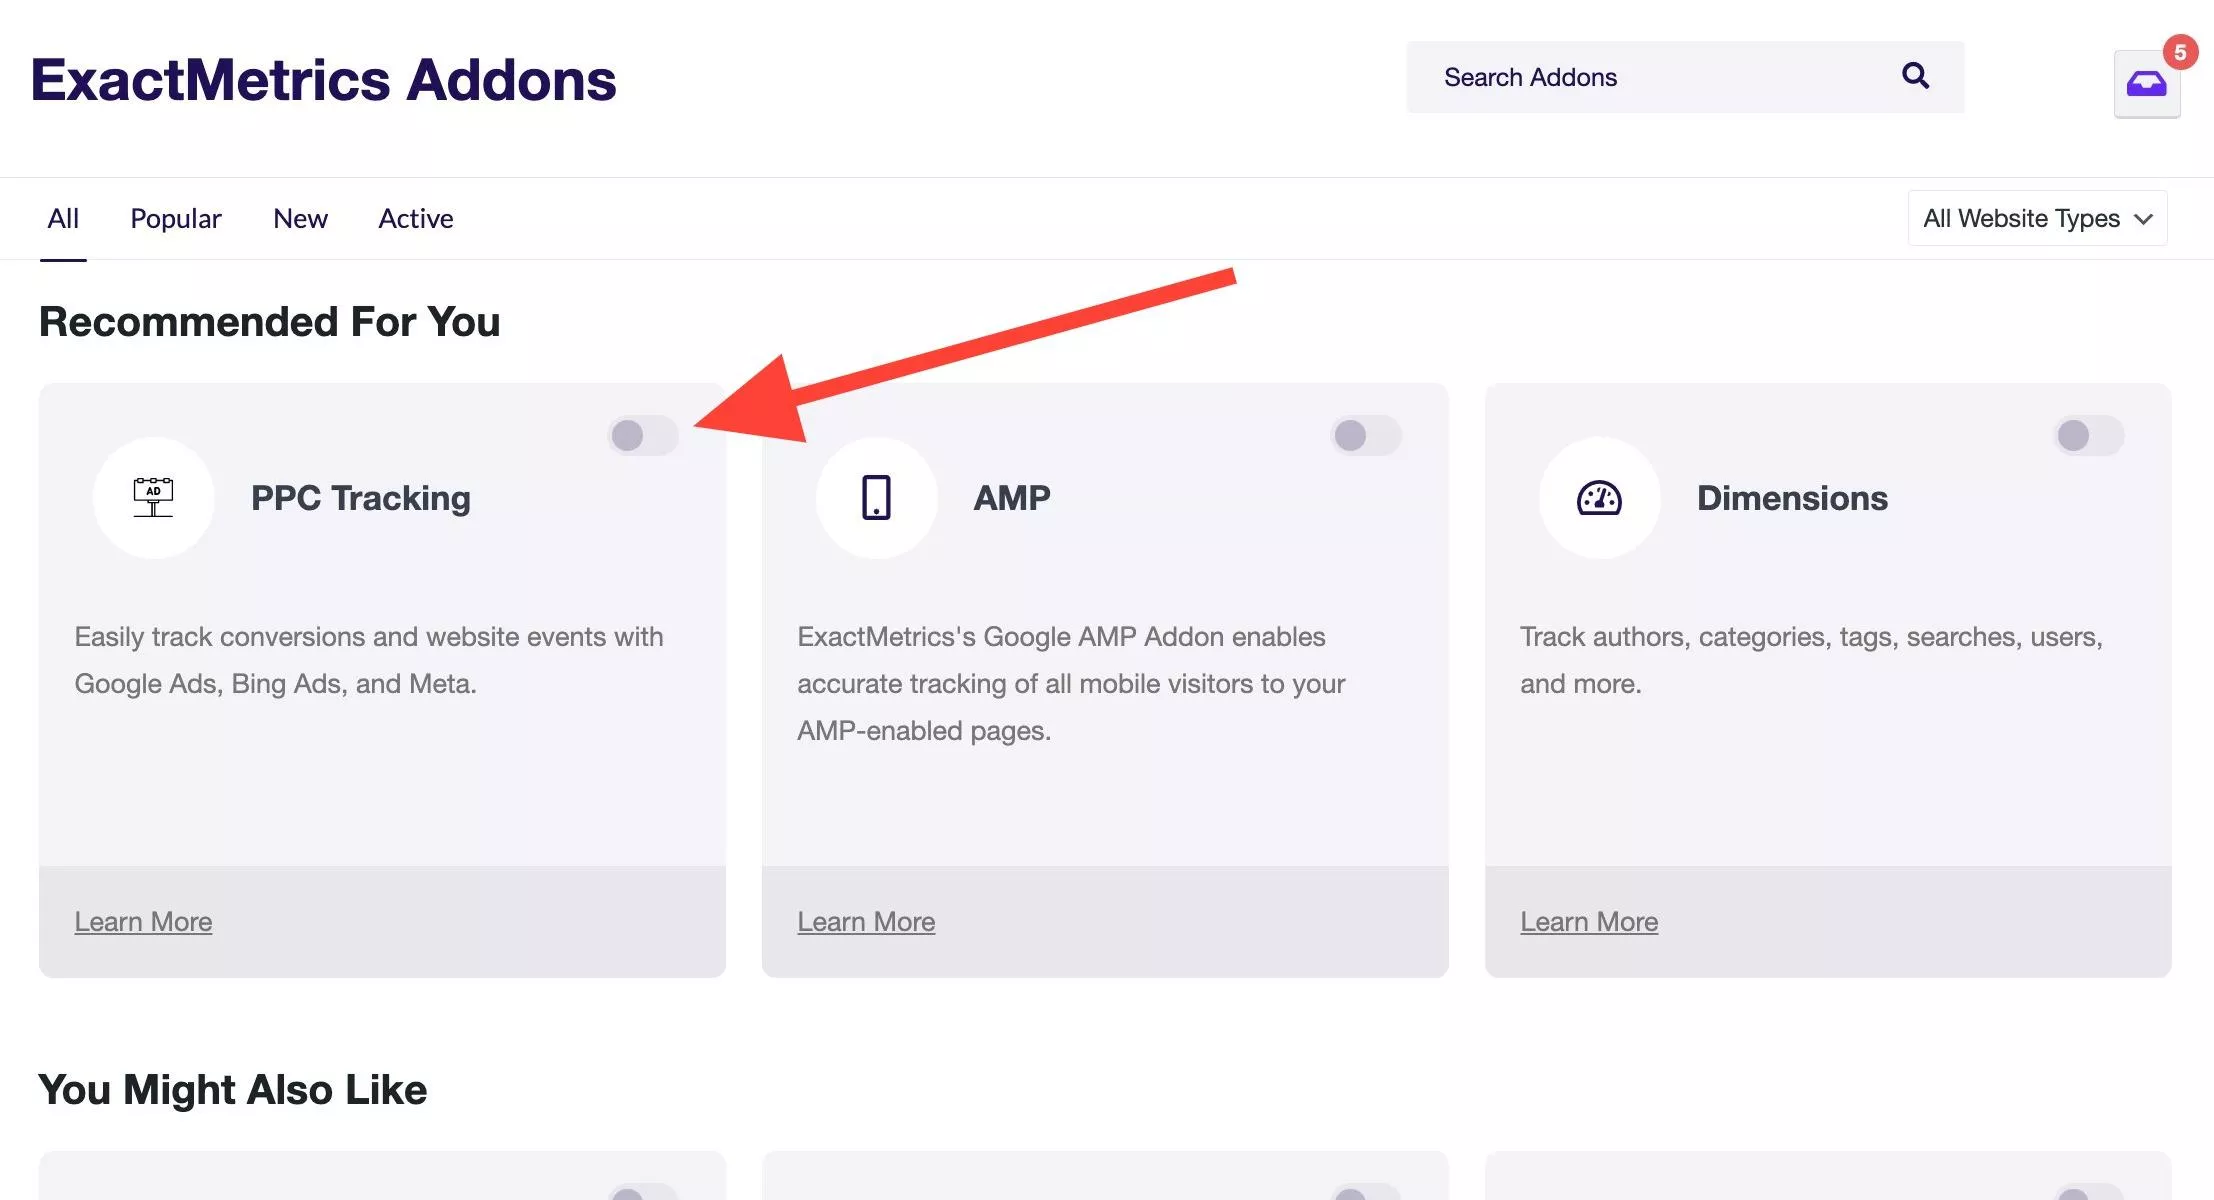
Next, find the PPC Tracking addon and switch the toggle from off to on.

Once toggled, the addon will be enabled for your WordPress site.
While using the PPC Tracking addon, please ensure the Ads addon is disabled, as both the PPC Tracking and Ads addon do not need to be active at the same time. Please only use 1 addon at a time.
Ads Conversion Tracking Inside ExactMetrics
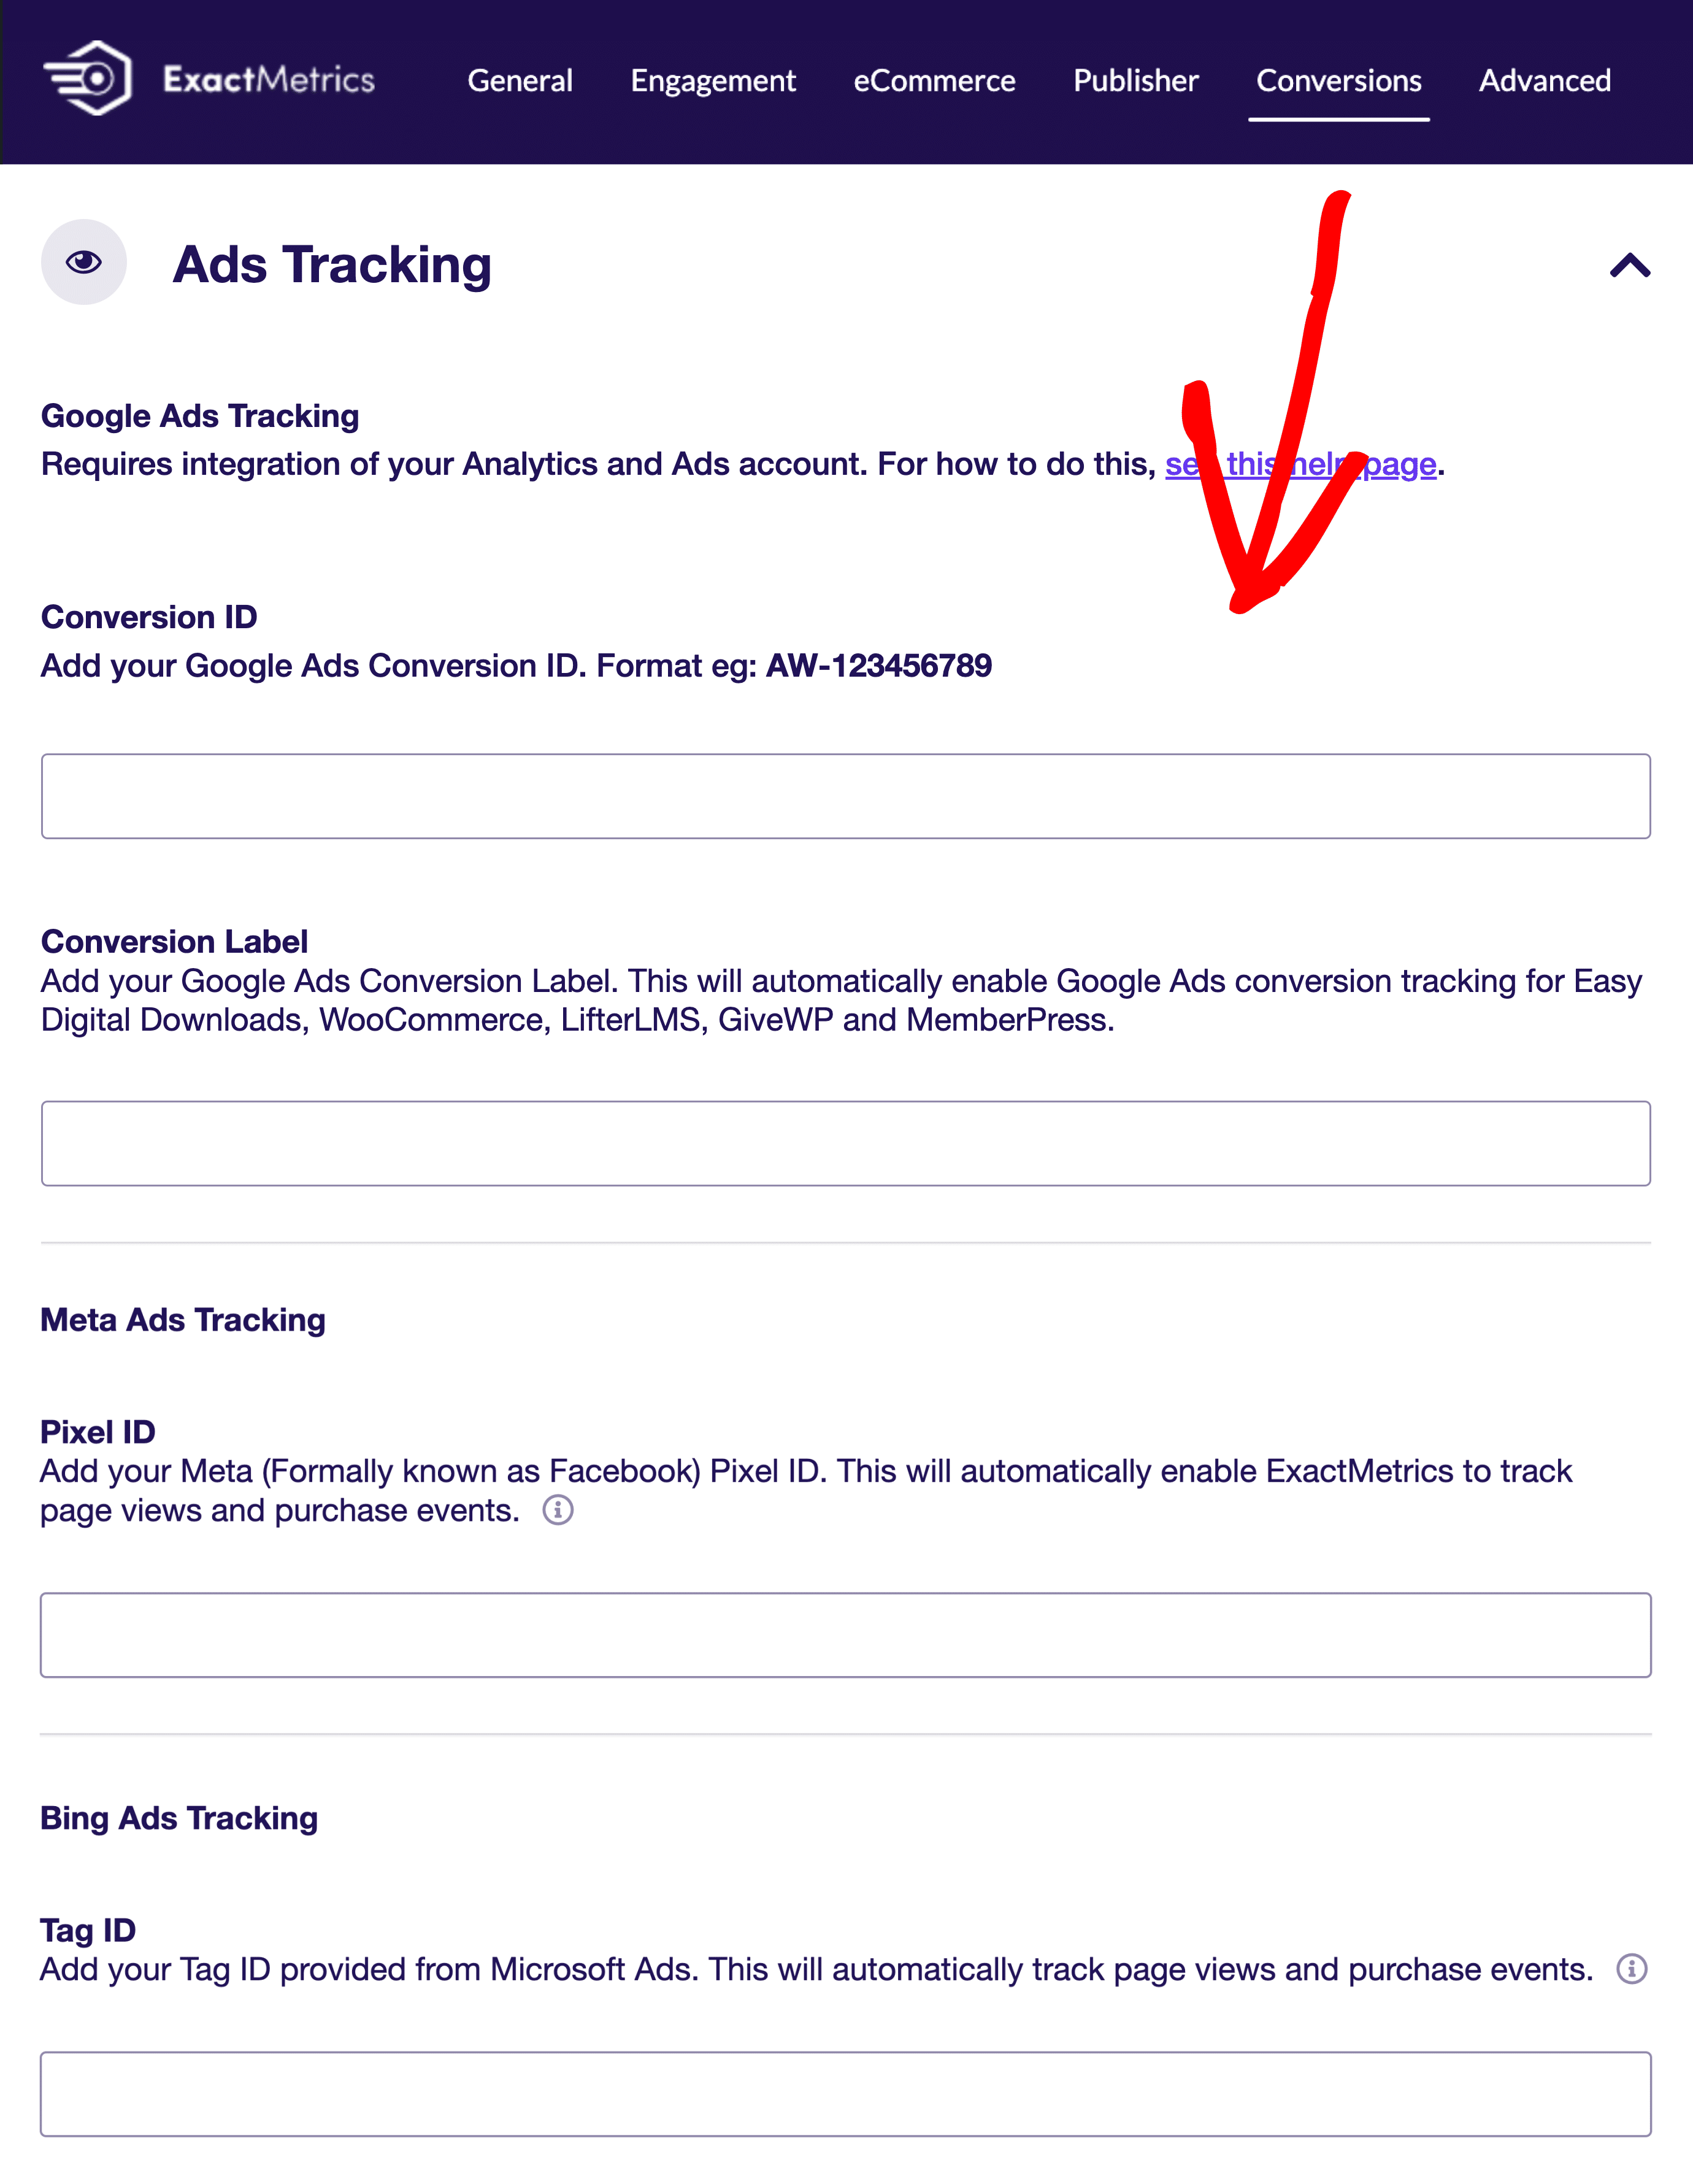
Go to ExactMetrics » Settings » Conversions » Ads Tracking, where you’ll be able to insert the following:
- A Google Ads conversion ID and conversion label
- A Meta (Facebook) pixel ID
- A UET tag ID from Bing
To enable Google Ads Tracking, please activate the eCommerce addon first. Both the Conversion ID and Conversion Label are required.

Once you’ve inserted your tracking IDs, make sure to click Save Changes.
That’s it! You’ve enabled advanced ads tracking on your website with a few clicks.
Next, use the Google Tag Assistant tool at tagassistant.google.com to check that your tags are firing as expected. To learn more, please see Troubleshooting with Tag Assistant.
