Need a simple way to create an event calendar in WordPress?
A WordPress event calendar is a fantastic way to engage with your users on your site. With a calendar plugin, you’ll be able to easily create multiple calendars and add events with just a few clicks. Then, your users can interact with and sign up for events in a clean, user-friendly way.
To help you get started, we chose the best simple-yet-mighty WordPress event calendar plugin and we’re going to walk you through setting it up. Plus, we’ll go over how to see how many visits you’re getting on your site and calendar pages.
Let’s dive in!
Best WordPress Event Calendar Plugin: Sugar Calendar
Sugar Calendar is our favorite event calendar plugin for WordPress. It’s simple and easy to set up, but still has all the basic features most users will need. Plus, it looks great and is customizable!
Just follow our step-by-step tutorial to get Sugar Calendar up and running on your site.
- Download & Install the Plugin
- Configure Sugar Calendar
- Create Your First Calendar
- Set up Events
- Publish Your Calendar
Step 1: Download and Install Sugar Calendar
First, you’ll need to go to the Pricing page and choose the license level that makes the most sense for your needs. For instance, if you need the ability to sell tickets or publish your calendar to a feed, you’ll want the Professional license. If you need only the basics, the Personal plan might work for you.
Once you’ve made your purchase, you’ll land on a Purchase Confirmation page. Scroll down to find your license key. You’ll need that soon, so copy it!
Then, scroll down to the Products section to find your download link. Click that to download Sugar Calendar in a zip file.


Activate the plugin when prompted.
That’s it! Sugar Calendar is installed.
Step 2: Configure Sugar Calendar
Next, you’ll want to configure Sugar Calendar to your website.
To do that, hover over the Calendar tab in your WordPress sidebar and click Settings.
Once there, you’ll see the spot where you can paste your License Key. Go ahead and do that:
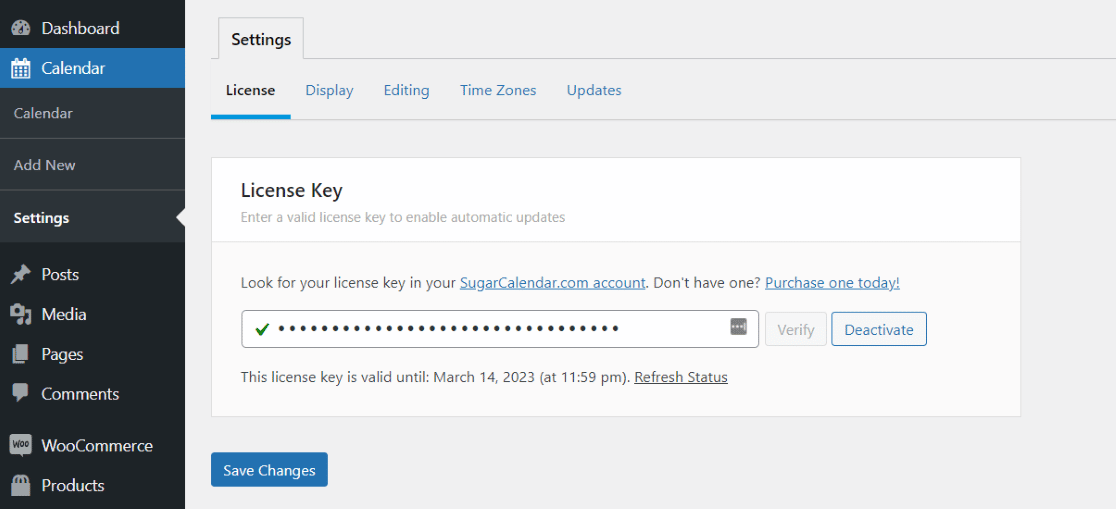
If you need to copy your license key again, you can do that on your purchases page.
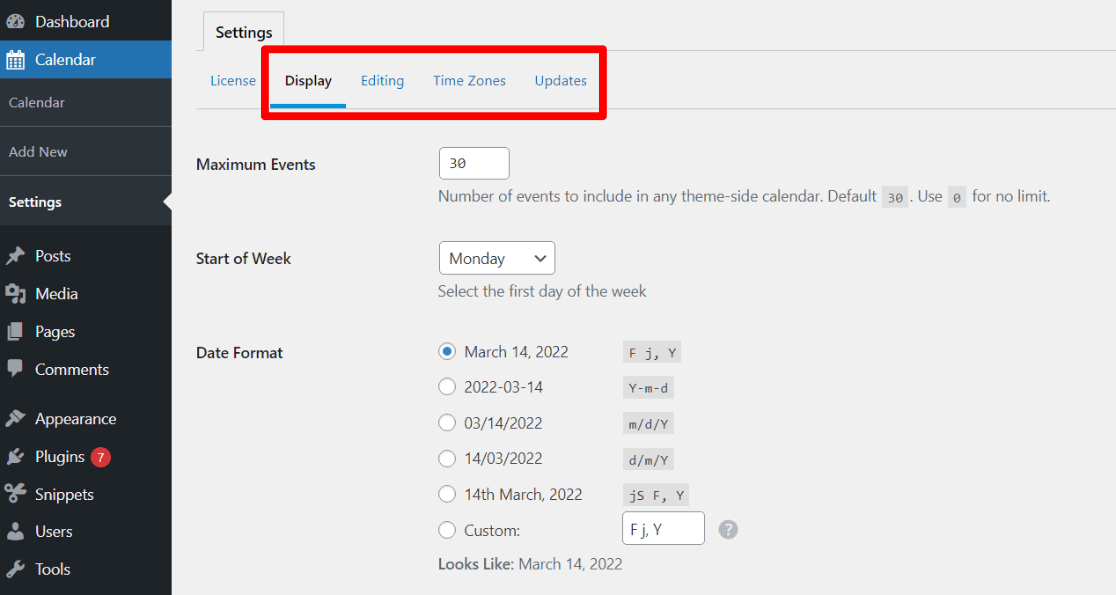
Now, it’s time to edit all your settings to personalize Sugar Calendar for your site. You’ll find the following Settings tabs:
- Display
- Editing
- Time Zones
- Updates
Make sure to go through each tab to choose your settings, such as your date format, calendar day colors, classic or block editor, time zones, and more.
Step 3: Create Your First Calendar
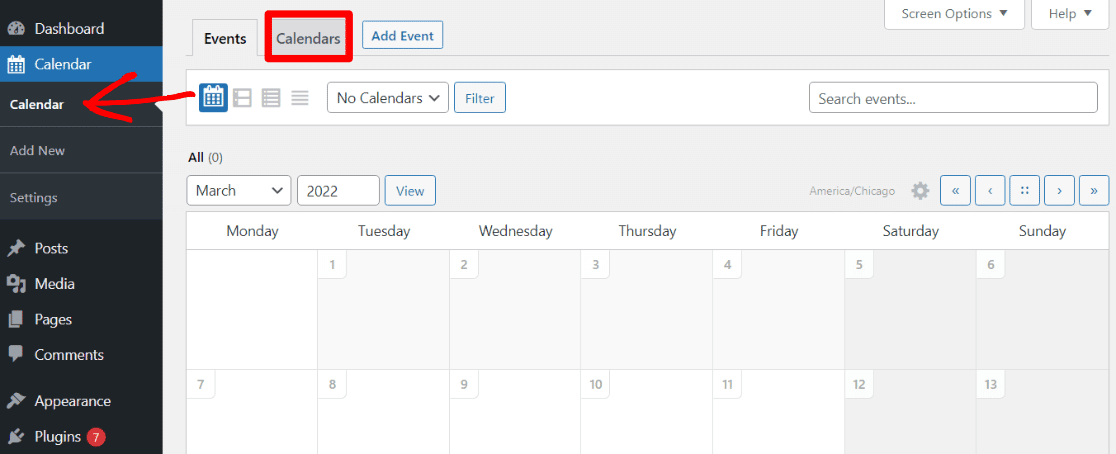
Now that your settings are set up to your liking, you can go ahead and create your first calendar. To do that, click Calendar in your WordPress sidebar, then toggle over to the Calendars tab at the top of the page:
Now, click the Add Calendar button:
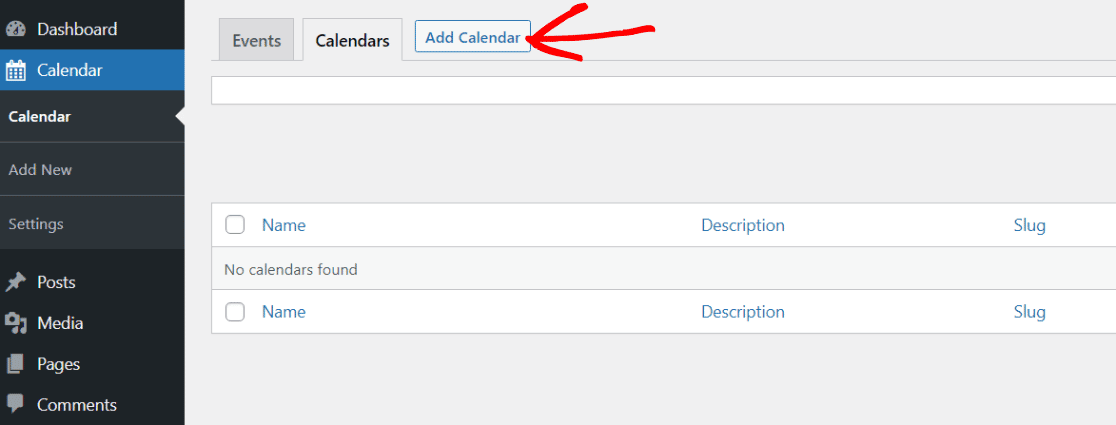
Then, fill out the calendar’s name, slug, parent calendar, description, and color.
Here’s an example:
Name: ExactMetrics Feature Walkthroughs
Slug: exactmetrics-feature-walkthroughs
Parent Calendar: None
Description: Wondering how to use all of ExactMetrics’ features? Join our feature walkthroughs to learn all you need to know about Google Analytics in WordPress!
Color: ExactMetrics purple – #a735df
Step 4: Set up Events
Now that you have a calendar to add events to, it’s time to start setting up those events. Navigate to the Events tab and click Add Event:
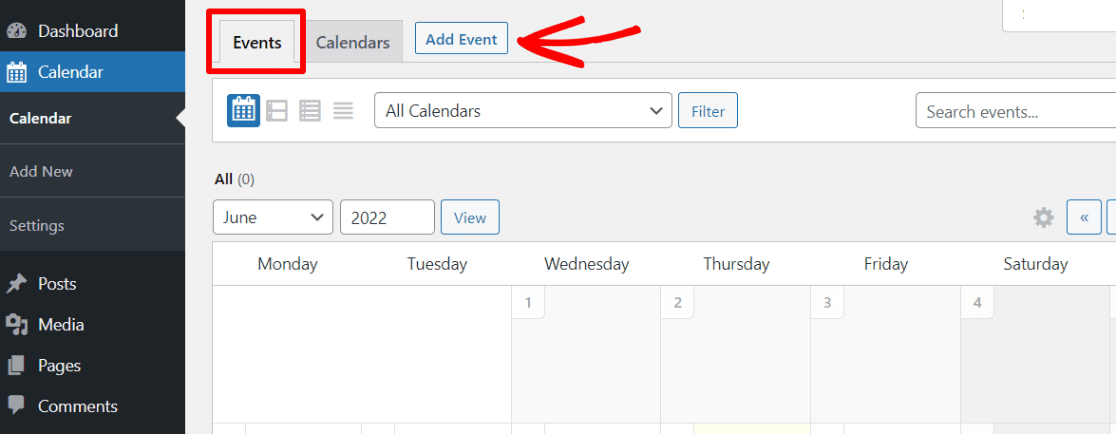
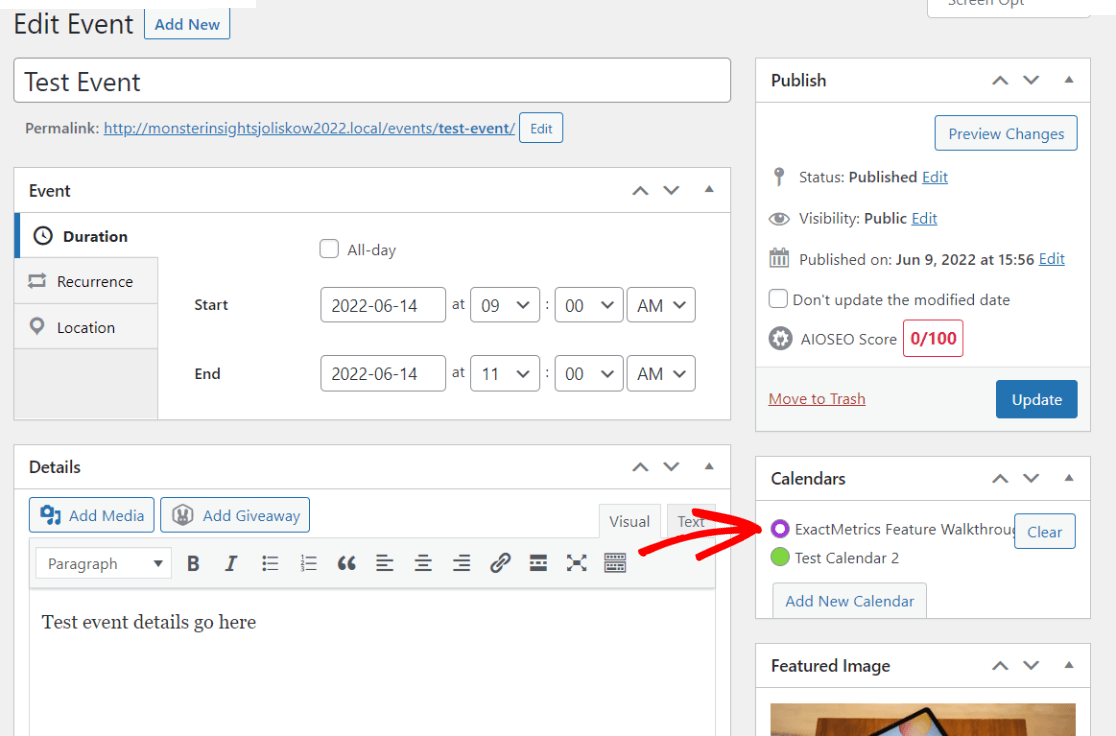
On the next screen, you’ll be able to fill out all of your event details, including:
- Event name
- Event date & duration
- Event location
- Whether the event reoccurs
- Event description/details
- Event image
- Which calendar the event goes on
Make sure to choose which calendar you want your event to go on (pictured below), even if you only have one calendar. Once you’ve filled out all of the information, hit the blue Publish button to add your event to your calendar.
Now that your event is published, you can view it on your calendar. Head back to Calendar » Events to see your calendar. Hover over it for some options:
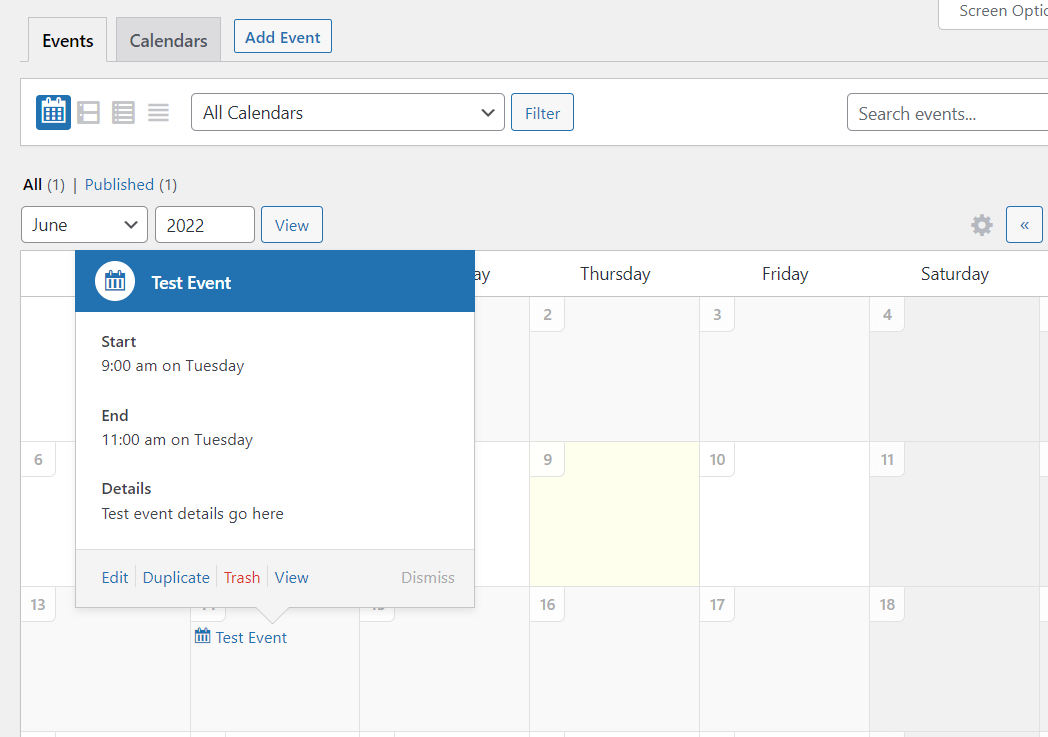
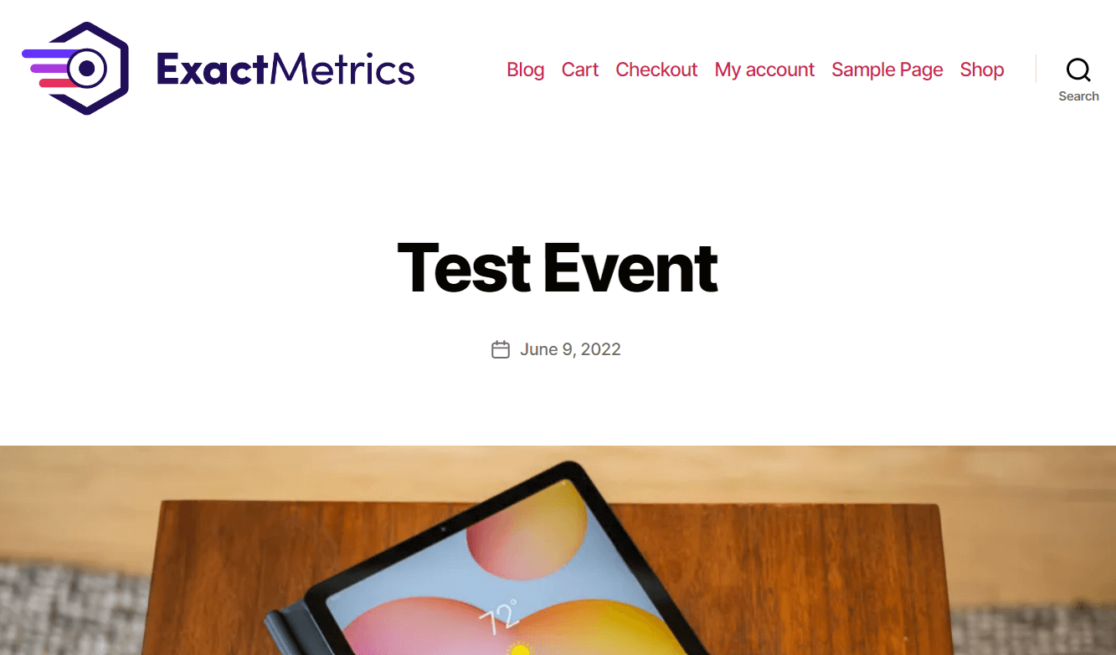
To see how the event looks on your site, click the View link:
Step 5: Publish Your Calendar
Now that your calendar is ready, it’s time to publish it on your site. Your calendar can be placed just about anywhere, on a page, in a post, or even in a widget. All you have to do is copy and paste the little snippet of code called a shortcode into the spot where you want your calendar to appear.
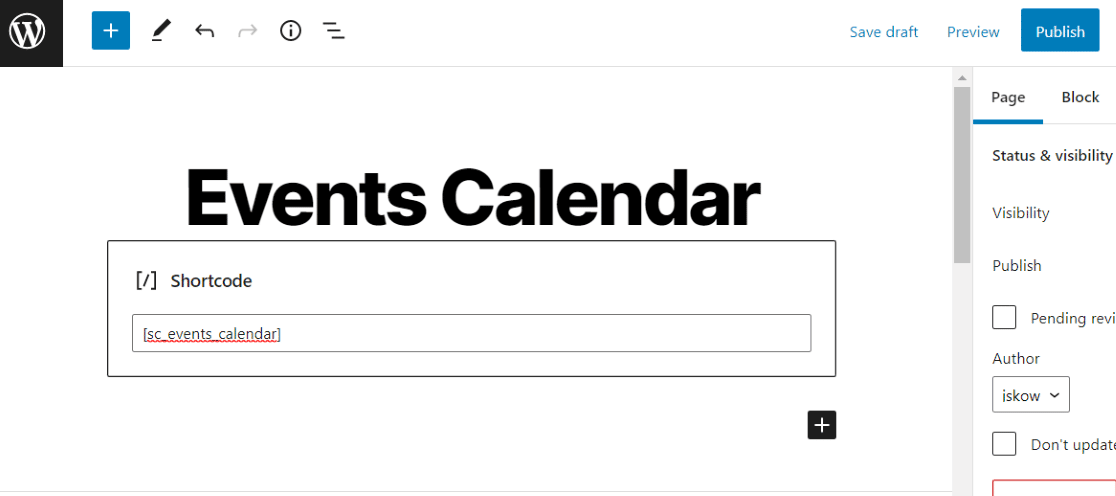
The Sugar Calendar shortcode is:
[sc_events_calendar]
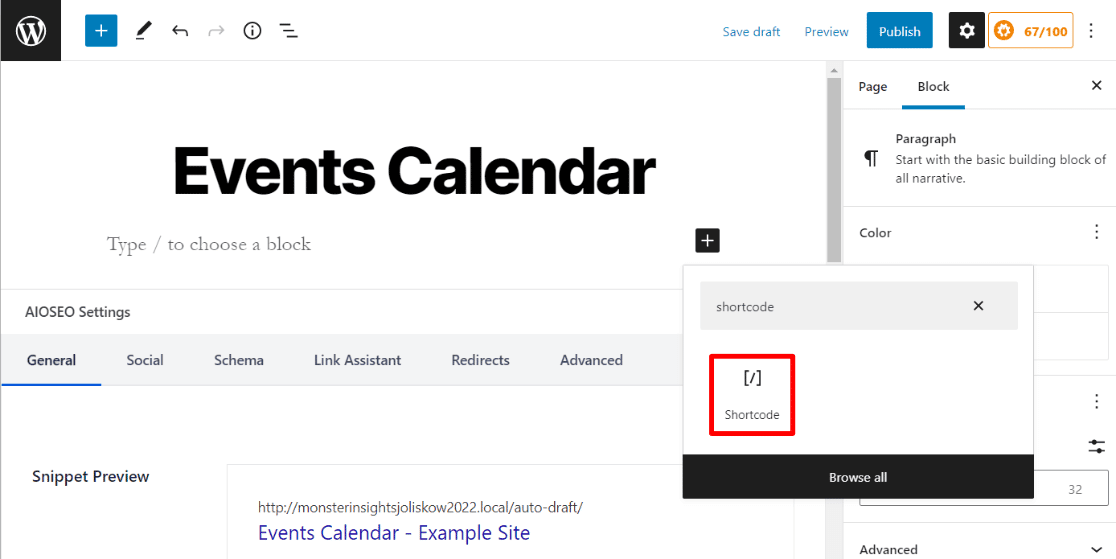
For example, let’s say I’ve created a new page where I want my calendar to live called “Events Calendar”. If I’m using the classic editor, I can just copy paste my code right in. If I’m using the Gutenberg block editor, I can just search for and add a block called Shortcode:
Then paste the Sugar Calendar shortcode into it:
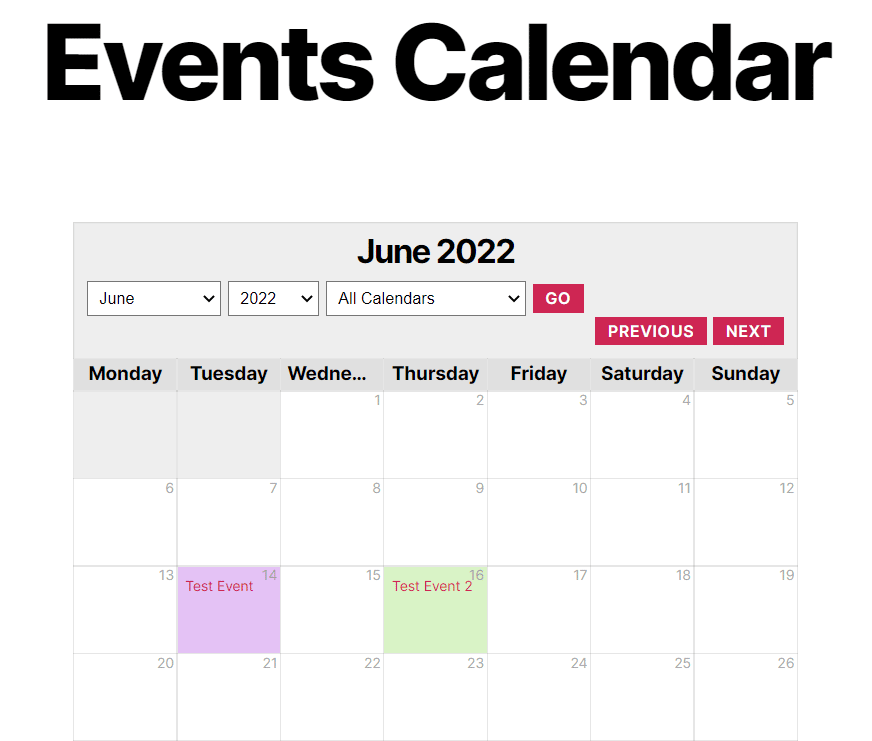
Then when I publish my page, the calendar is there on it:
We’re done! Our calendar is all set up and ready to go.
Looking for great social media plugins to help you share your new events? Check out 11 Social Media Plugins for WordPress to Download Now.
Not using ExactMetrics yet? What are you waiting for?
Don’t forget to follow us on Twitter and Facebook to see all the latest Google Analytics tutorials.


