Do you have a WooCommerce site and want to set up Google Ads conversion tracking?
With ExactMetrics, we make it simple to track all your WooCommerce eCommerce data with Google Analytics and we also make it easy to implement your Google Ads conversion tracking for eCommerce.
Follow this guide for more information.
Prerequisites:
- Your Google Ads account is set up.
- Your ExactMetrics is already installed and Google Analytics is authenticated on your website.
- You’ve already installed and activated the eCommerce Addon.
- You’ve already installed and activated the Ads Addon or PPC Tracking Addon.
- You’ve already connected your Google Analytics account to your Google Ads account.
Awesome! If you’ve Completed those Prerequisites, Please Proceed.
Overview: In this guide, there are a few steps, but they consist of:
- Logging into Google Ads.
- Collecting the required tracking code from Google Ads.
- Adding this tracking code into ExactMetrics.
Step 1. Please go to ads.google.com and log into your account.
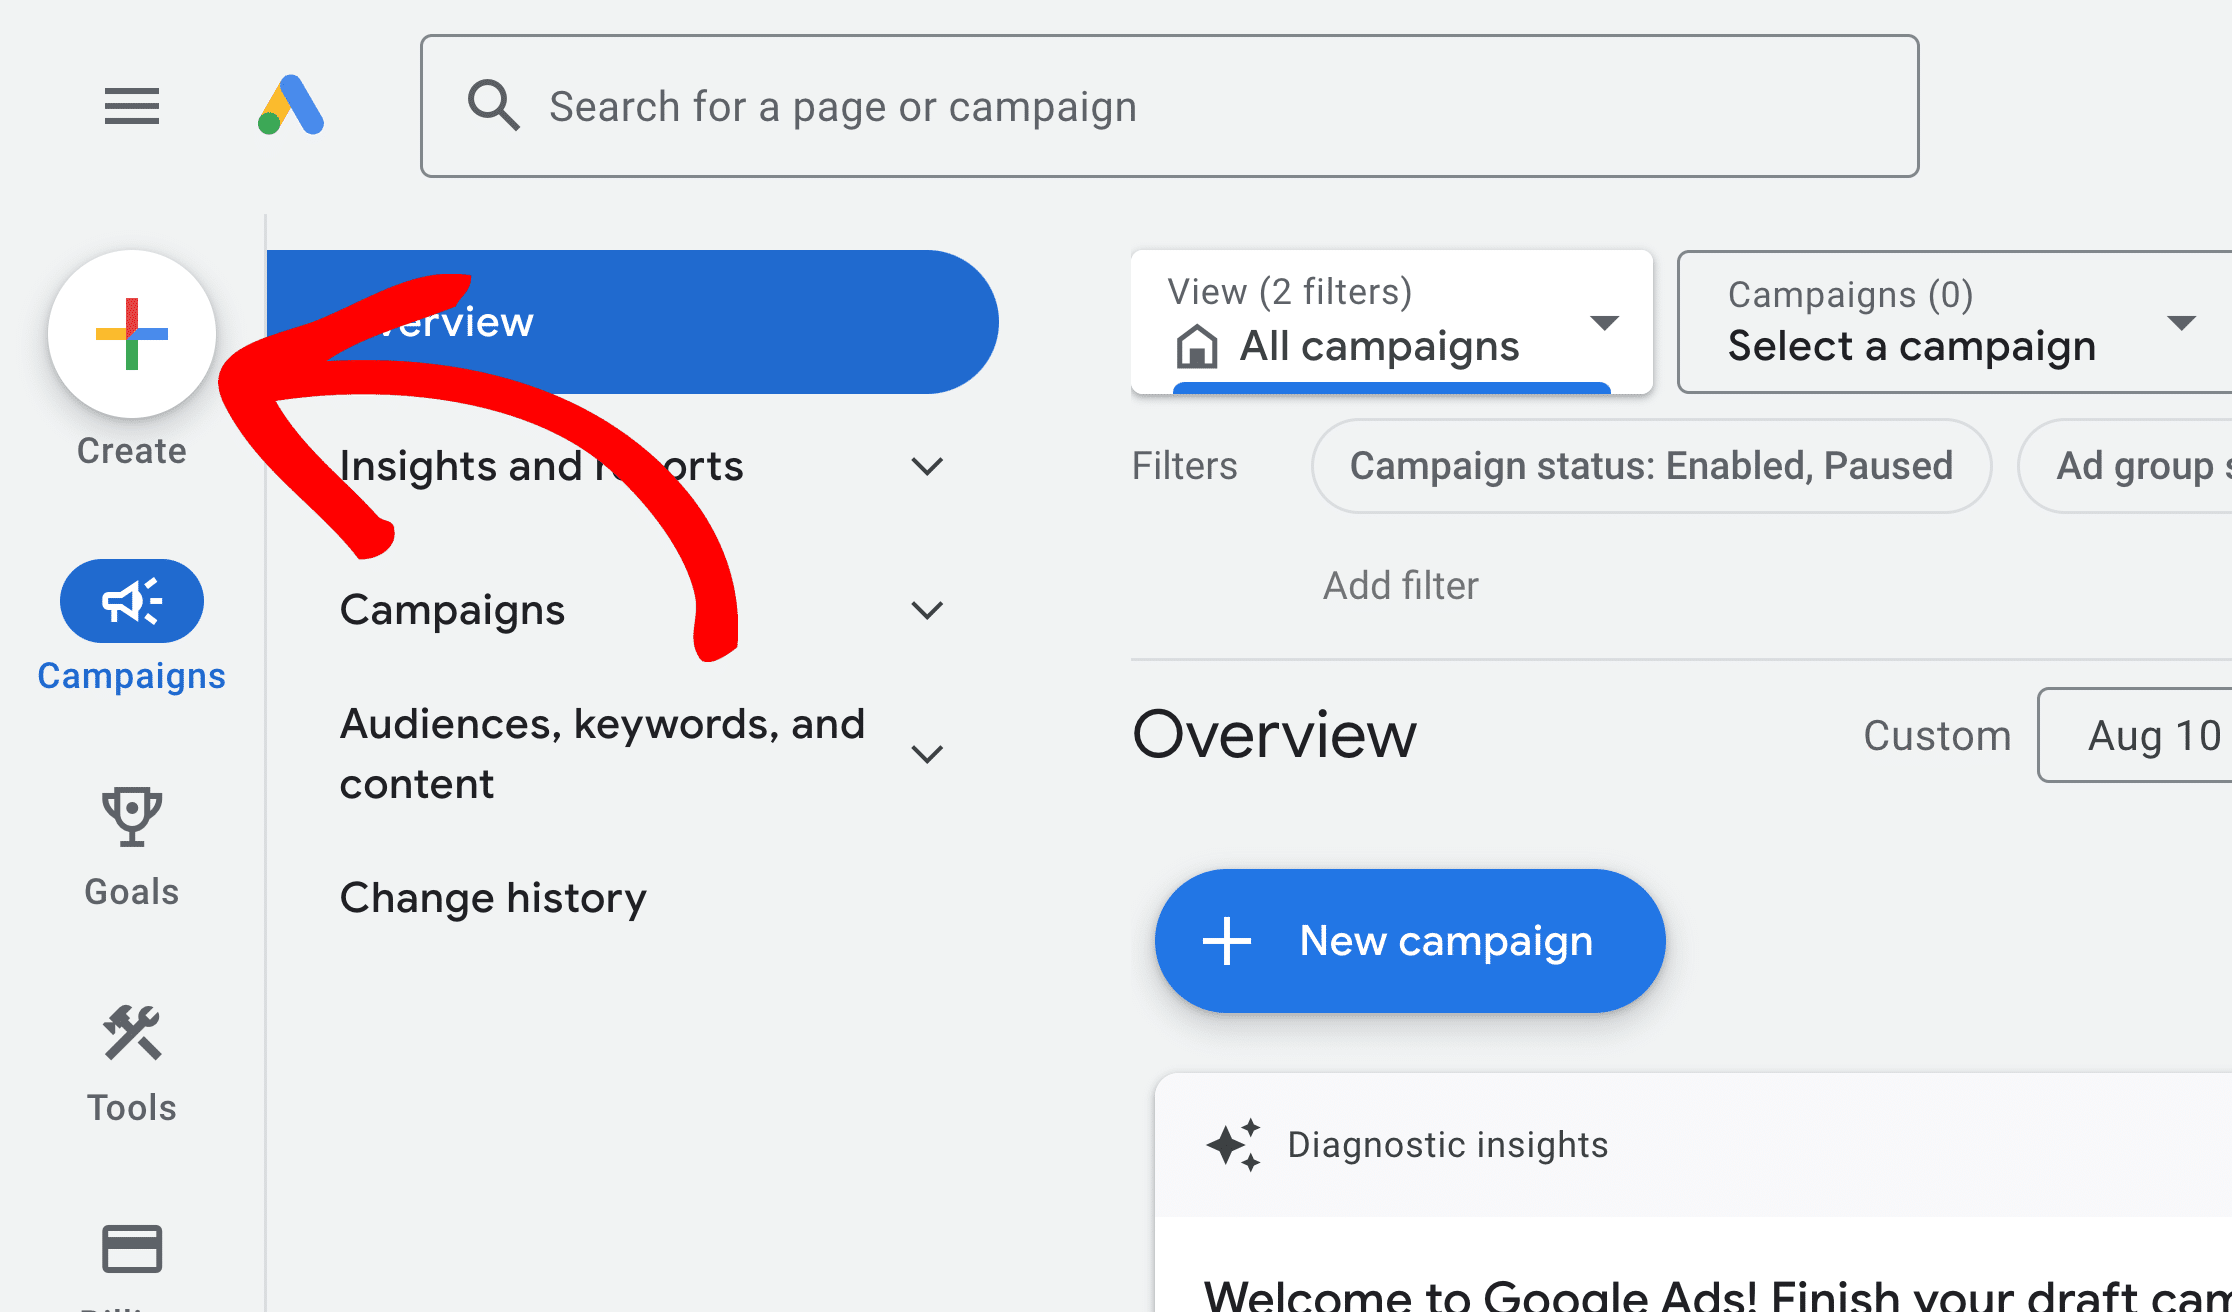
Once logged in, click on Create.
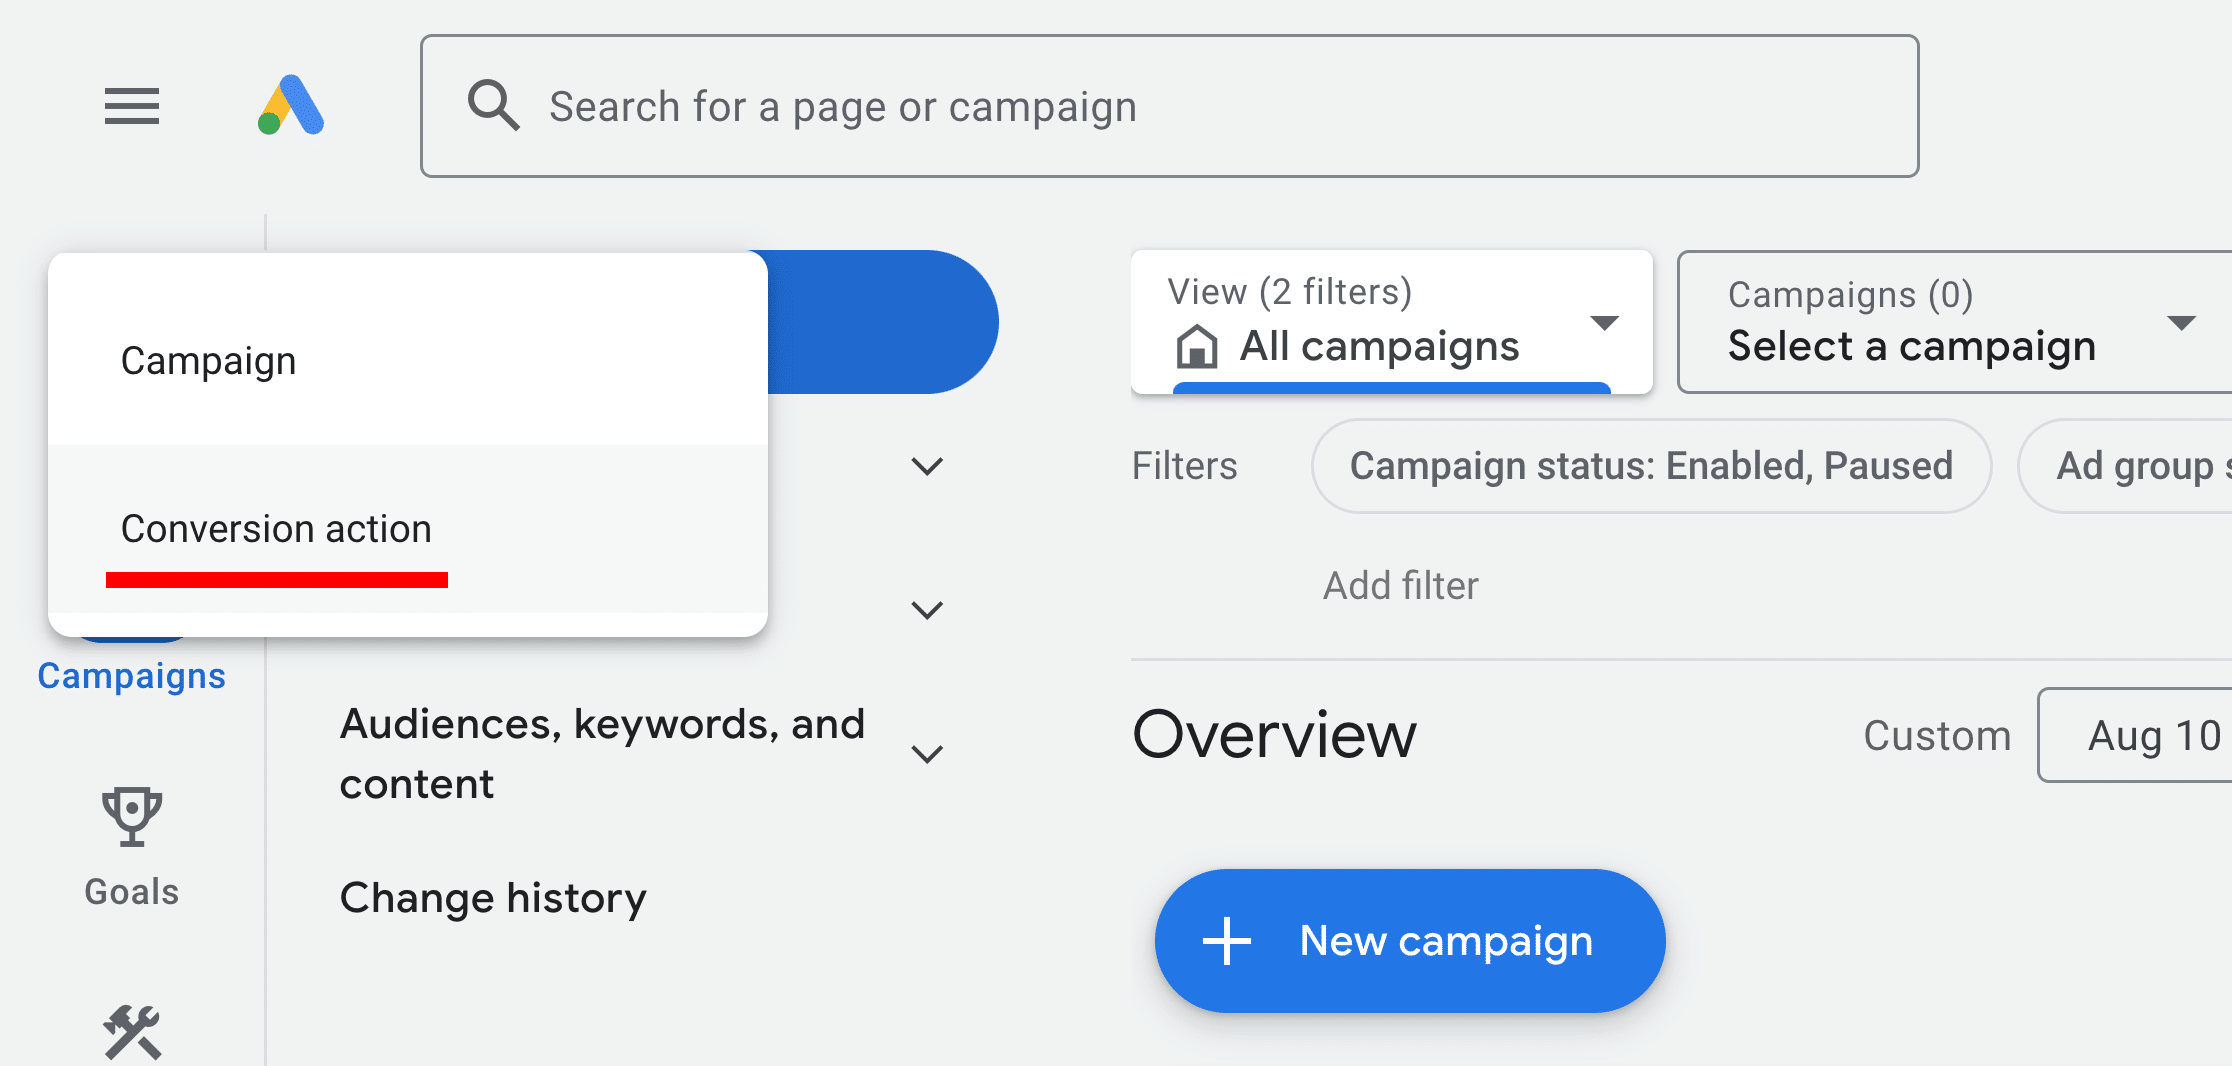
Step 2. Choose Conversion action from the dropdown.
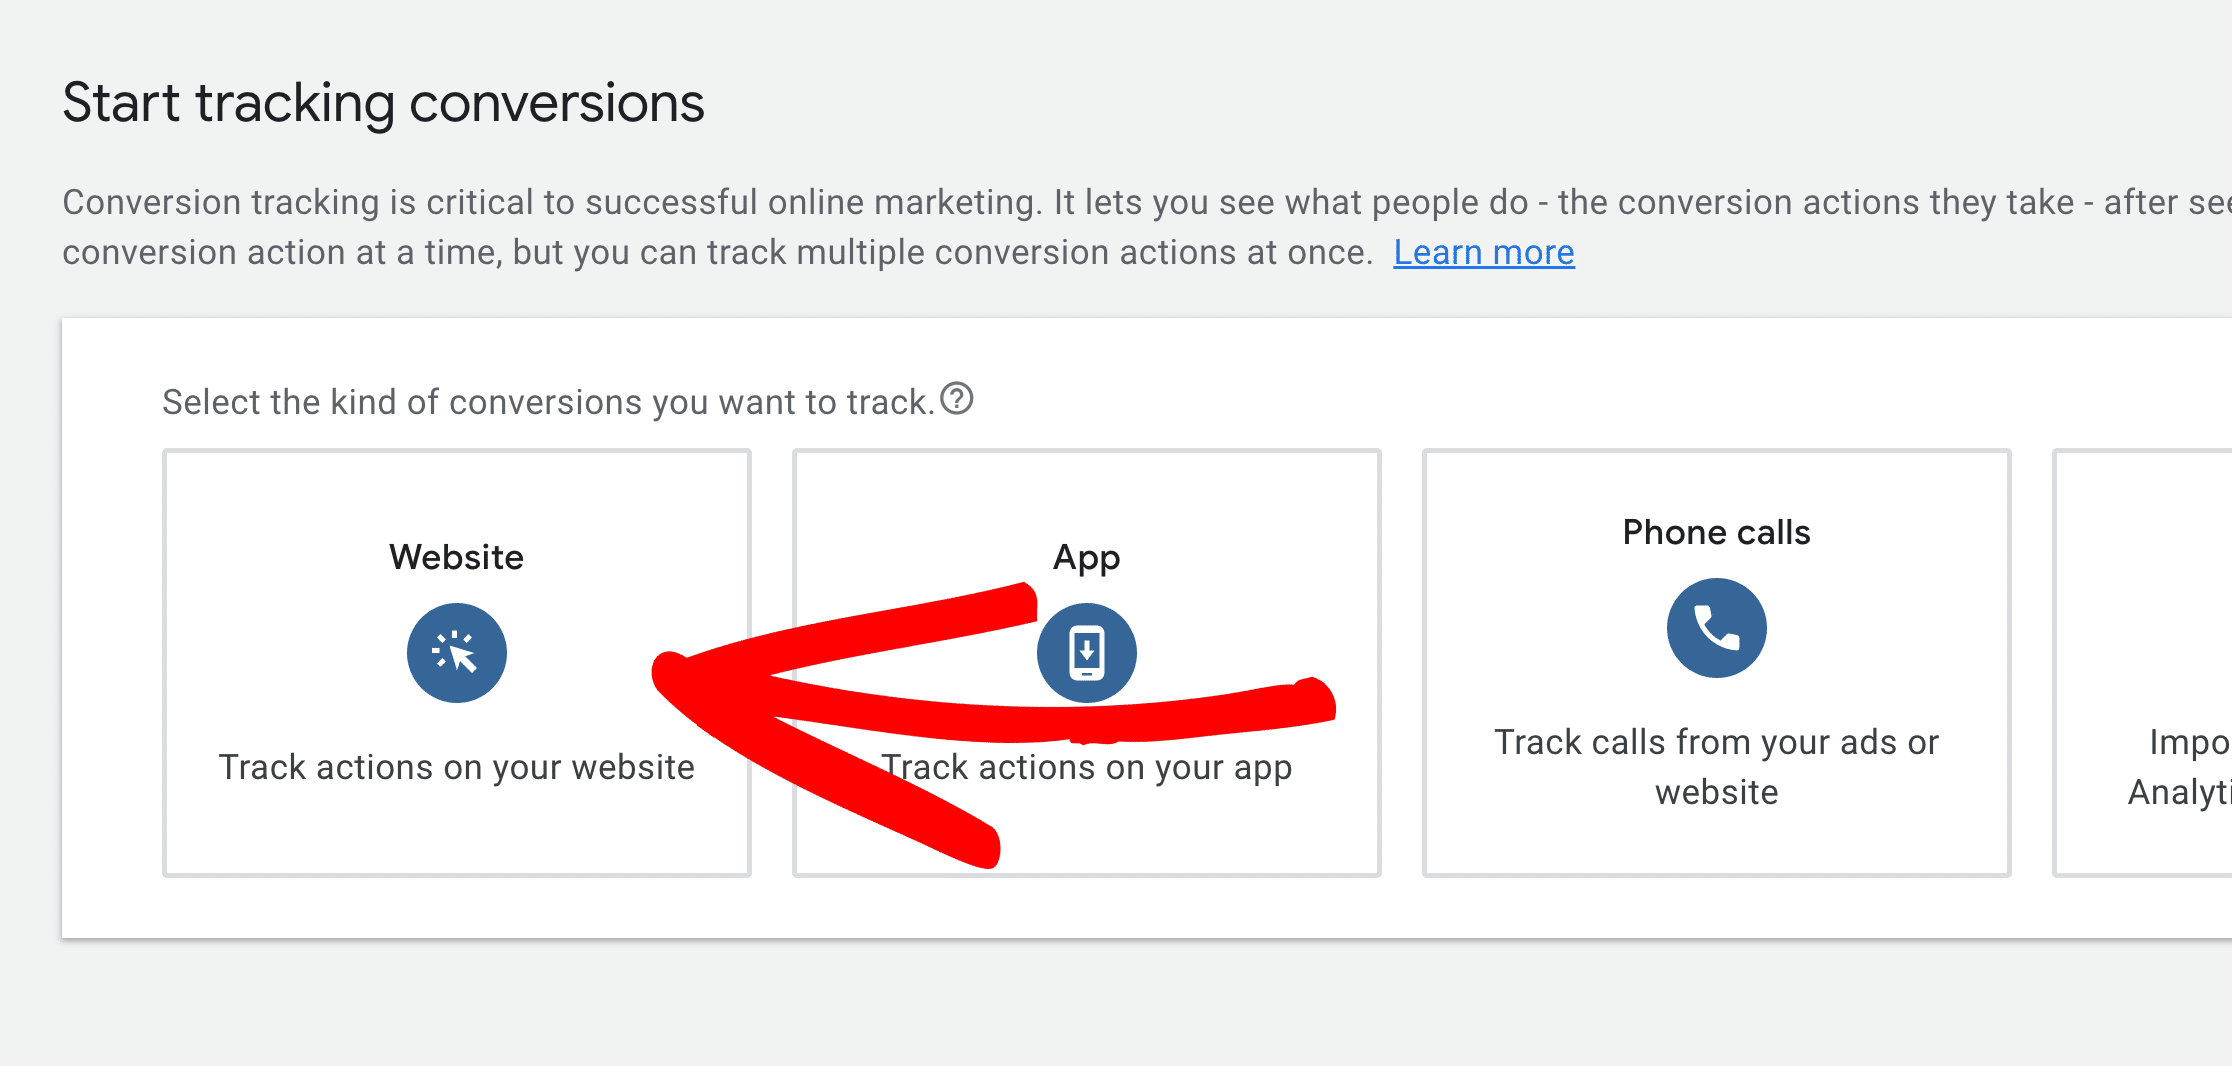
Step 3. Click the Website conversion action type.
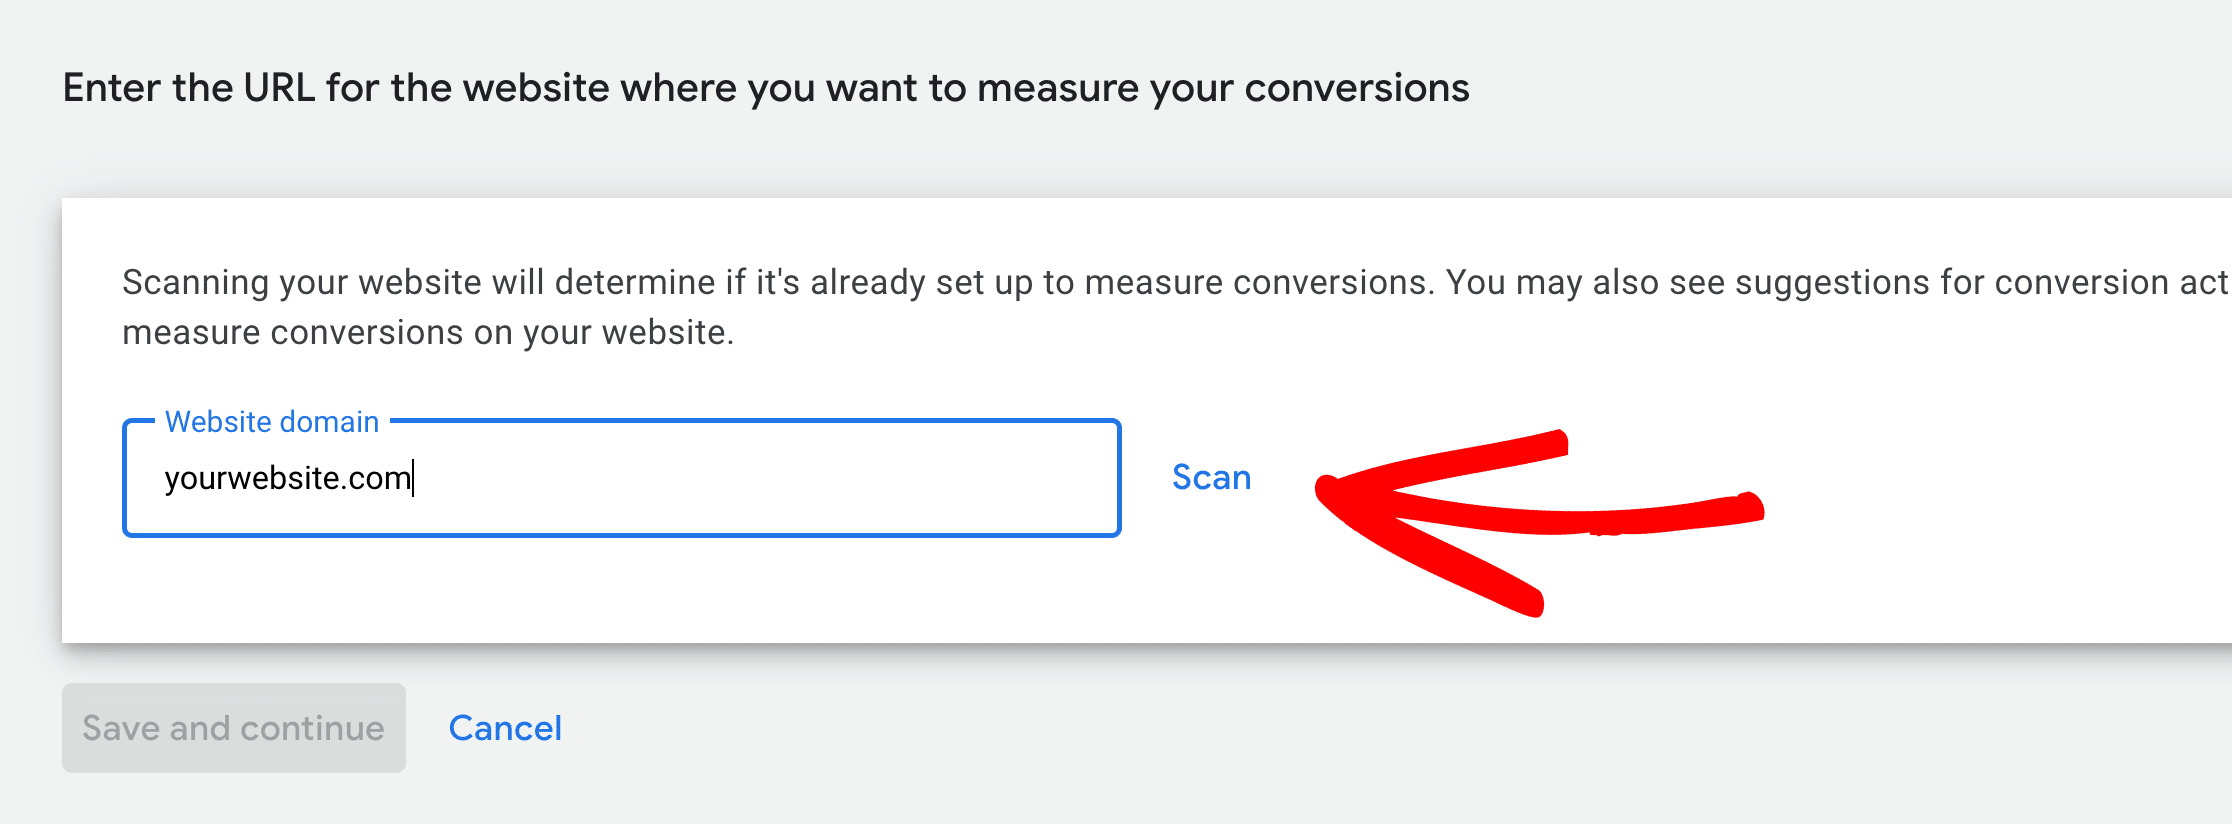
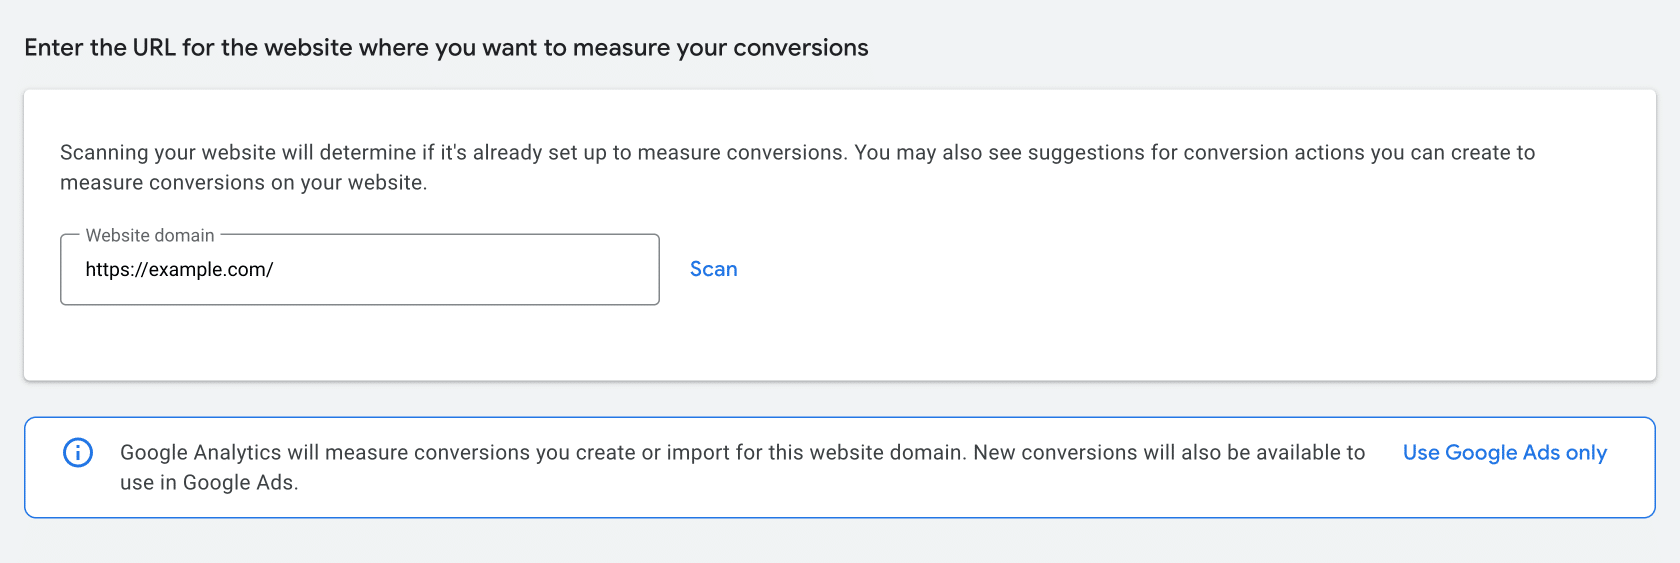
Step 4. Enter your WordPress site’s URL to be scanned and select which website address you’d like to use (if prompted) by clicking on Apply.
Note: Please click on the link Use Google Ads only before continuing, if your Google Ads account is set to create conversions based on Google Analytics key events.
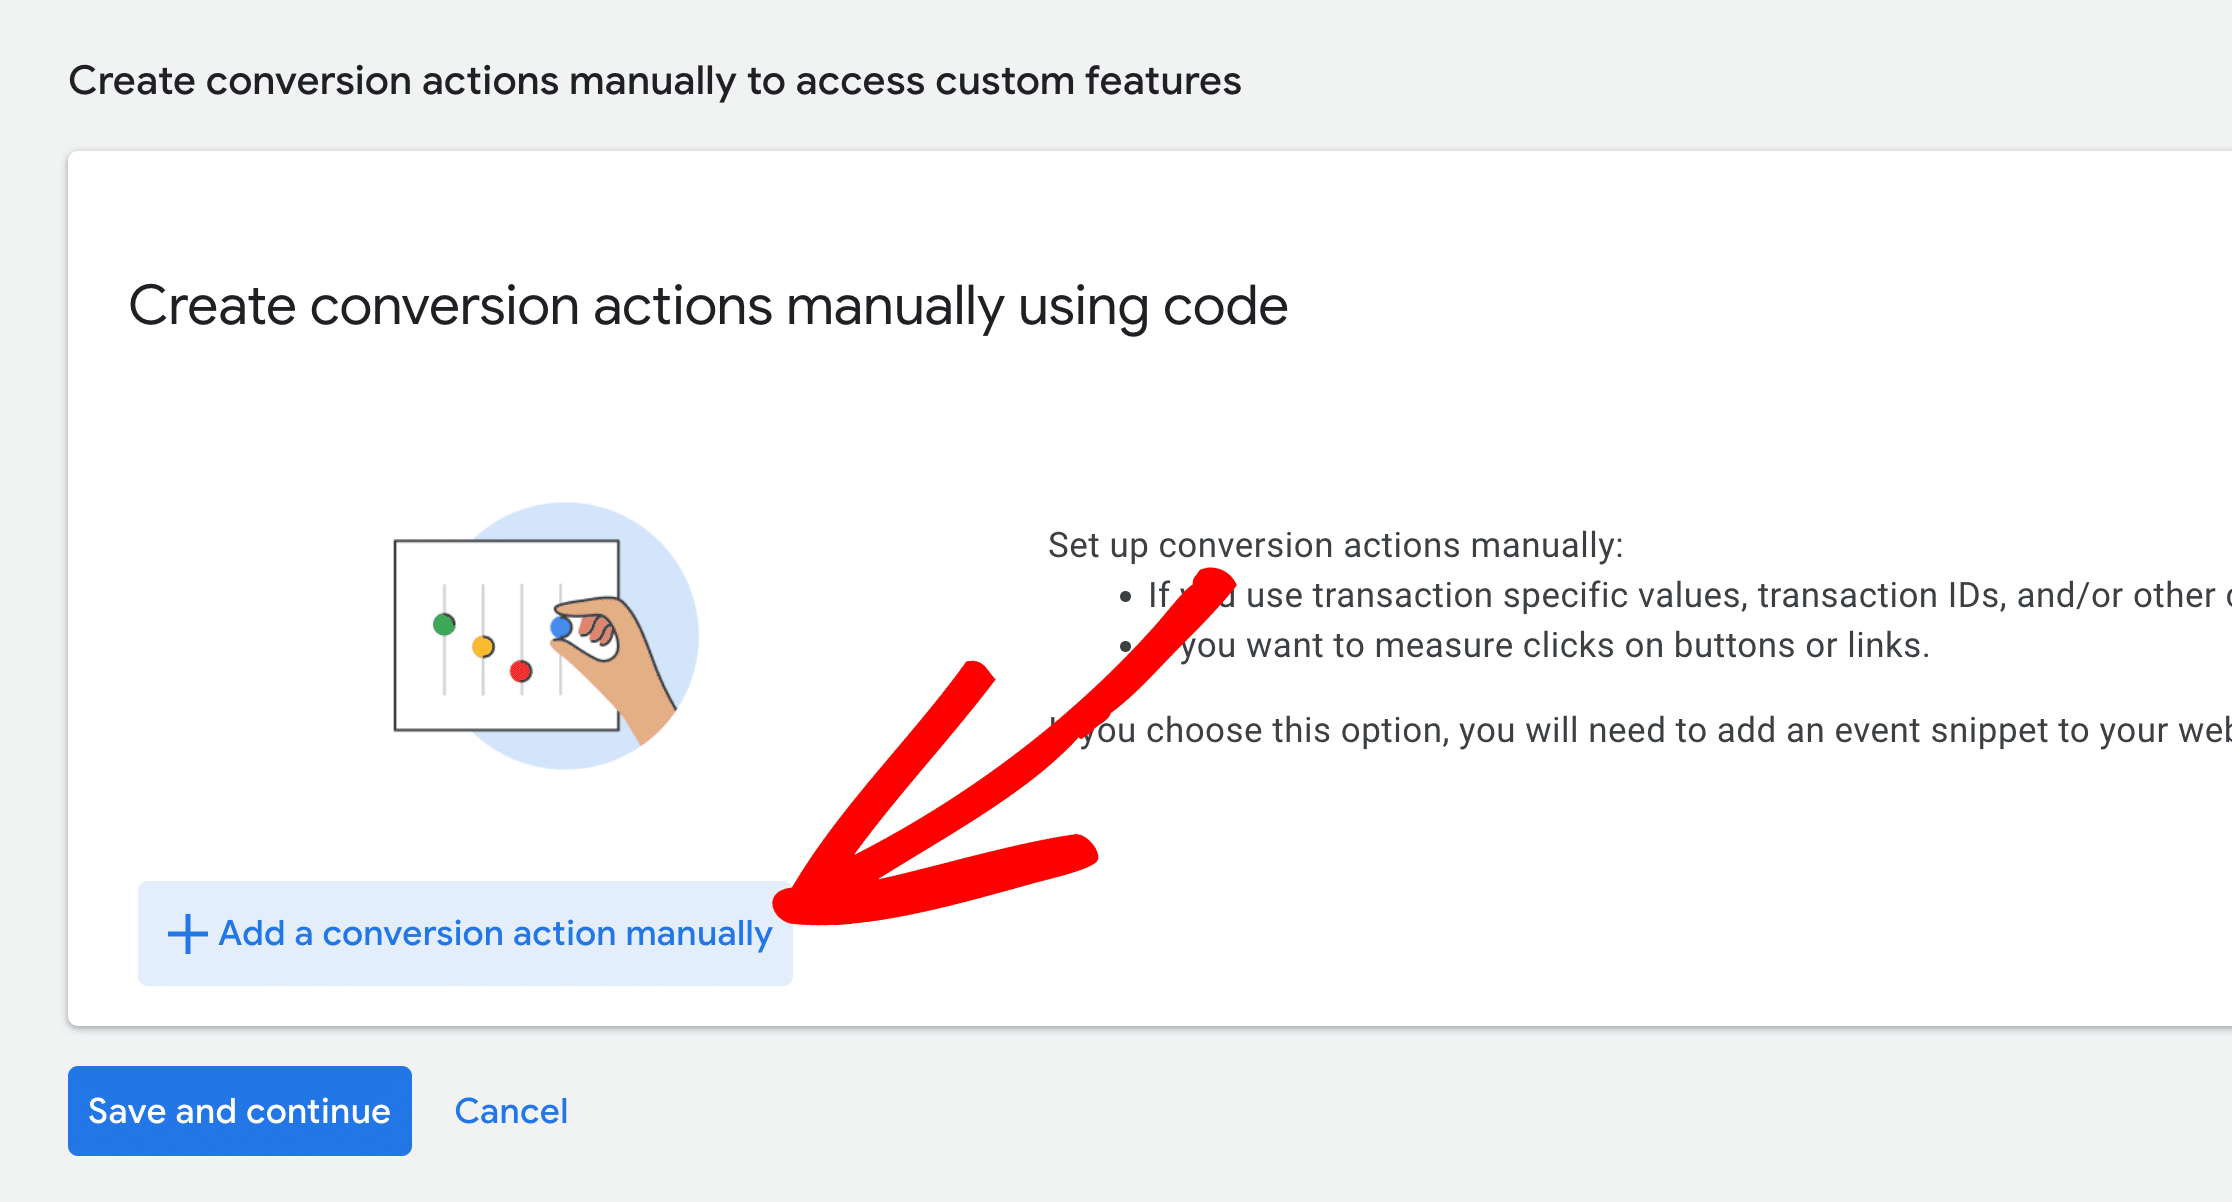
Step 5. You’re ready to create your conversion action. Get started by clicking on Add a conversion action manually.
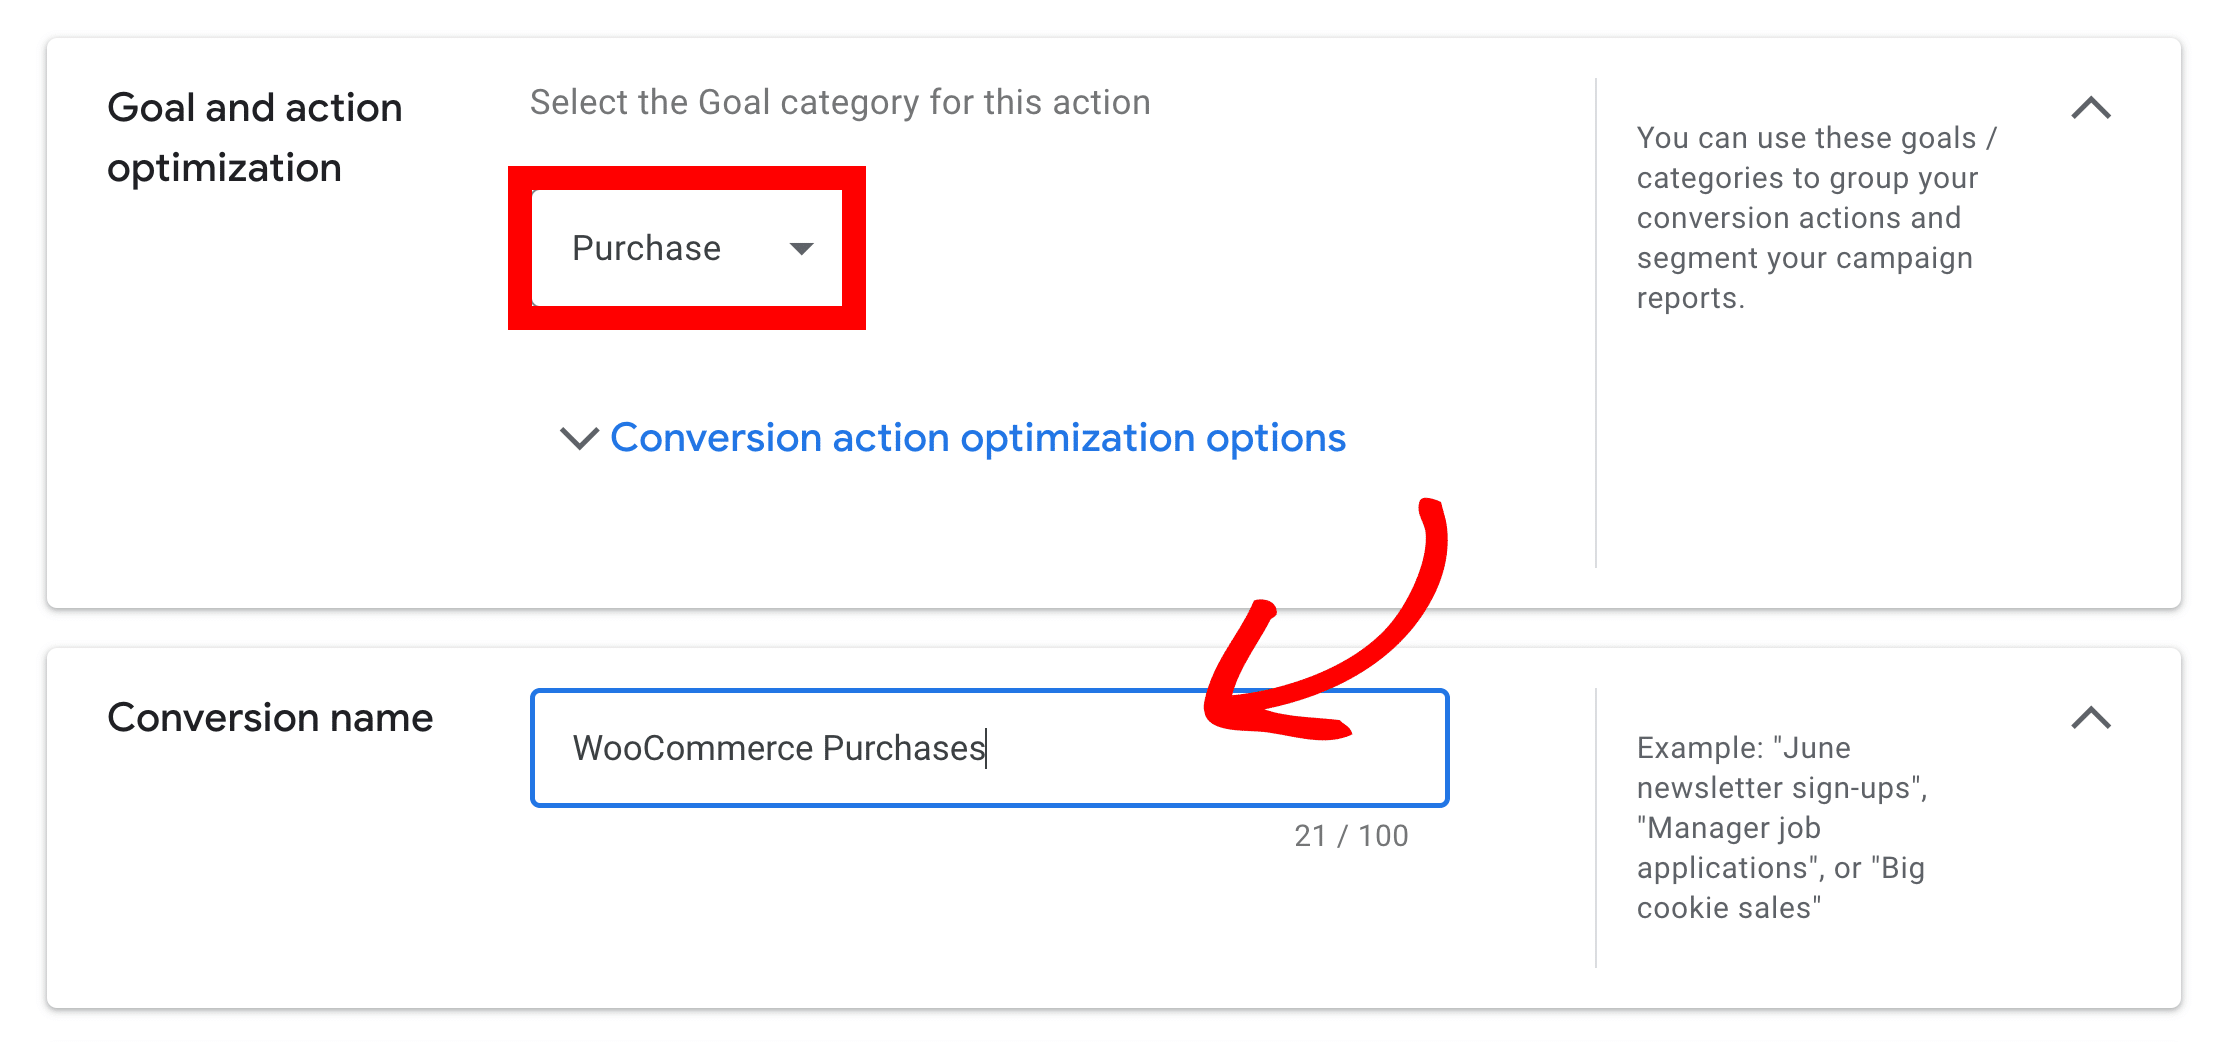
Step 6. Select Purchase item from the category drop-down and name your conversion.
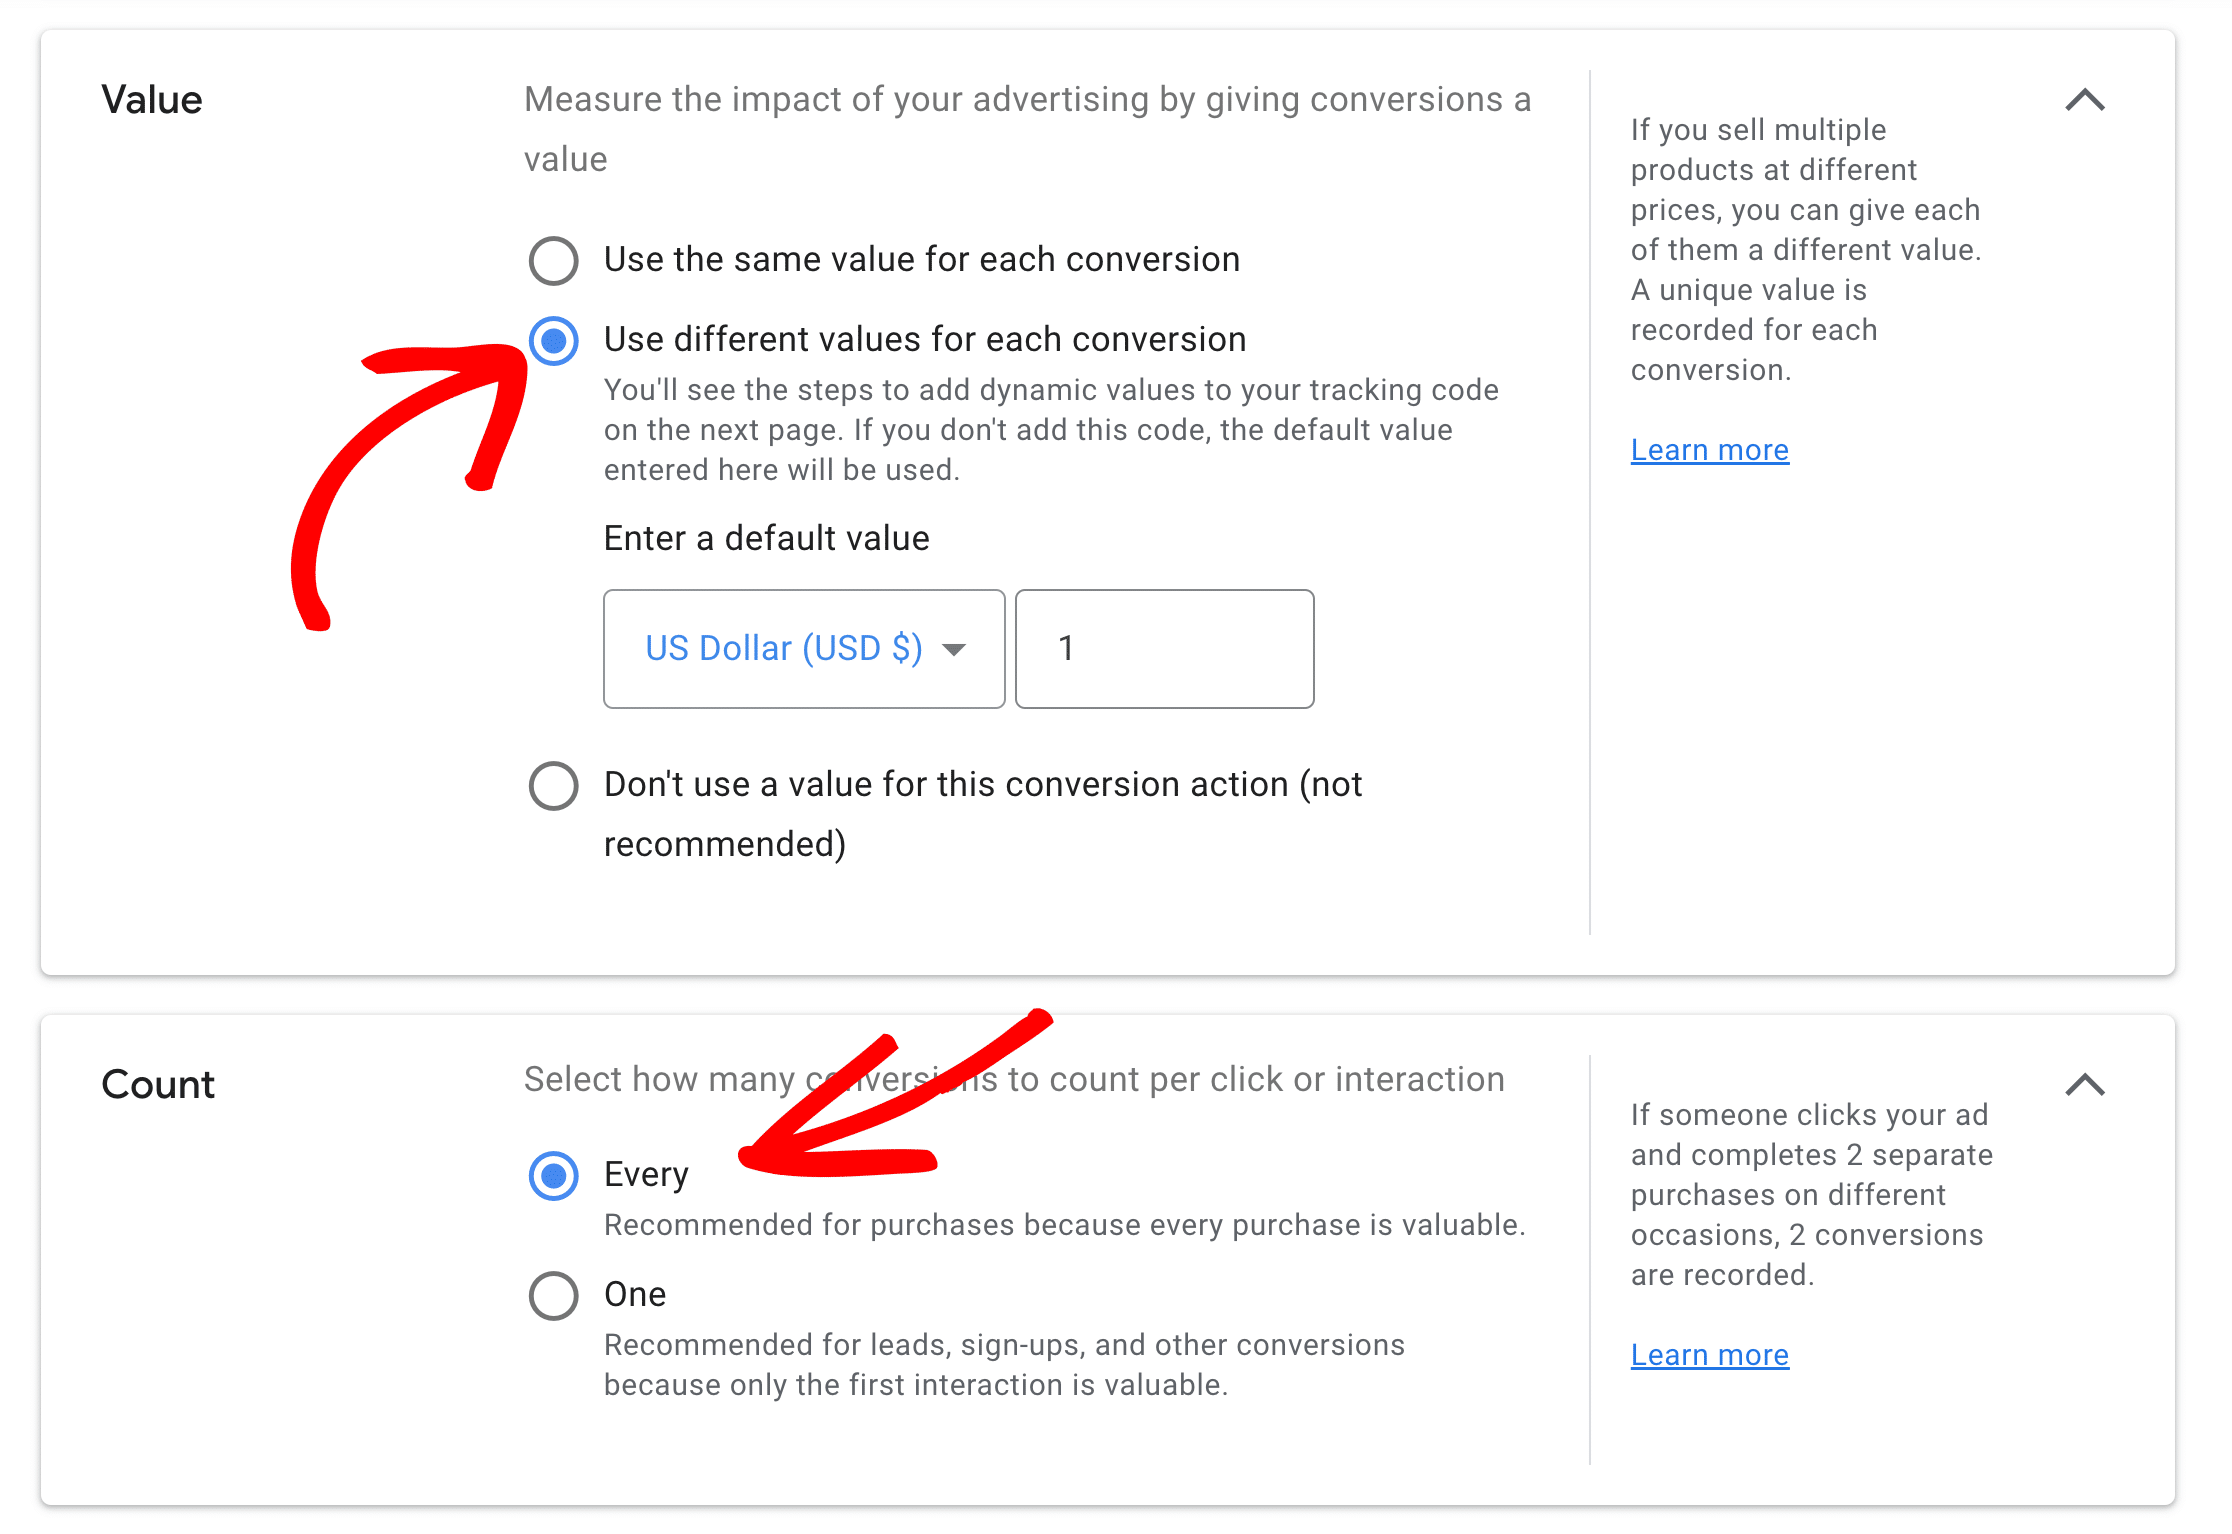
Step 7. Select the Use different values for each conversion item from the options being displayed. Set the Count option to Every.
Step 8: Click Done to finish creating your conversion action.
Step 9. Next click the blue Save and Continue button.
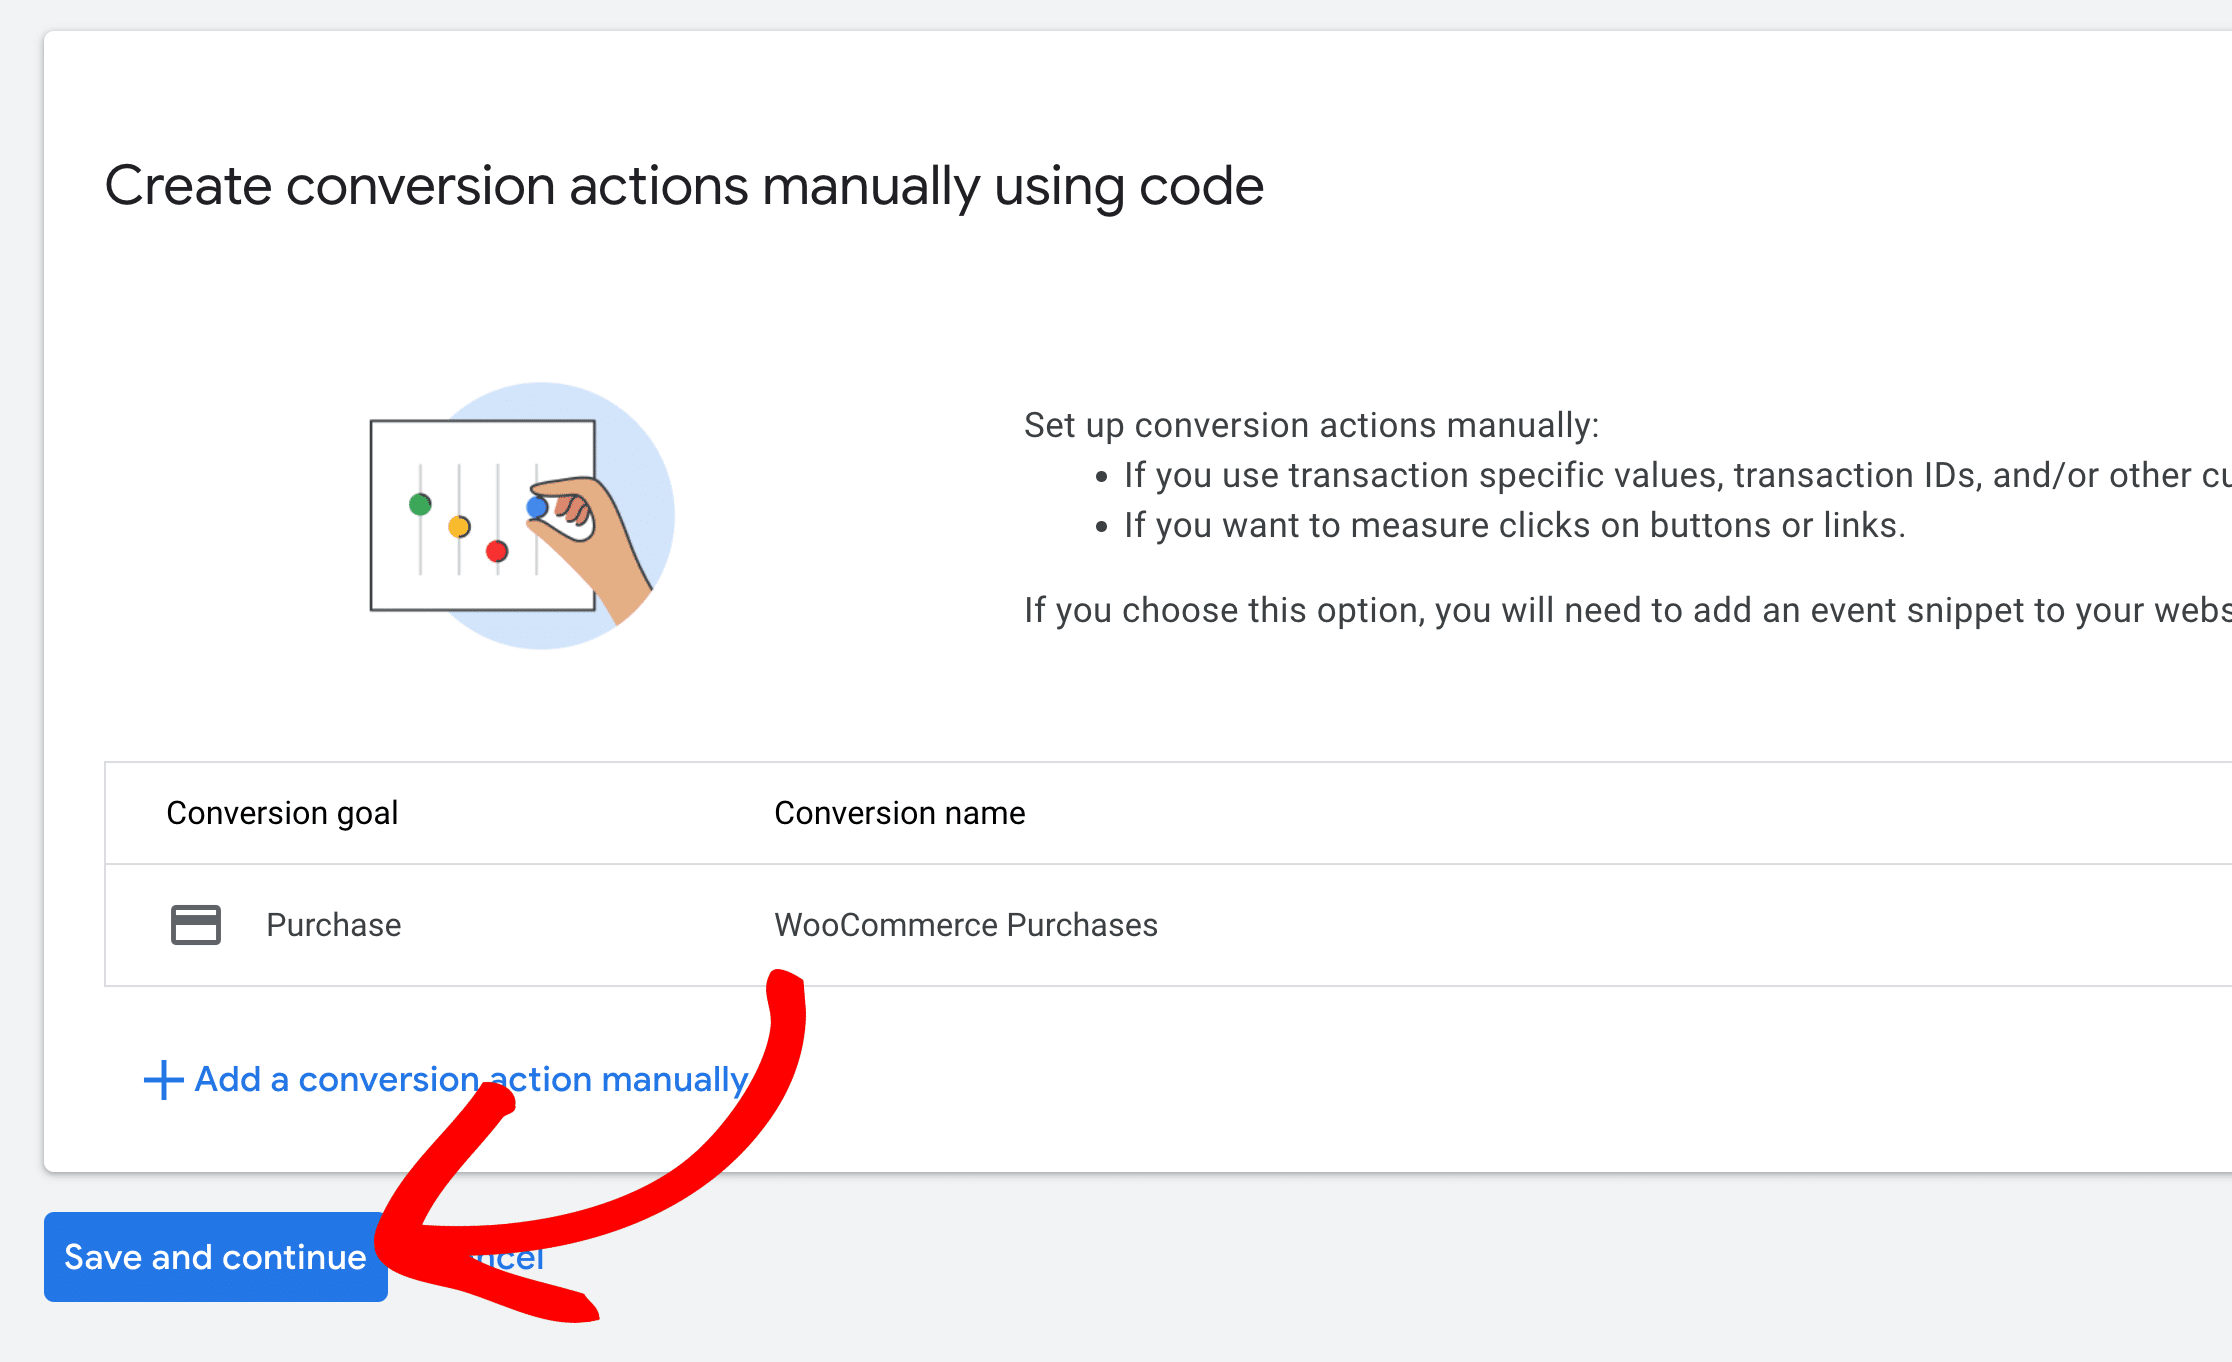
Step 10. On the next page, click on Use Google Tag Manager.
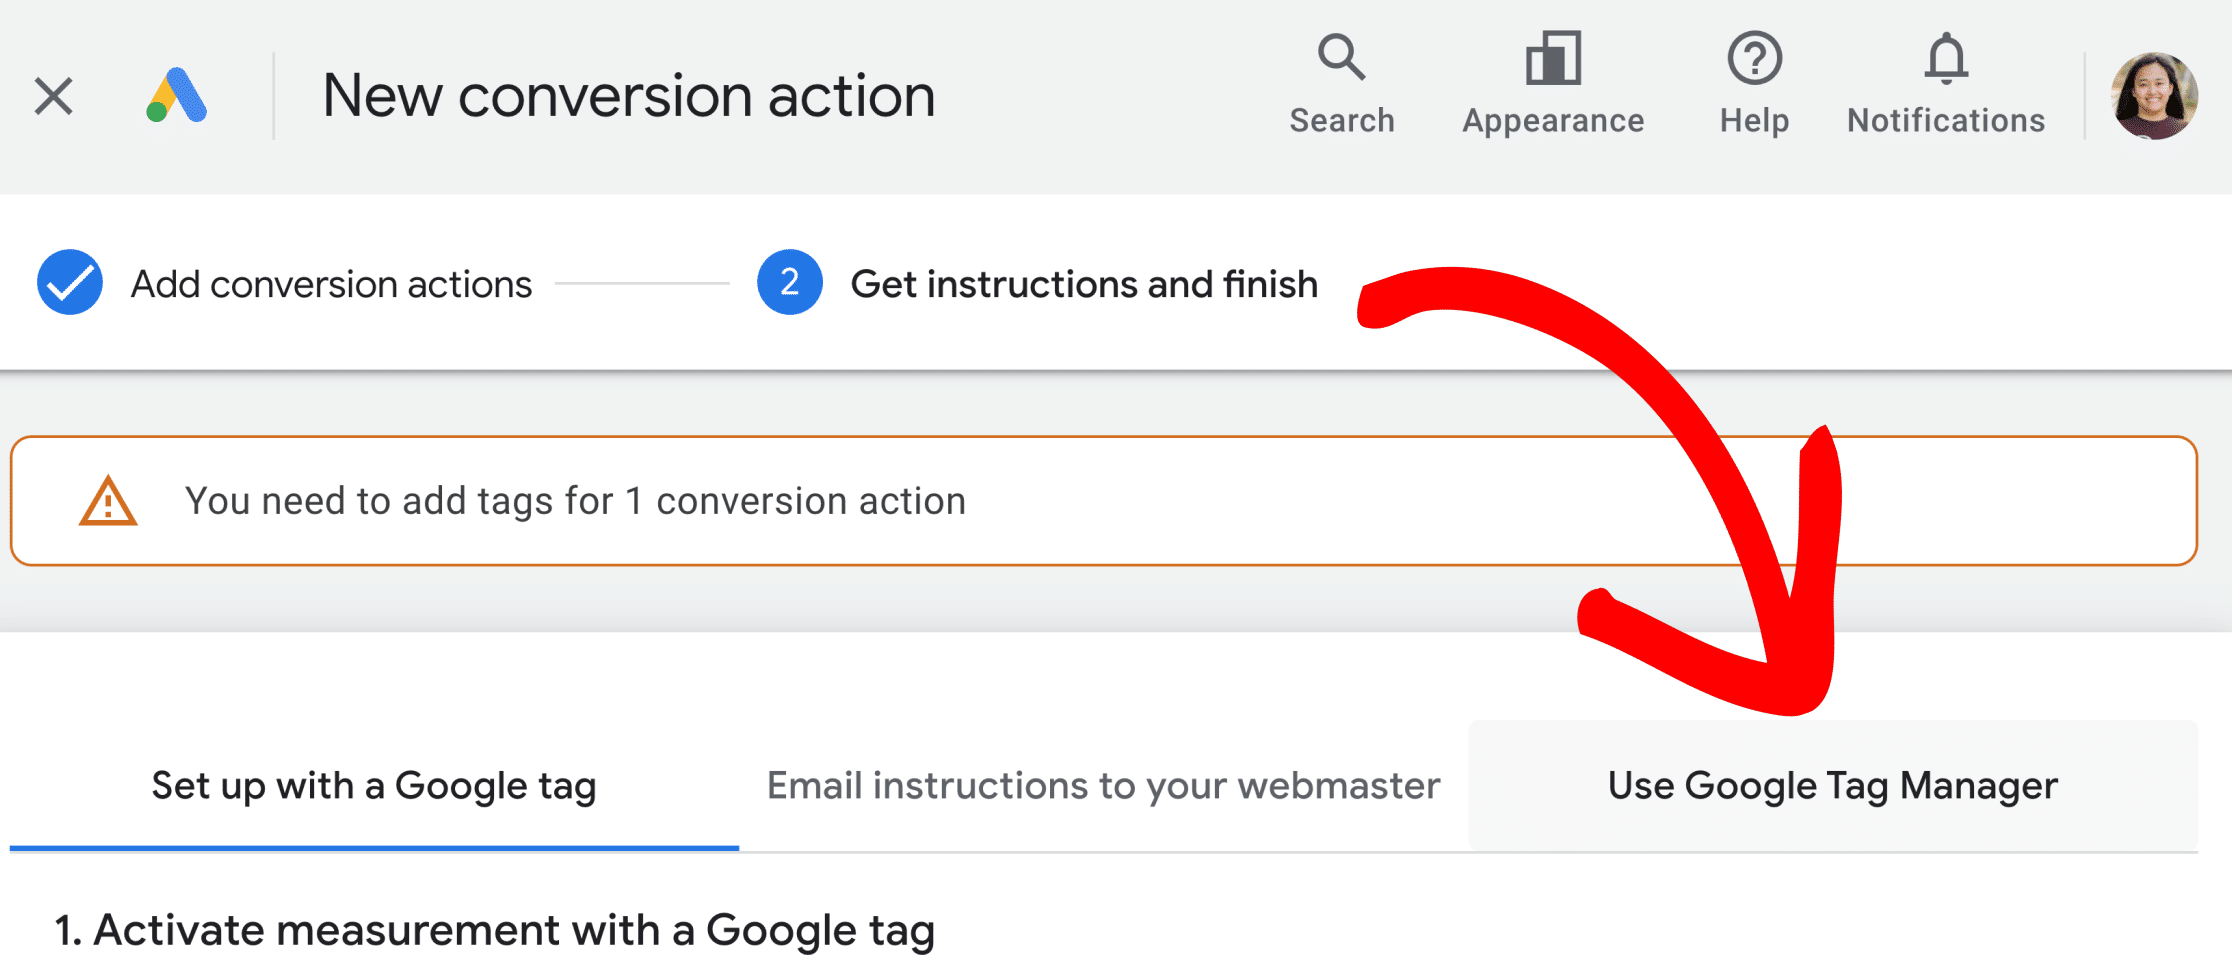
Step 12: On this screen, you’ll see the Conversion ID and Conversion Label that you can use.
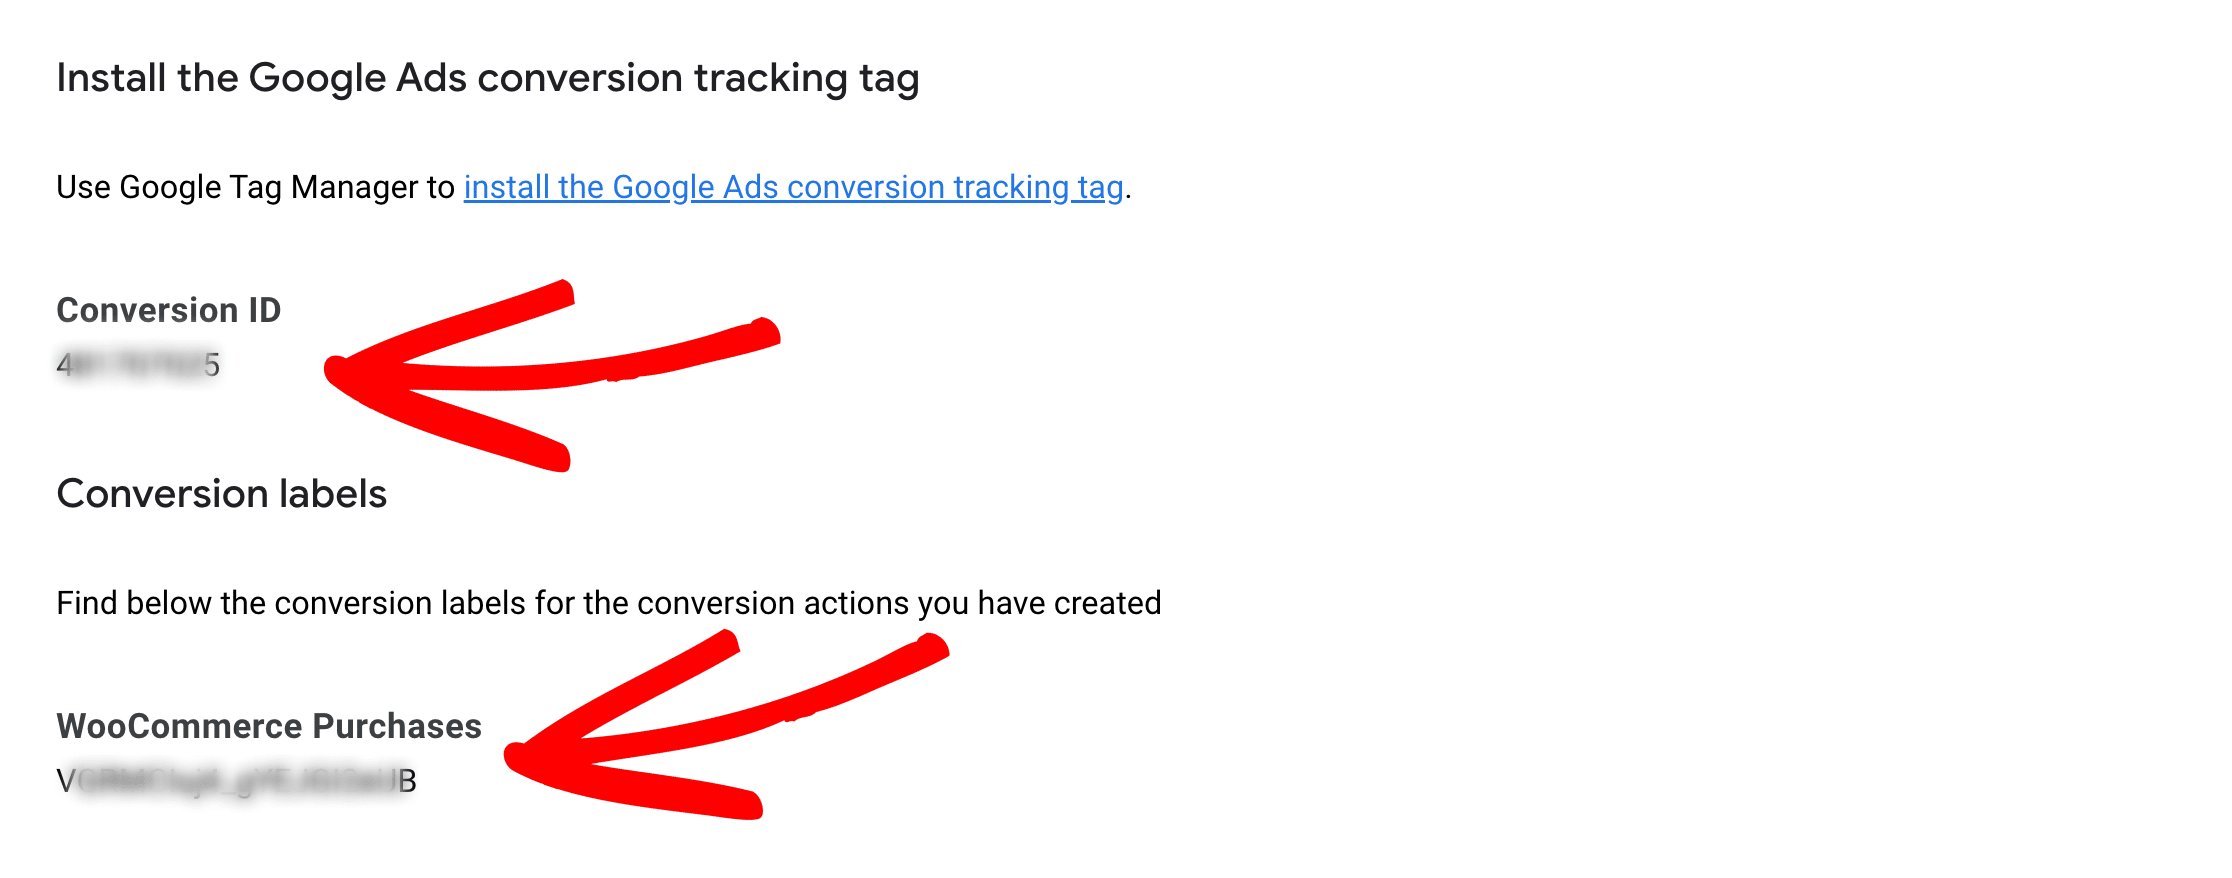
Please keep in mind that ExactMetrics supports a Conversion ID format of AW-123456789.
If your Conversion ID format shown is just 123456789, then simply preface this with AW- for the next step.
Step 13: Now insert your Conversion ID and Conversion Label into your WordPress site by going to ExactMetrics » Settings » Conversions » Ads Tracking.
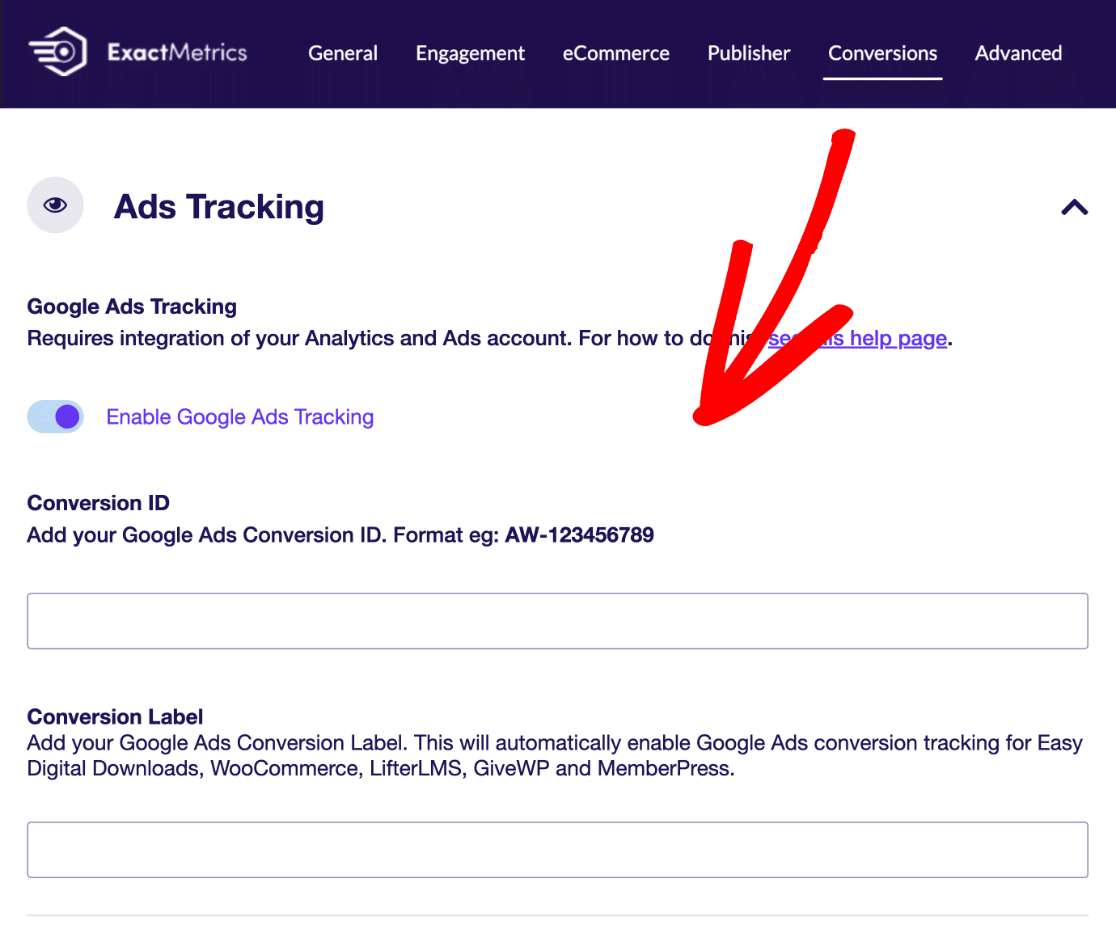
Note: You can also track conversions for Bing and Meta Ads by using the PPC Tracking Addon instead of the Ads Addon.
Step 14. Click Save.
That’s awesome! You’ve just set up Google Ads conversion tracking for WooCommerce.
Now, not only do you have the best Google Analytics tracking for your WordPress website setup, but you’ve easily set up Google ads.
Next, please navigate back to our guide: Getting Started with ExactMetrics: Guide and Checklist for Advanced Metrics and continue setting up anything that might be relevant to your site, if you haven’t yet.

