Interested in tracking how often your WordPress menu links are clicked on?
We’ll show you how to use ExactMetrics’ custom link attribution to add Google Analytics event tracking to your WordPress navigation menus.
If you’re wanting to do this for regular links, check out this guide: How to Add Custom Link Attribution: Setup Custom Link Categories, Labels, and Actions.
- You’ve installed and activated ExactMetrics.
- You’ve already connected with Google Analytics.
- You’re using ExactMetrics 6.0.0 or higher.
The Benefits of Custom Event Tracking
Track the most important links on your site:
- See if visitors are clicking your Call-to-Action (CTA) buttons or links.
- See if visitors can easily find and click into your internal high-value pages.
You can also adjust ExactMetrics default tracking behavior for telephone links, email link clicks, or downloads.
- Event Category
- Event Action
- Event Label
About Custom Link Attribution with ExactMetrics
The following is an example of custom link attribution:
<a href="https://www.exactmetrics.com" data-vars-ga-category="Custom Category" data-vars-ga-action="Custom Action" data-vars-ga-label="Custom Label">Example</a>
How to Add Custom Event Tracking to Navigation Menu Links in WordPress
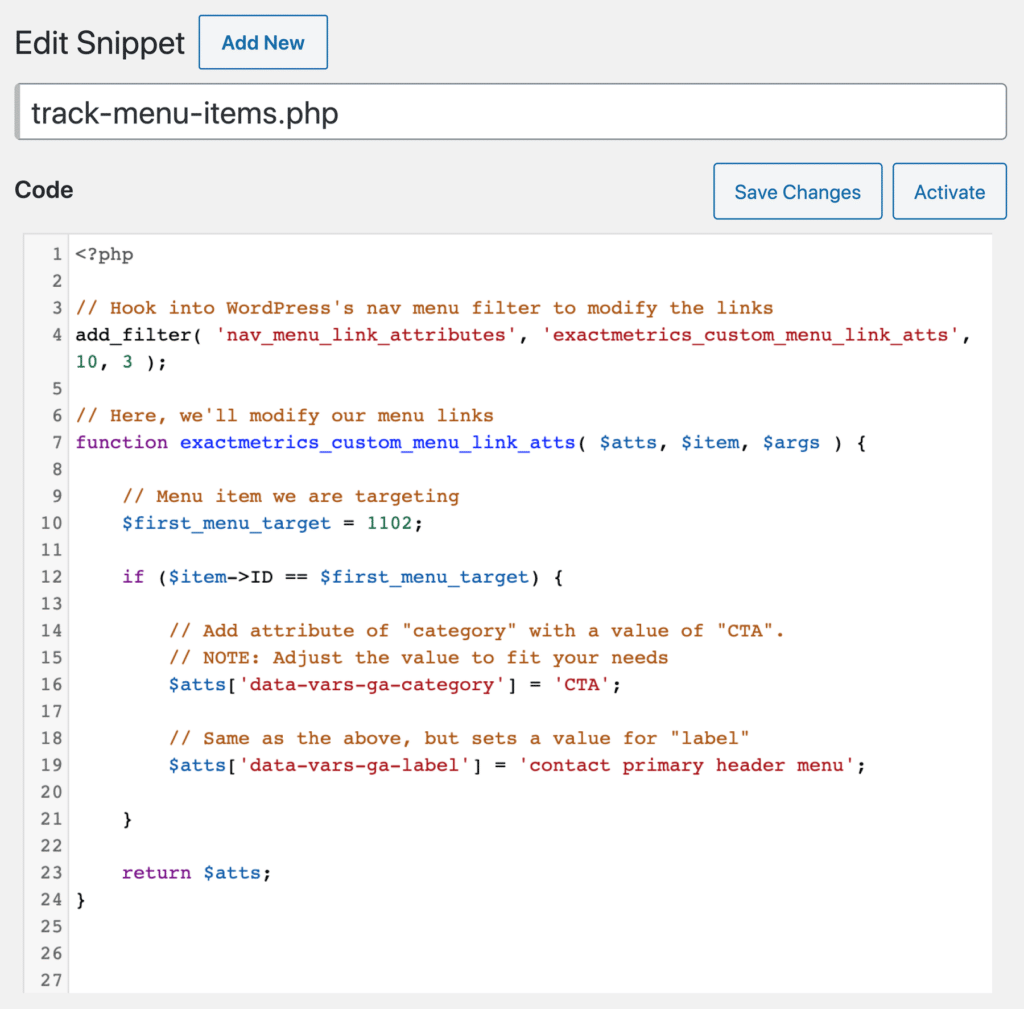
This example snippet of code will allow you add custom attribution to your navigation menu links. You can copy and paste into your theme’s functions.php or as a custom functionality plugin.
// Hook into WordPress's nav menu filter to modify the links
add_filter( 'nav_menu_link_attributes', 'exactmetrics_custom_menu_link_atts', 10, 3 );

// Here, we'll modify our menu links
function exactmetrics_custom_menu_link_atts( $atts, $item, $args ) {

    // Menu item we are targeting
    $first_menu_target = 1075;

    if ($item->ID == $first_menu_target) {

        // Add attribute of "category" with a value of "CTA".
        // NOTE: Adjust the value to fit your needs
        $atts['data-vars-ga-category'] = 'CTA';

        // Same as the above, but sets a value for "label"
        $atts['data-vars-ga-label'] = 'contact primary header menu';

    }

    return $atts;
}
What this snippet does:
- Targets a specific menu item: 1075 (this will vary for your own menu item).
- Adds custom attribution of “data-vars-ga-category” and “data-vars-ga-label” to that menu item.
- Also sets a value for “data-vars-ga-category” and “data-vars-ga-label”.
If you want to adjust more than one menu item, the following snippet is an example of how you would target multiple menu items:
// Hook into WordPress's nav menu filter to modify the links
add_filter( 'nav_menu_link_attributes', 'exactmetrics_custom_menu_link_atts', 10, 3 );

// Here, we'll modify our menu links
function exactmetrics_custom_menu_link_atts( $atts, $item, $args ) {

    // Menu items we want to target.
    $first_menu_target = 1075;
    $second_menu_target = 2725;
    $third_menu_target = 1109;

    if ($item->ID == $first_menu_target) {

        // Add attribute of "category" with a value of "CTA".
        // NOTE: Adjust the value to fit your needs
        $atts['data-vars-ga-category'] = 'CTA';

        // Same as the above, but sets a value for "label"
        $atts['data-vars-ga-label'] = 'contact primary header menu';

    } else if ($item->ID == $second_menu_target) {

        $atts['data-vars-ga-category'] = 'CTA';
        $atts['data-vars-ga-label'] = 'contact secondary header menu';

    } else if ($item->ID == $third_menu_target) {

        $atts['data-vars-ga-category'] = 'CTA';
        $atts['data-vars-ga-label'] = 'article submissions primary header menu';
    }

    return $atts;
}
In this example, we target three menu items using their unique ID (replace these with your own). When found, these menu links get:
- An attribute of category, with CTA as the value.
- Another attribute of label, with a description of the link.
As iterated, you’ll have to customize the values set within the code to fit your own needs.
How to implement your custom snippet into your WordPress site:
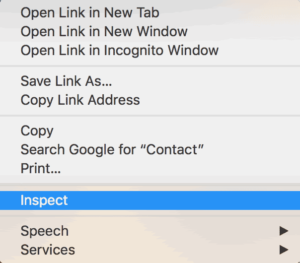
Step 1: Find the ID of the navigation menu items you want to track. To do this, while viewing your WordPress site, right-click on the link you’d like to track:

Step 2: View the source code of your website by clicking on “inspect element” or “inspect”.

Step 3: Find the unique ID number that WordPress assigns to your menu link element:

In our example, the unique ID number we’ll be targetting is 1102.
Step 4: Grab the example code snippet detailed earlier and update it with your own unique ID number found within your website. Adjust the category values as needed.
Step 5: Add a description of the custom event through the attribute “data-vars-ga-label” (custom event label). For example, if the link you’re tracking is for a contact page, you might use “contact primary header menu” as the value.
Step 6: You can also add a “data-vars-ga-action” attribute (in the same format as category and label attributes), or you can omit it. The custom event action will default to the full URL of the link.
Step 7: You’re ready to insert your modified code snippet with your values and unique ID numbers. Within the functions.php file of your theme or through a functionality plugin, paste in your customized snippet.

Track as many menu items as you need, but it’s best to only track important events to avoid having too much irrelevant data.
Examples of Other Events to Track:
ExactMetrics automatically tracks:
- Telephone links
- Email links
- Download links
- Outbound links
You did it! Now you know how to add custom attributes to track custom events in your WordPress navigation menu.
What’s next? Read more in-depth about custom link attribution with ExactMetrics: How to Add Custom Link Attribution: Setup Custom Link Categories, Labels, and Actions.

