Trying to find an easy way to add Google Analytics to WordPress multisite? A WordPress multisite network offers a simple way to create and manage an entire network of sites from a single WordPress dashboard.
But when it comes to connecting to Google Analytics, it can be tricky for beginners. Besides that, adding the tracking code to each website can be a time-consuming task.
This is where ExactMetrics comes in handy. It sets up Google Analytics on all your websites in your multisite network automatically to help save a lot of time. Plus, there are a whole handful of extra features you’ll get to use on every website.
In this article, we’ll teach you how to add Google Analytics to WordPress multisite in just a few easy steps.
Issues with Adding Google Analytics to WordPress Multisite
Google Analytics is a great tool for getting data about how your WordPress multisite network is performing. But one of the drawbacks is how tedious it is to connect Google Analytics to your network.
If you have just a few websites in the network, setting up Google Analytics on each site one-by-one may not be much of a setback. But for website owners that have hundreds of sites in their network, this can be incredibly time-consuming.
Aside from that, most analytics plugins don’t support multisite tracking, so you have to manually add Google Analytics to each site.
So, is there an easier way of adding Google Analytics to a WordPress multisite network?
The best and simplest way to link Google Analytics to a WordPress multisite network is with ExactMetrics. It’s the best premium WordPress Analytics plugin, and you can easily connect each site to your analytics all at once. Plus, you don’t have to deal with any code.
Let’s look at the steps for setting up Google Analytics on your multisite network.
How to Set Up Google Analytics on WordPress Multisite
The first thing you’ll need to do is download ExactMetrics.
ExactMetrics is the best premium WordPress analytics plugin. With ExactMetrics, there’s a whole list of things you can set up and monitor in Google Analytics and your WordPress dashboard, plus multisite support.
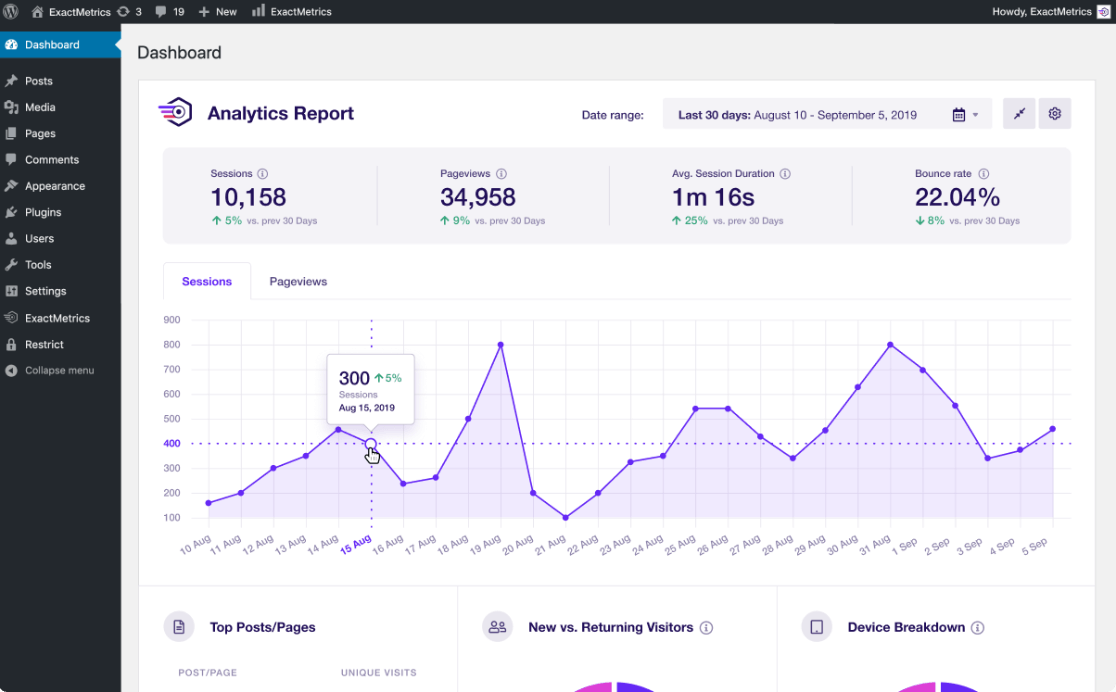
Our most popular features include:
- Easy enhanced ecommerce setup and tracking through WooCommerce
- Top outbound and top affiliate link clicks
- GDPR compliance
- Scroll tracking
- Form tracking
- Popular posts or products widget
With ExactMetrics, all your most important metrics are right there in your WordPress dashboard.
Step 1: Install and Activate ExactMetrics
You’ll need the ExactMetrics Agency plan for setting up Google Analytics on a WordPress multisite network.
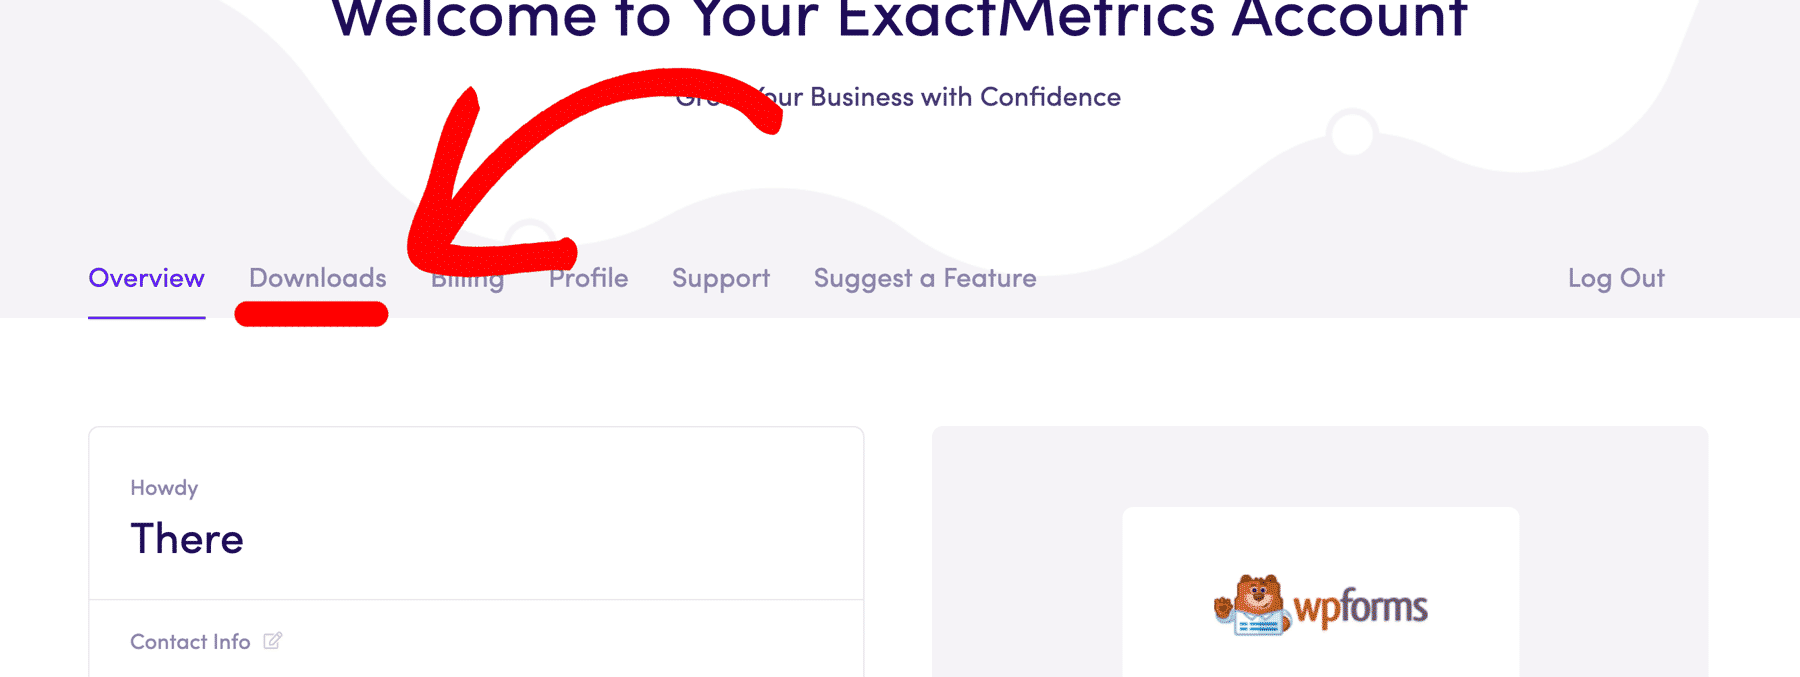
After purchasing the plugin, log into your ExactMetrics account, and select the Downloads tab.
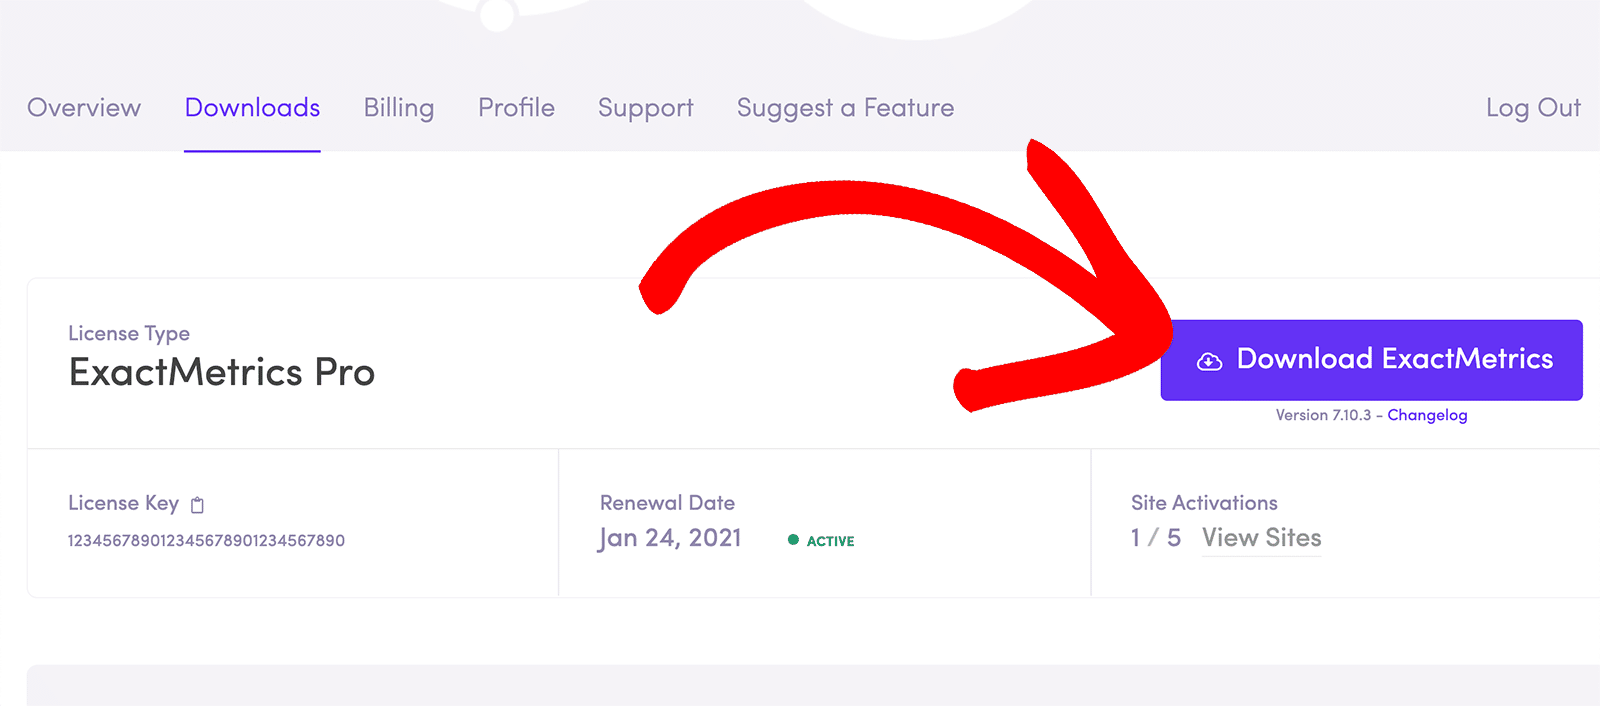
Click the Download ExactMetrics button.
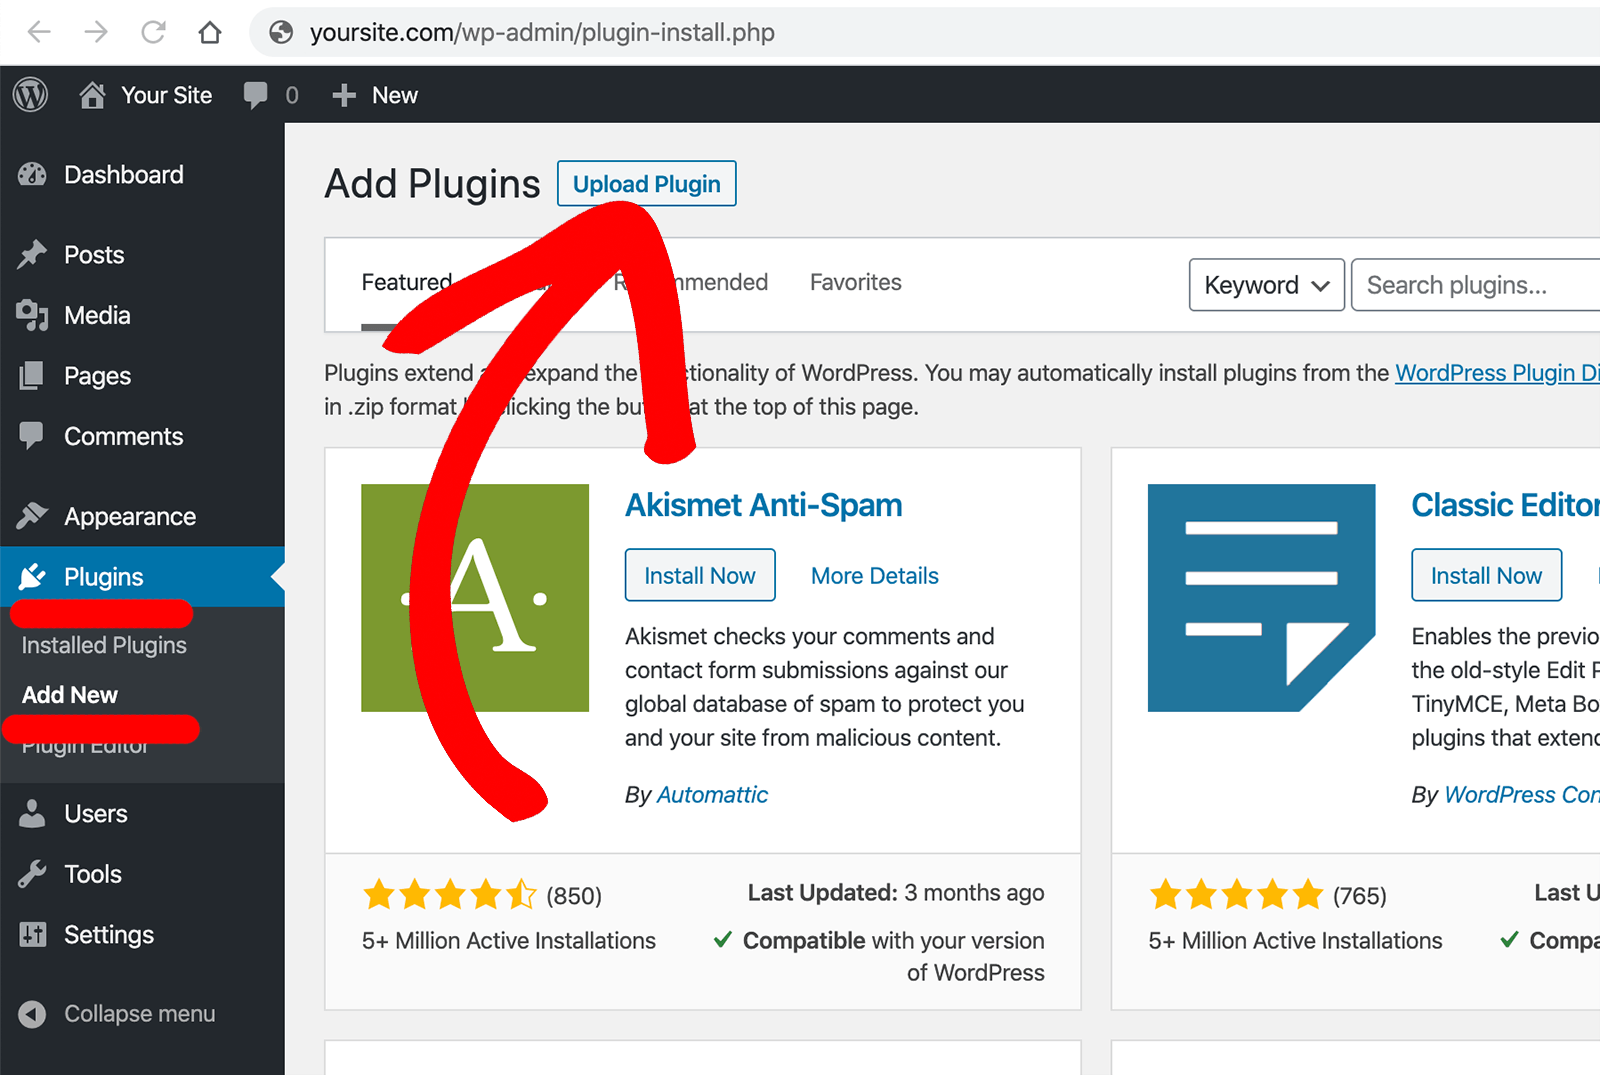
Next, log into your WordPress multisite network to install and activate the plugin.
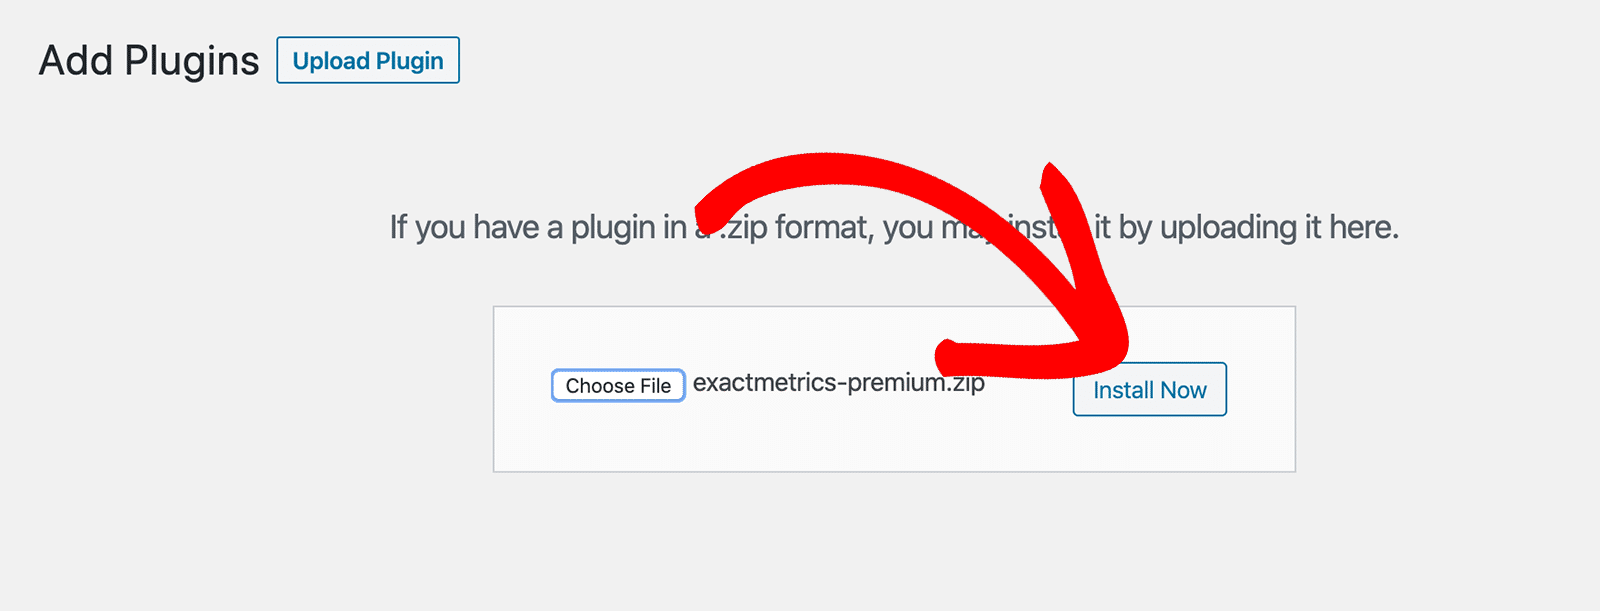
Select Plugins » Add New and click on Upload Plugin near the top of the screen.
On the next screen, select the zip file you just downloaded from your ExactMetrics account.
To install it on your WordPress multisite network, click Install Now to upload the file.
Once uploaded, click Network Activate to activate the plugin across your entire network.
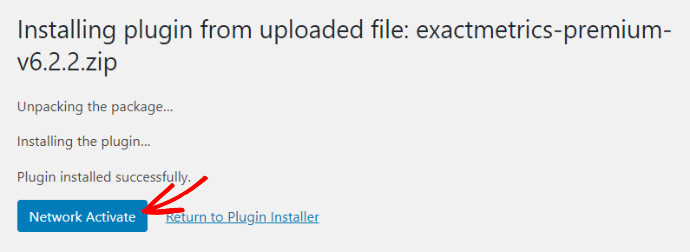
ExactMetrics is now active throughout your WordPress multisite network! We’ll set it up after we create your Google Analytics account next.
Step 2: Create a Google Analytics Account
Go to the Google Analytics website and click the Start for free button if you don’t already have an account. If you do have an account, skip to step 3.

On the next screen, you’ll have to log in using your Google account. If you don’t have one, click the Create account button to set up a new account.
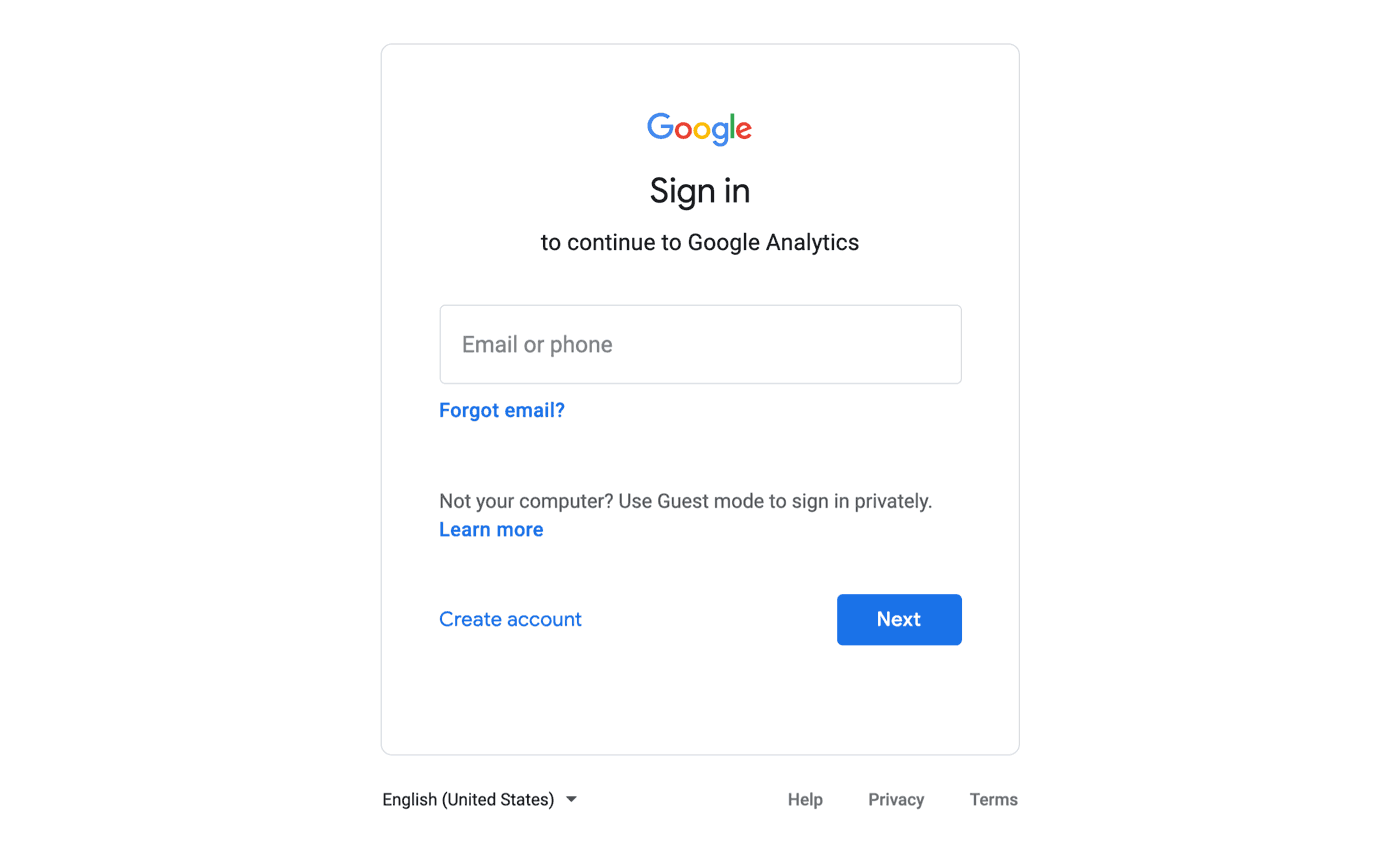
Once you log in, you will see Google Analytics welcome screen. Next, click the Start measuring button.

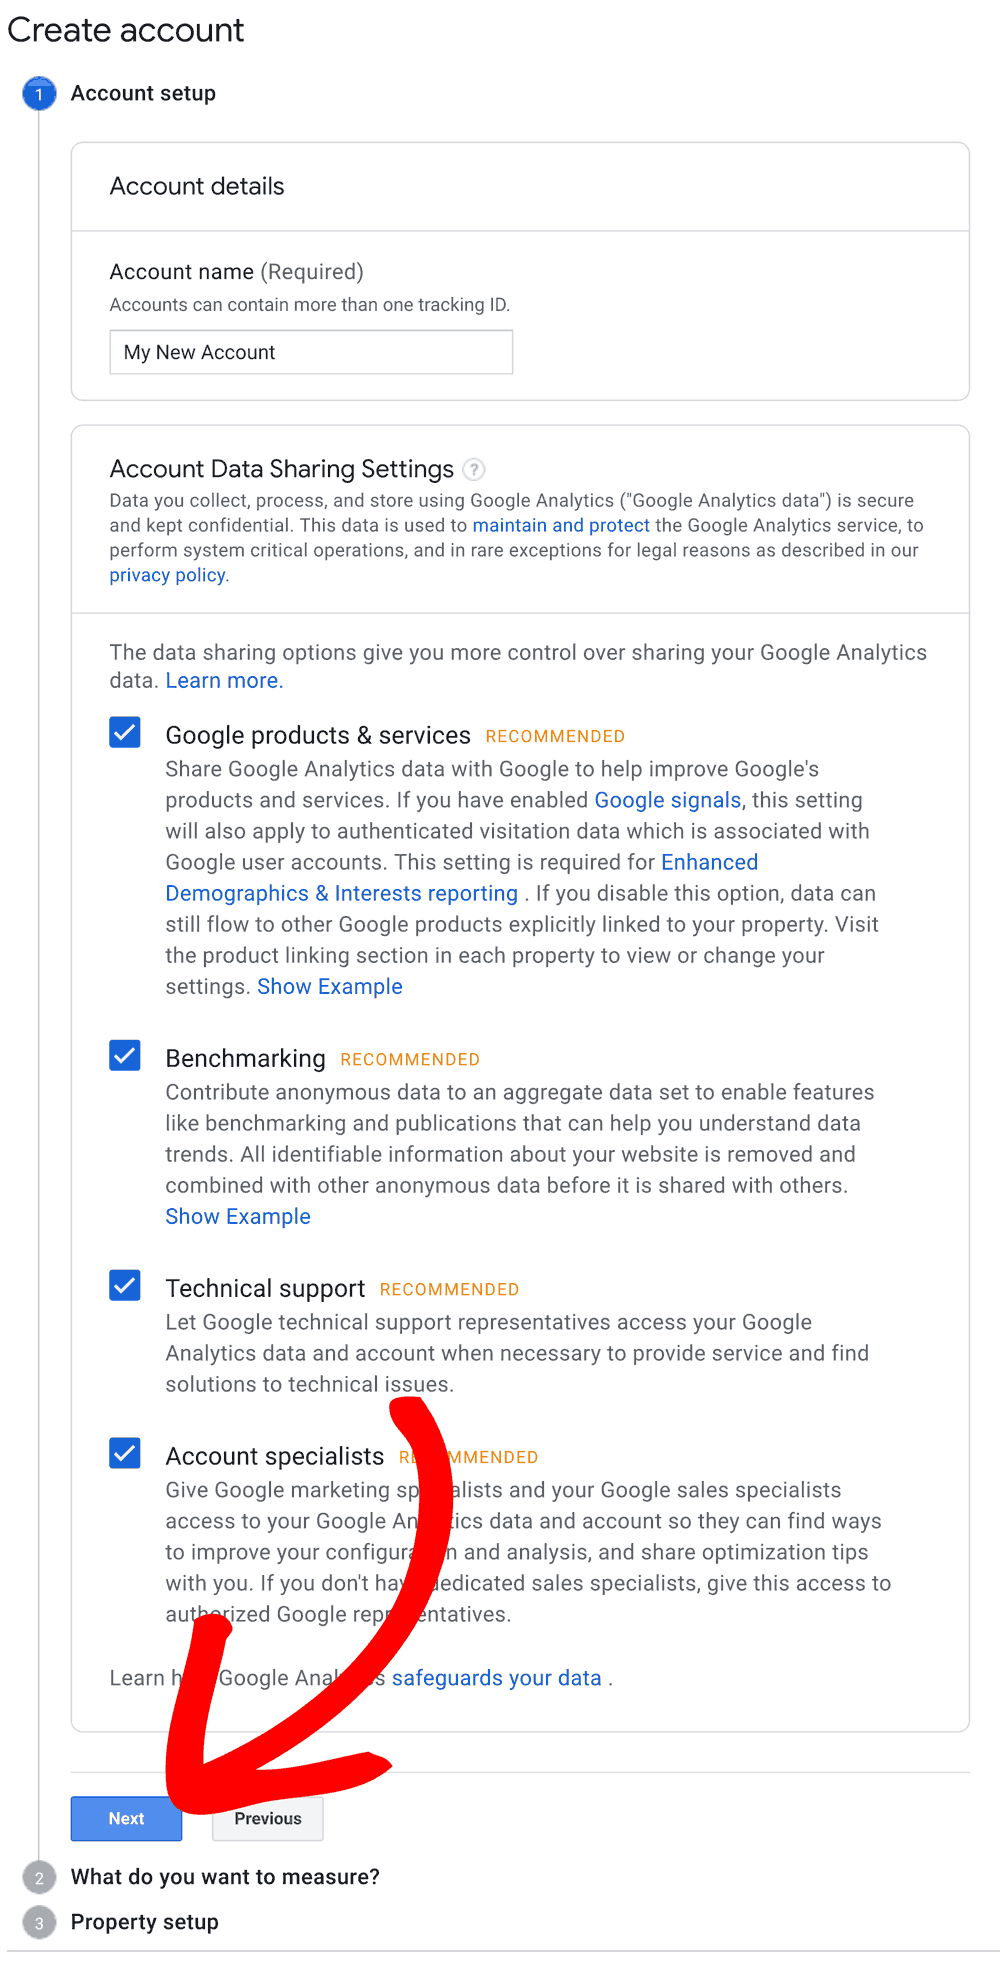
Now enter an Account name for your Google Analytics account. Make sure you’ve checked all the options listed under Account Data Sharing Settings. Then scroll down and click Next.
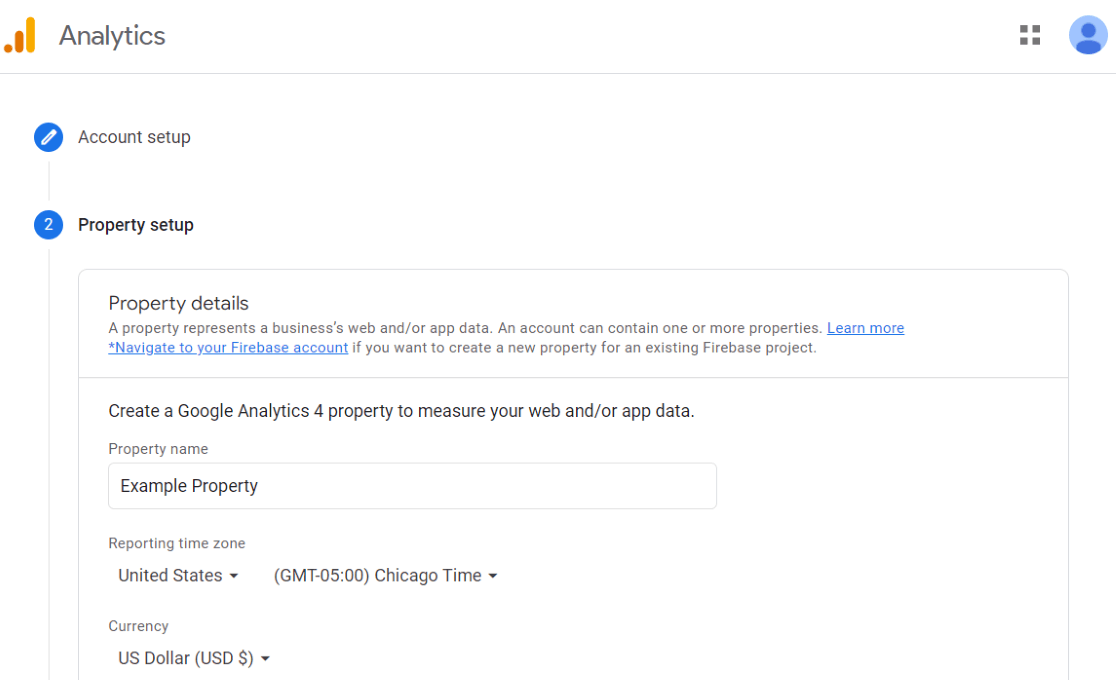
Google Analytics will now ask for your Property details. Enter a property name, which is your website. Then select a reporting time zone and currency and click Next.
The third step in creating a Google Analytics account is to provide some business information. Choose your category, business size, and what you’ll be using Analytics for.
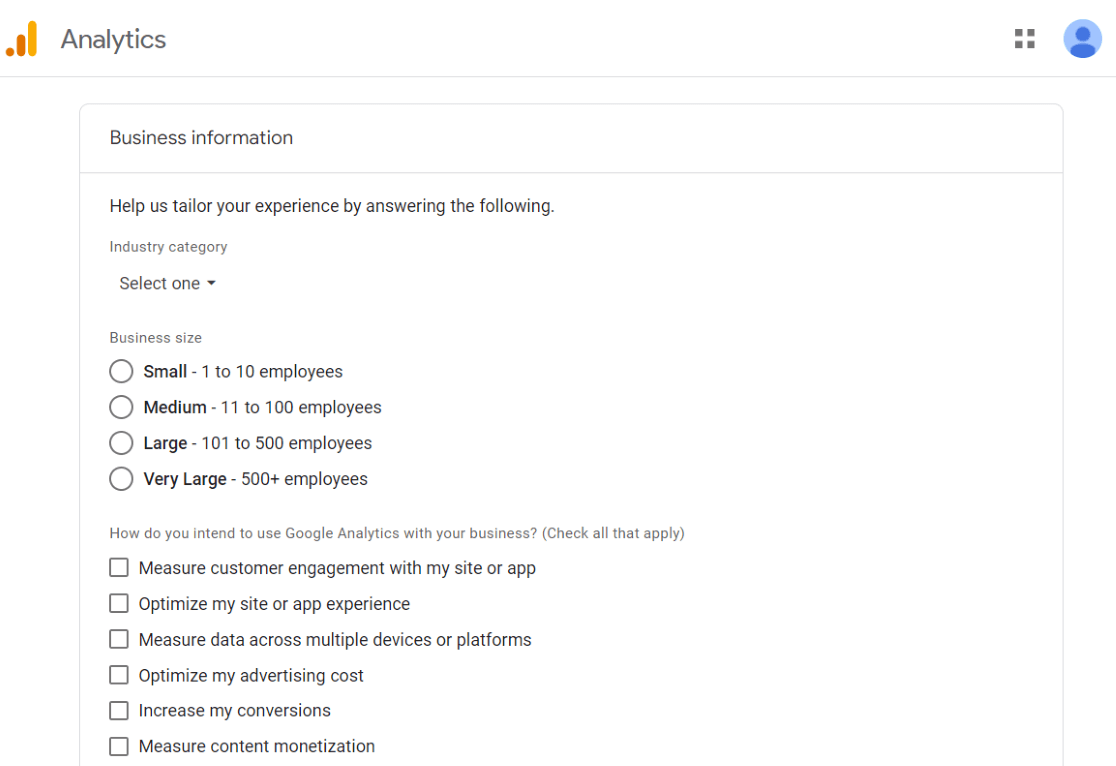
Once you’ve entered the information, click Create.
A popup window should now appear that contains Google Analytics Terms of Service Agreement.
Review the terms of service and then check the box below the terms about GDPR.
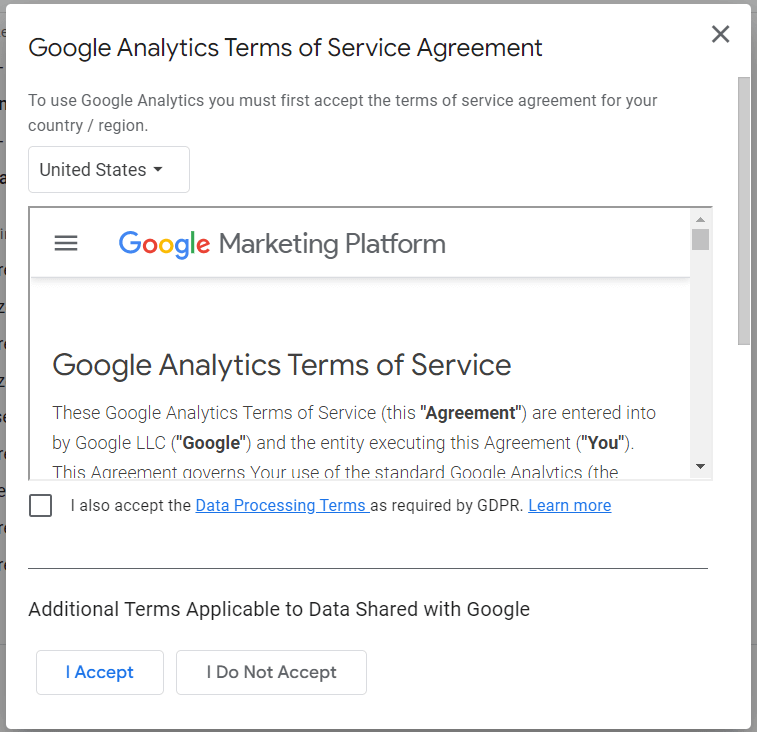
That’s it! Your Google Analytics account is created.
Note: You’ll be prompted to set up a data stream next. You do not need to do this, as ExactMetrics will create one for you.
Step 3: Add Google Analytics to WordPress Multisite
The next step is to verify your license key and add Google Analytics to WordPress multisite.
After you installed ExactMetrics on your network in step one, you were taken to a welcome screen. Click the Launch the wizard button to begin the setup process.
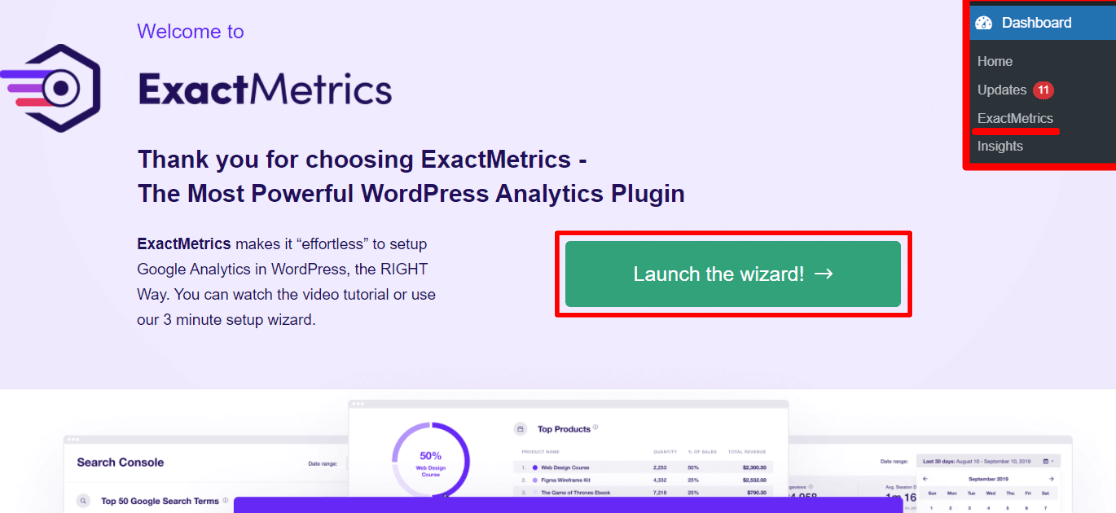
You can also launch the setup wizard by navigating to ExactMetrics » Settings and clicking the Launch Setup Wizard button.
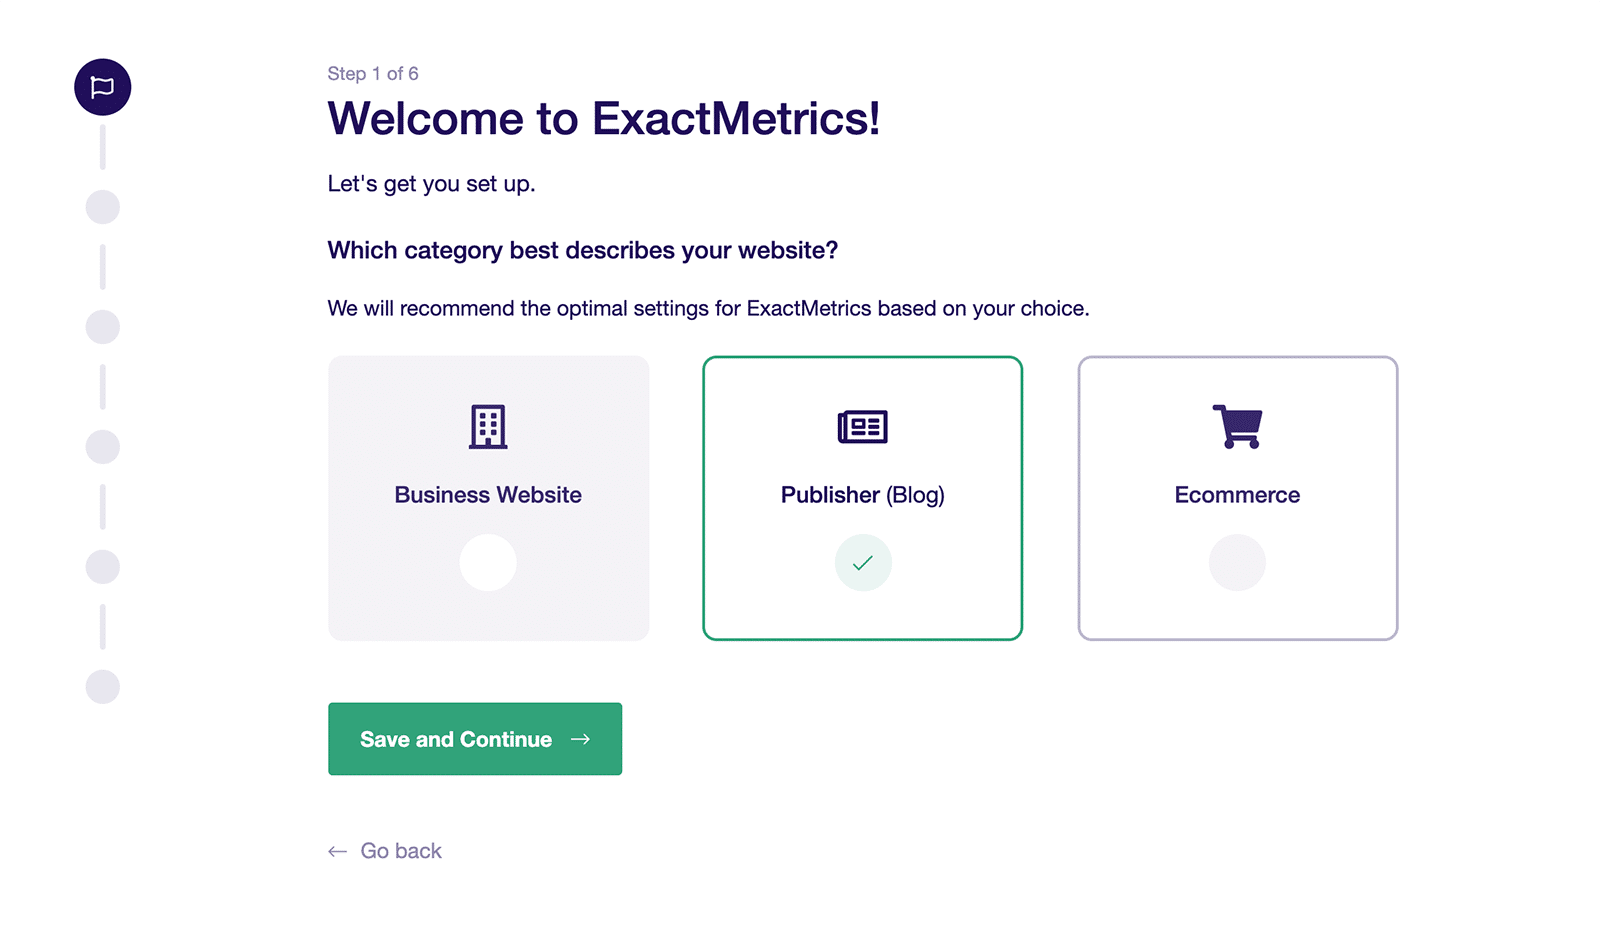
After launching the setup wizard, you’ll be prompted to select a category that describes your website. Select one and click Save and continue.
On the next screen, enter the ExactMetrics license key. You can find the key under the download tab in your account area.
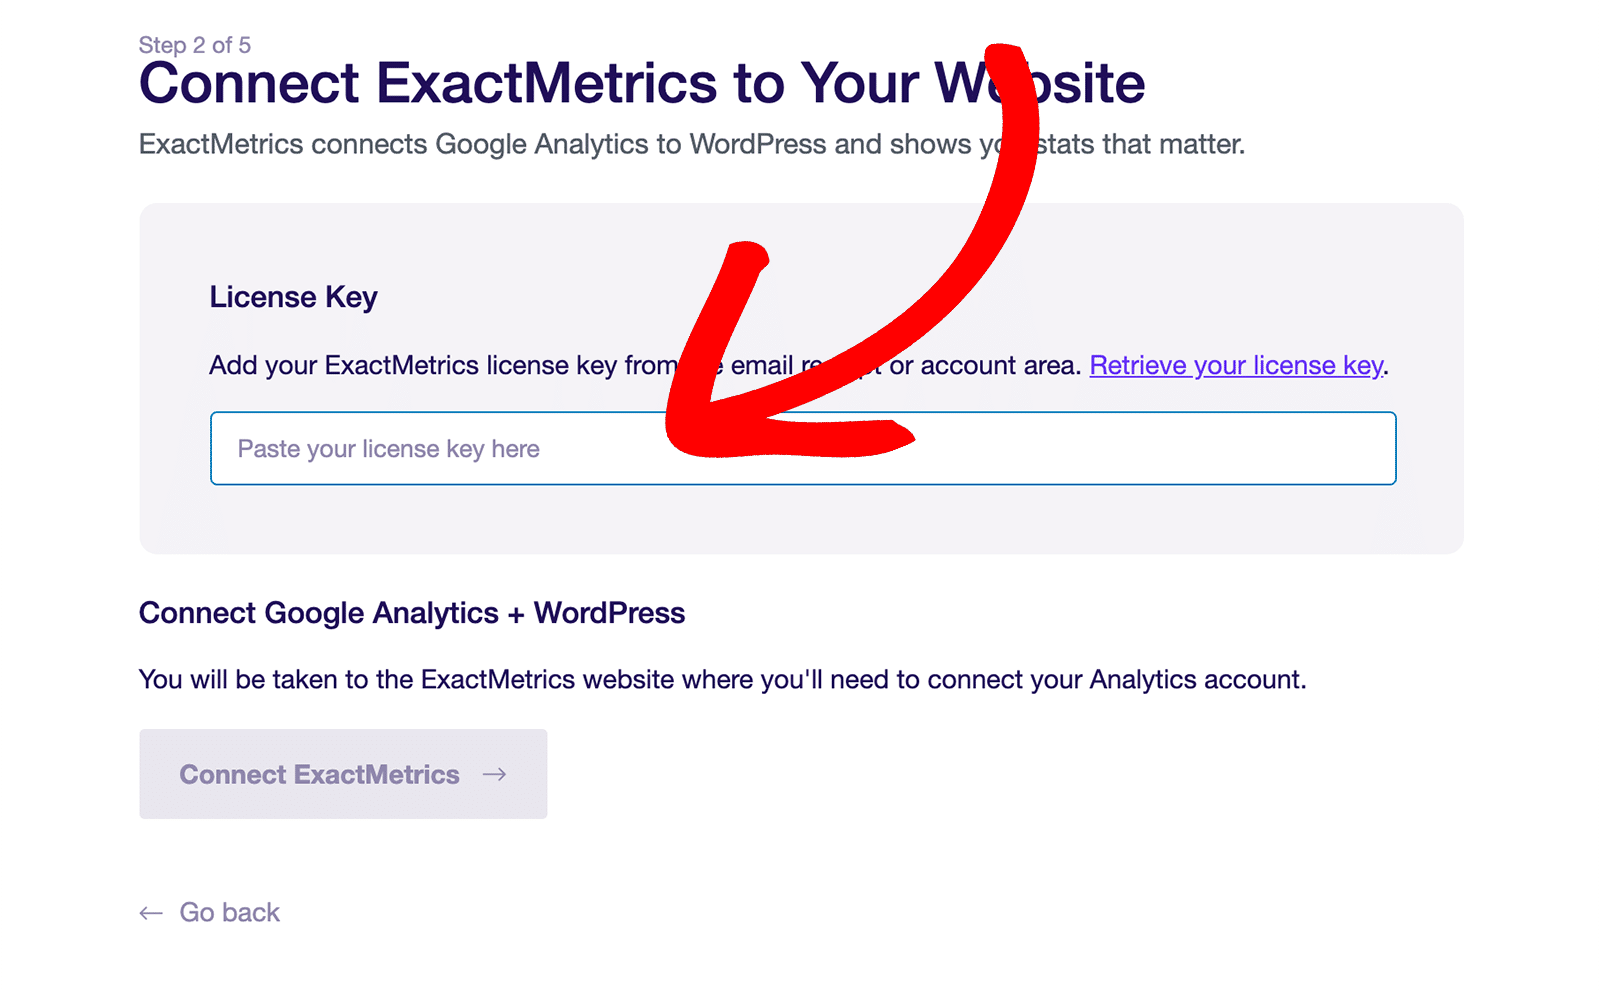
Once your license key is verified, the setup wizard will help you connect Google Analytics to ExactMetrics. Click the Connect ExactMetrics button to start.

Now select a Google account to connect it to ExactMetrics. Make sure it’s the same account you used in the previous step.
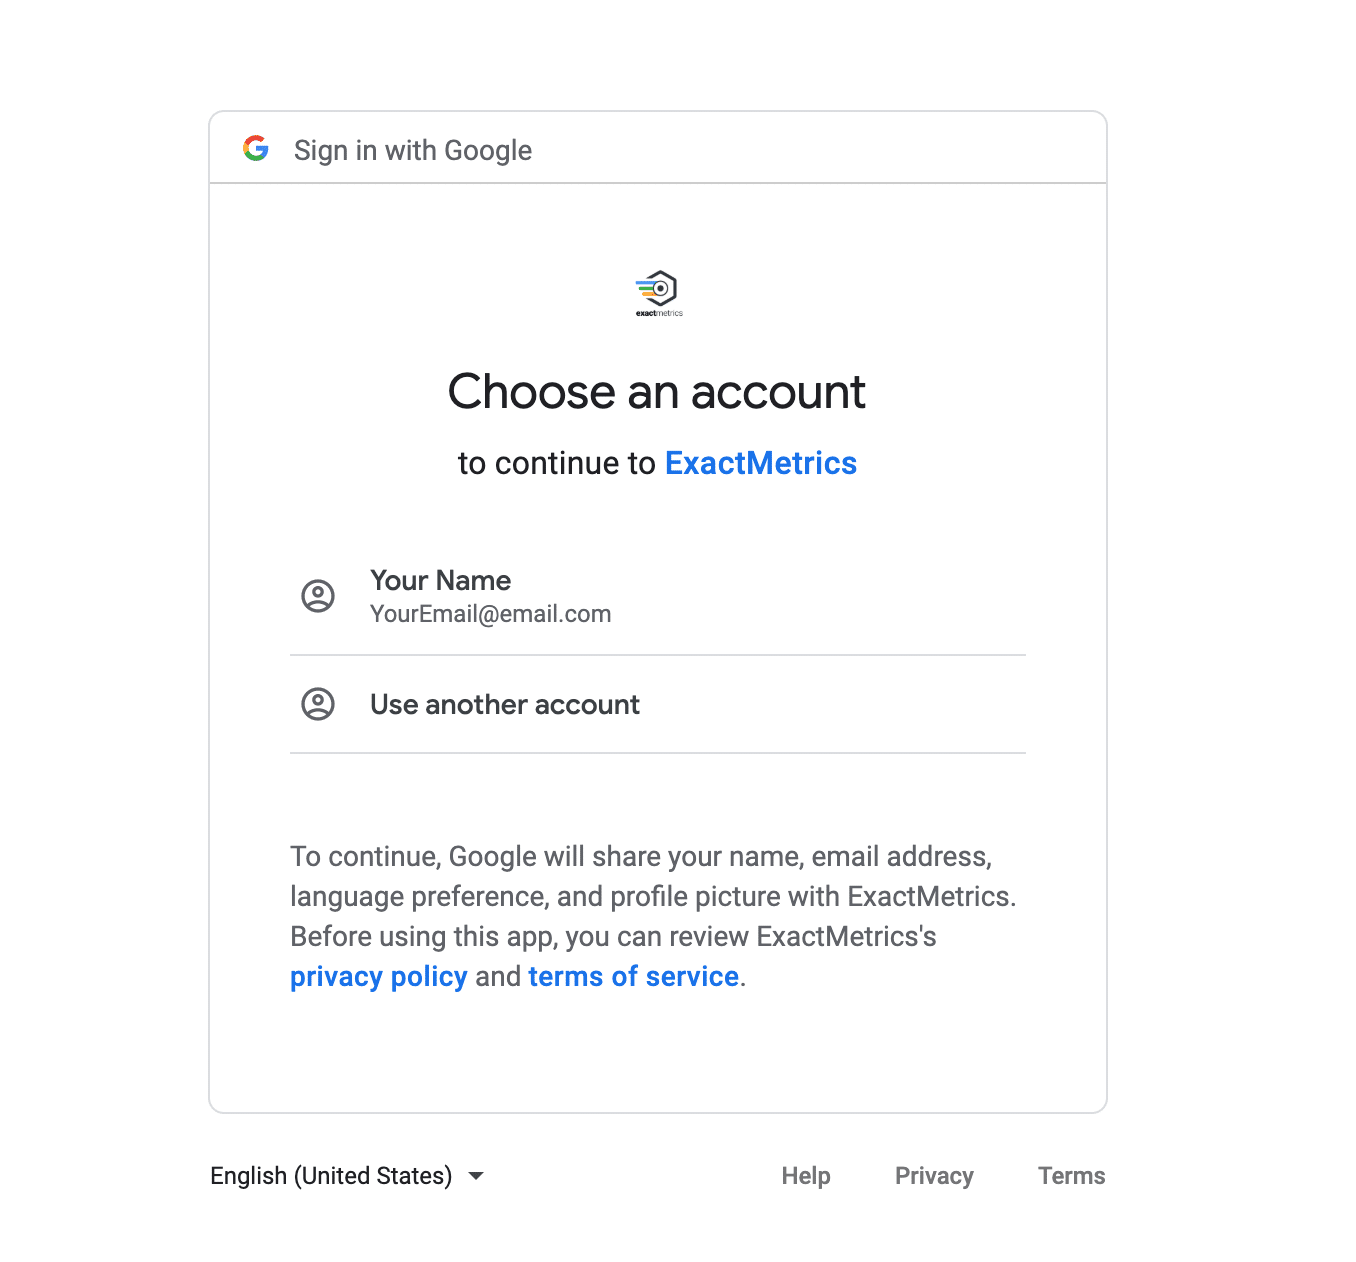
On the next screen, click Allow to give ExactMetrics the permissions it needs to connect to your Google account.

Next, select the Google Analytics account associated with your site. Then click Allow to give ExactMetrics access to your analytics data.
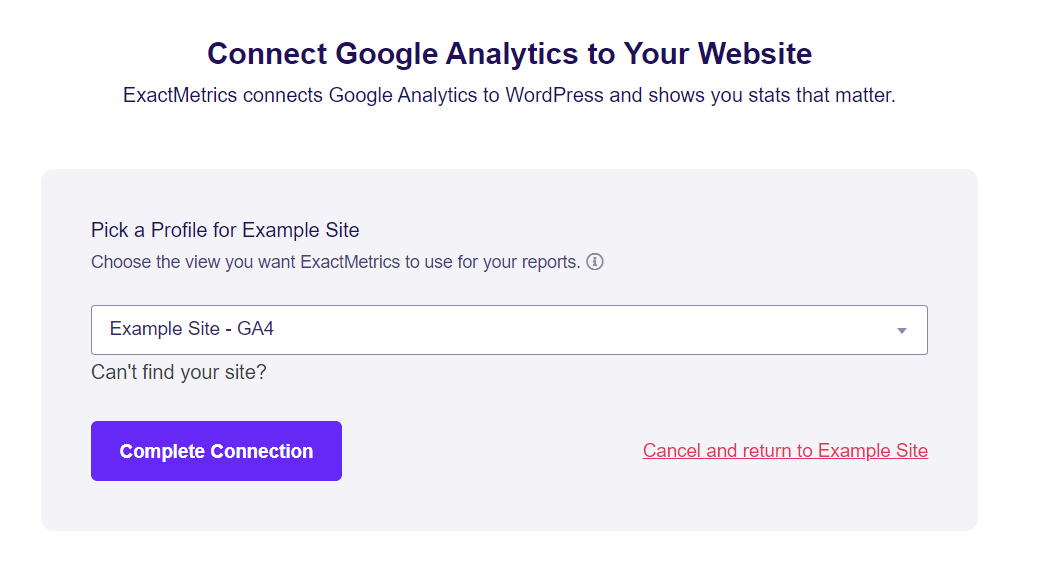
On the next screen, choose the website profile you want to connect to and select Complete Connection.
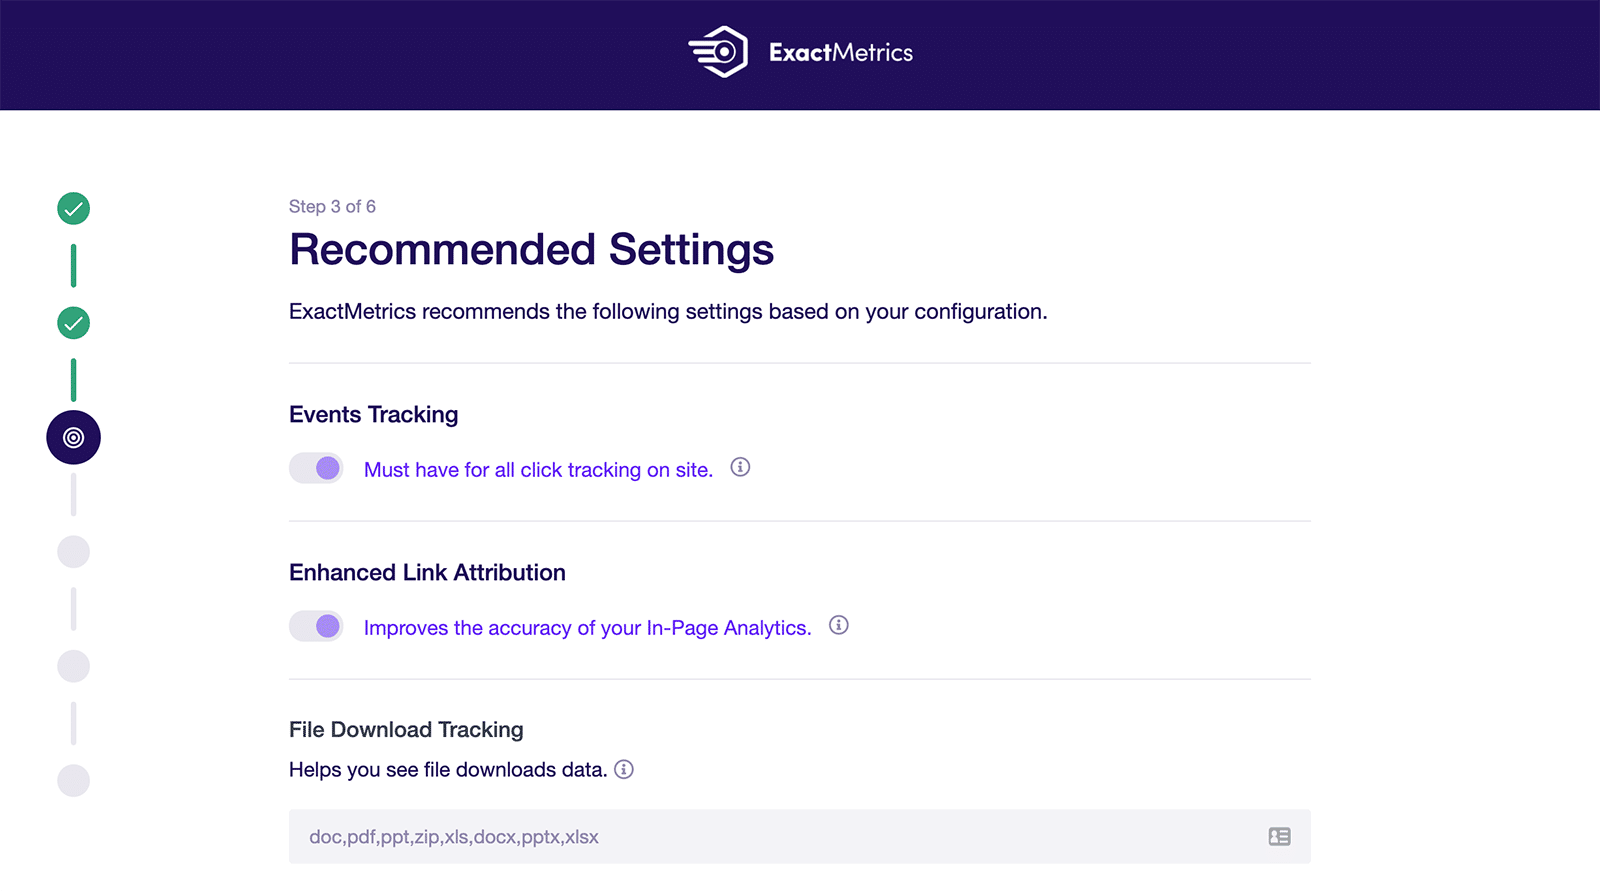
ExactMetrics will then show you some recommended settings such as enabling event tracking and enhanced link attribution, entering file download extensions, setting up affiliate link tracking, and more. Click Save and continue when you’re satisfied with the settings.
In the next step, ExactMetrics will recommend tracking features, addons, and plugins. Choose the ones you want for your site and click Continue.
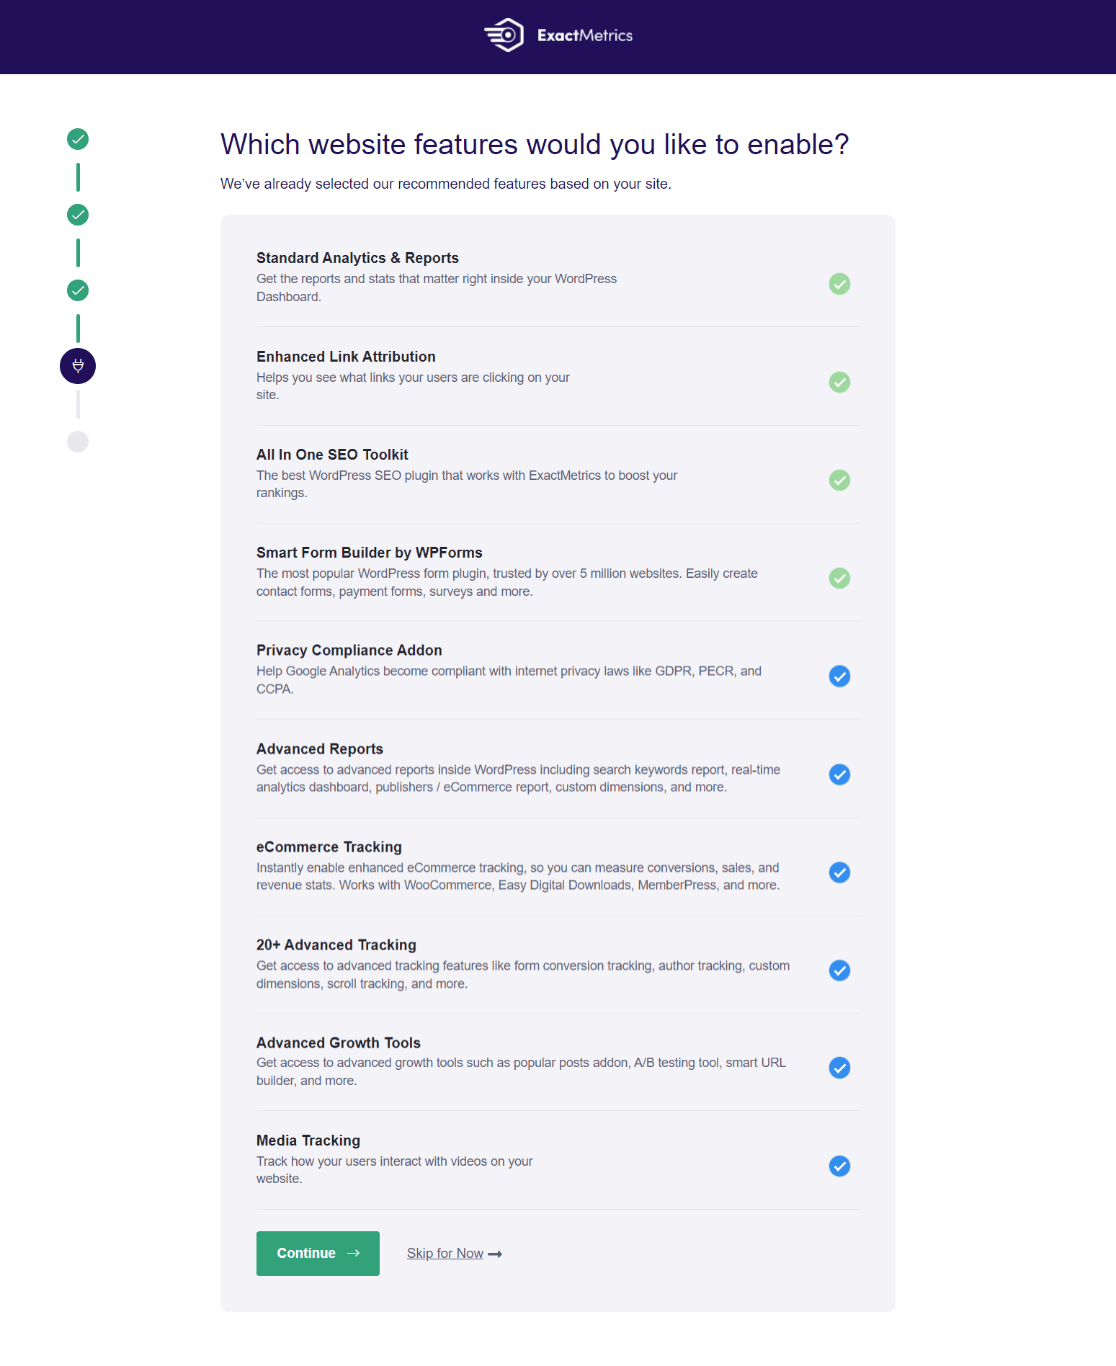
In the last step, click the Finish Setup & Exit Wizard button to finish setting up ExactMetrics.
With that, you’ve added Google Analytics to your multisite network!
Step 4: Add Other Websites in the Network to Google Analytics
Once you’ve created a Google Analytics account and property and connected ExactMetrics, the last thing to do is add your other websites in the multisite network to Analytics, if you want them to be in separate properties.
When you set up your network with ExactMetrics, all sites within the network will be tracked in the master account and property you set up your network with. However, if you want each to be tracked separately and have their own data in their ExactMetrics dashboard, you’ll want to create a separate property or account for each one, log into that site, and reconnect ExactMetrics.
Remember, each subsite you connect to its own property or account will count as a site under your ExactMetrics license.
To create more properties, head to the Admin tab, then click Create Property:
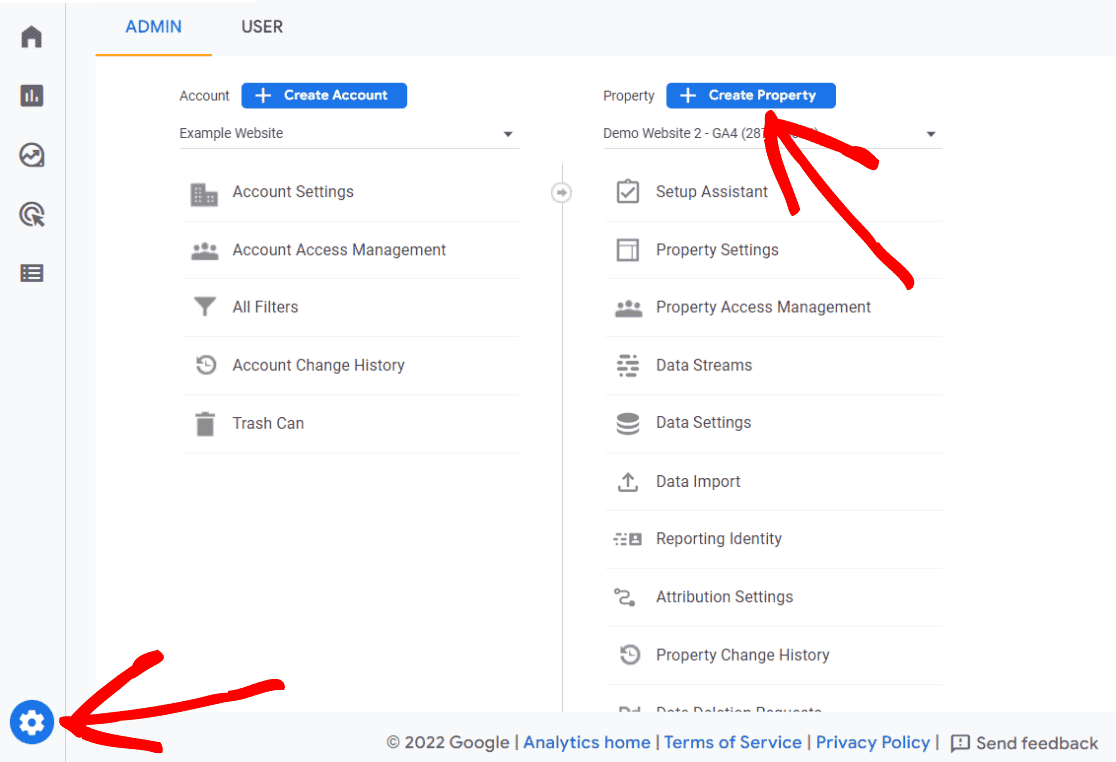
You will have to enter all the websites that you want tracked separately in your multisite network this way. Just repeat this step and enter the details of your sites until you’ve added all the websites.
Step 5: Add Google Analytics to Subsites
If you want to view analytics stats for any of the subsites directly in their WordPress dashboard, you can override the network settings for that subsite.
To do that, switch to the subsite’s dashboard by navigating to My Sites » Subsite » Dashboard.
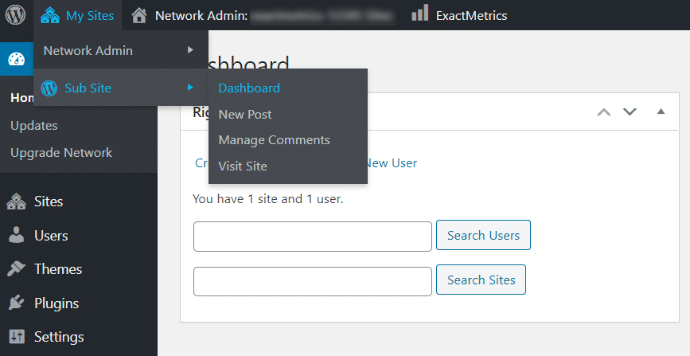
Once in the subsite’s dashboard, select ExactMetrics » Settings and activate the license key the same way you did before.

By default, each site will use the same tracking code set up on the network site. If you want to use a different tracking code on an individual site, you can override the network’s tracking code in this next step.
To add Google Analytics for the subsite, click Connect ExactMetrics.
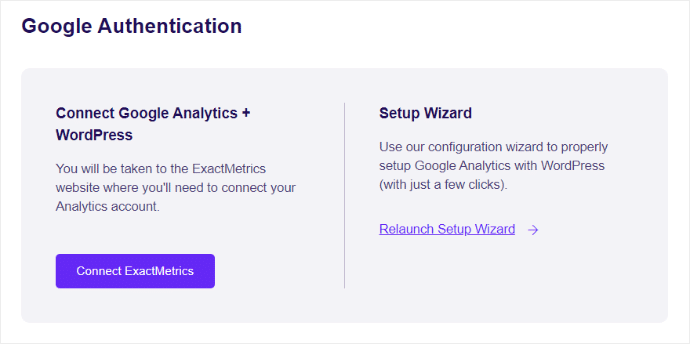
Then choose which analytics account you want to link to the subsite and click Complete Connection.
Depending on the number of site activations you have available, you can repeat this process for any of the subsites you want to see individual data for.
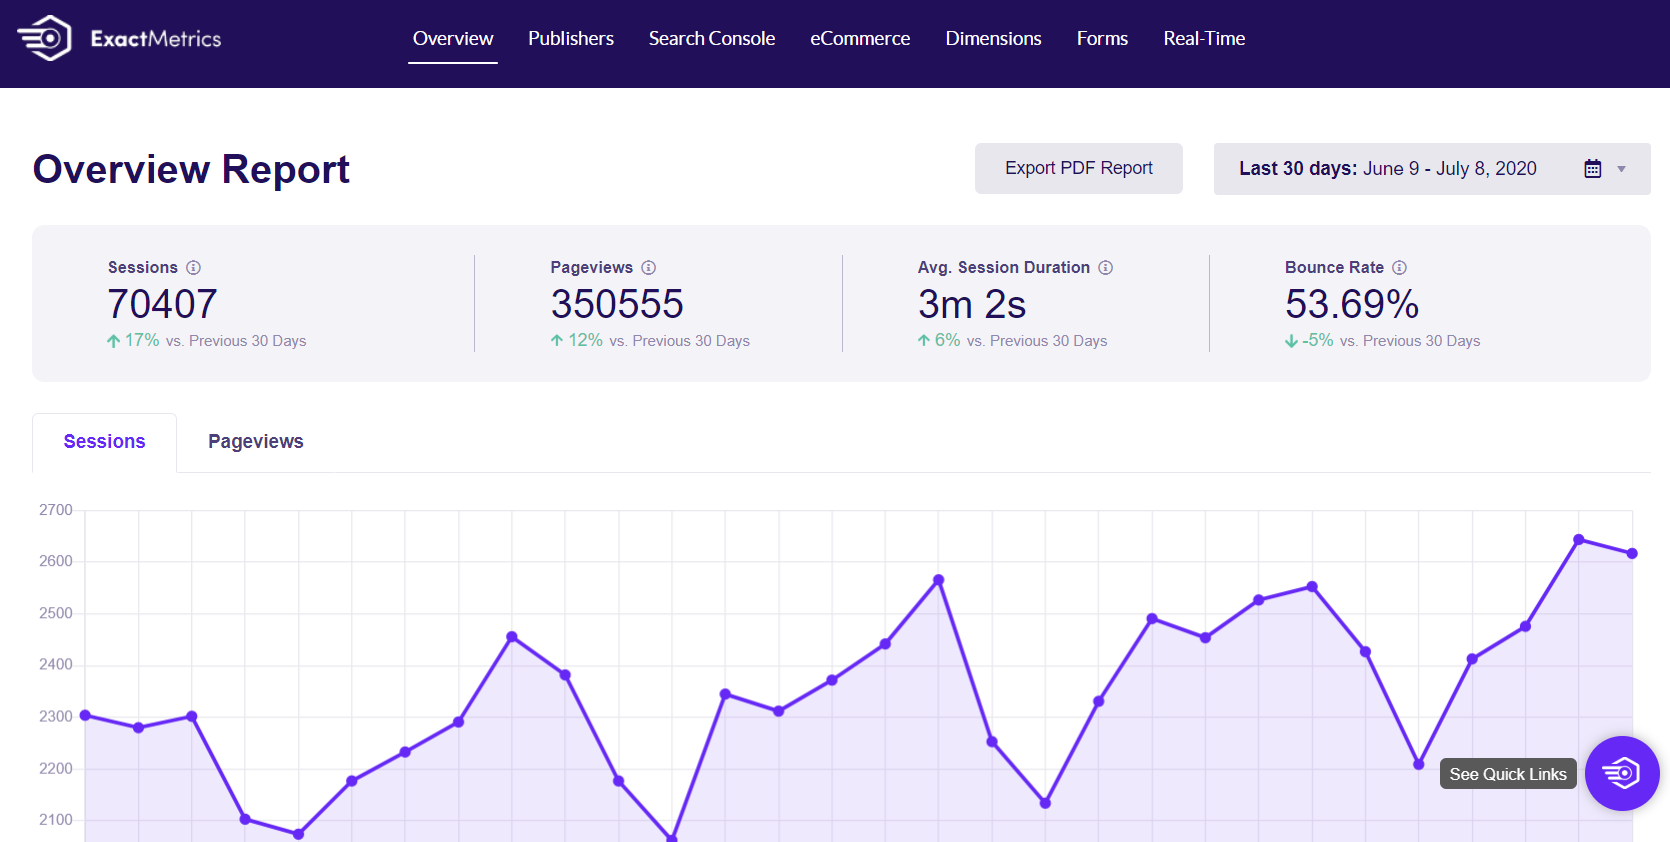
It may take a few hours before Google Analytics starts collecting data. Once data is available, you can check your analytics for the whole network right in WordPress.
To do that, go to the network dashboard. Then select ExactMetrics » Reports to see how your WordPress multisite is performing.
And that’s it!
We hope this tutorial on adding Google Analytics to WordPress multisite was helpful! You may also want to check out our tutorials on how to track your form conversions source in Google Analytics.
Don’t forget to follow us on Twitter and Facebook to get the latest information and tutorials on Analytics.

