Want to get a simple yet informative Google Analytics email report in your inbox each week?
Setting up automated Google Analytics reports can save you some valuable time while keeping you up to date on how your business is doing online. Plus, not only will you then have those stats to review, but you’ll also be able to easily send them to your colleagues.
Let’s dive into how to set up automated Google Analytics reports!
How to Get Google Analytics 4 Email Reports
Unfortunately, Google Analytics 4 (GA4) doesn’t currently offer automated email reports. However, we’ll show you a way to still get your most important stats emailed to you weekly from WordPress. We’ll also show you how to export reports in Google Analytics if you want to manually send reports.
How to Set Up Google Analytics Automated Email Reports
- Install ExactMetrics
- Add Your License Key and Connect to Google Analytics
- Turn on Automated Reports
- Set up Email Summary Settings
- Send a Test Email
ExactMetrics is the best premium WordPress analytics plugin. With ExactMetrics, there’s a whole list of things you can set up and monitor in Google Analytics and your WordPress dashboard, plus an easy-to-set-up automated reporting feature.
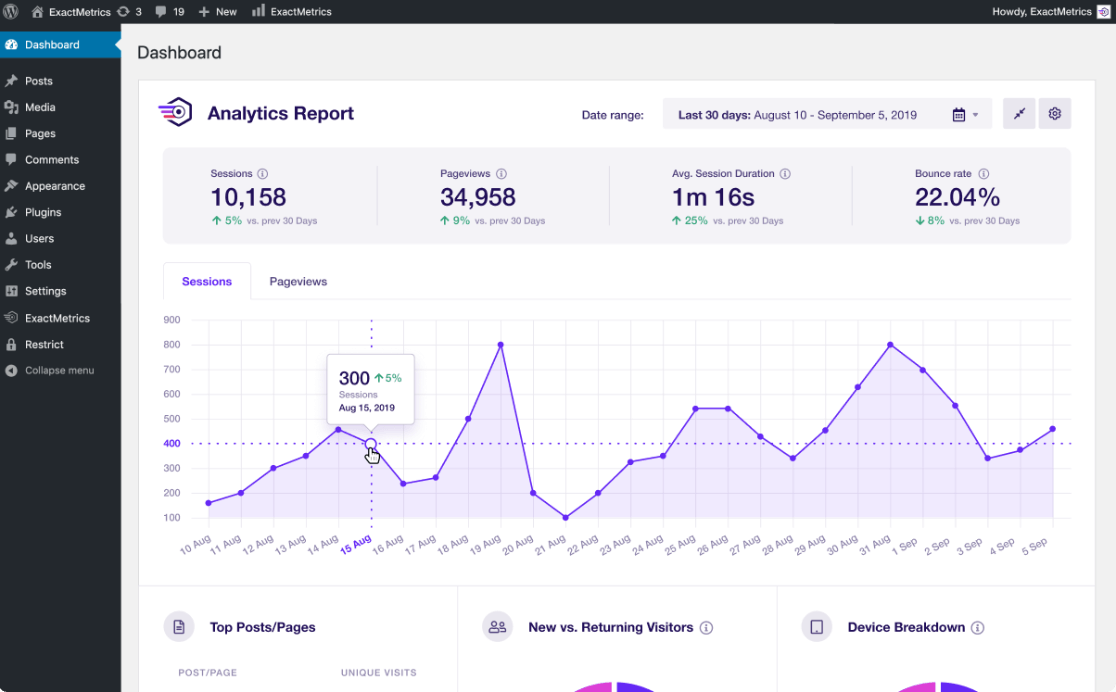
Our most popular features include:
- Easy ecommerce setup and tracking
- Top outbound and top affiliate link clicks
- GDPR compliance
- Scroll tracking
- Form tracking
- Popular posts or products widget
- And lots more…
With ExactMetrics, all your most important metrics are right there in your WordPress dashboard. Plus, you can easily set up an automated report!
To set up your emailed Google Analytics report, the first thing you need to do is install ExactMetrics.
Step 1: Install ExactMetrics
Already have the plugin? Skip to step 3.
To start, head to the Pricing page and get started with ExactMetrics. Once you complete checkout, download the plugin.
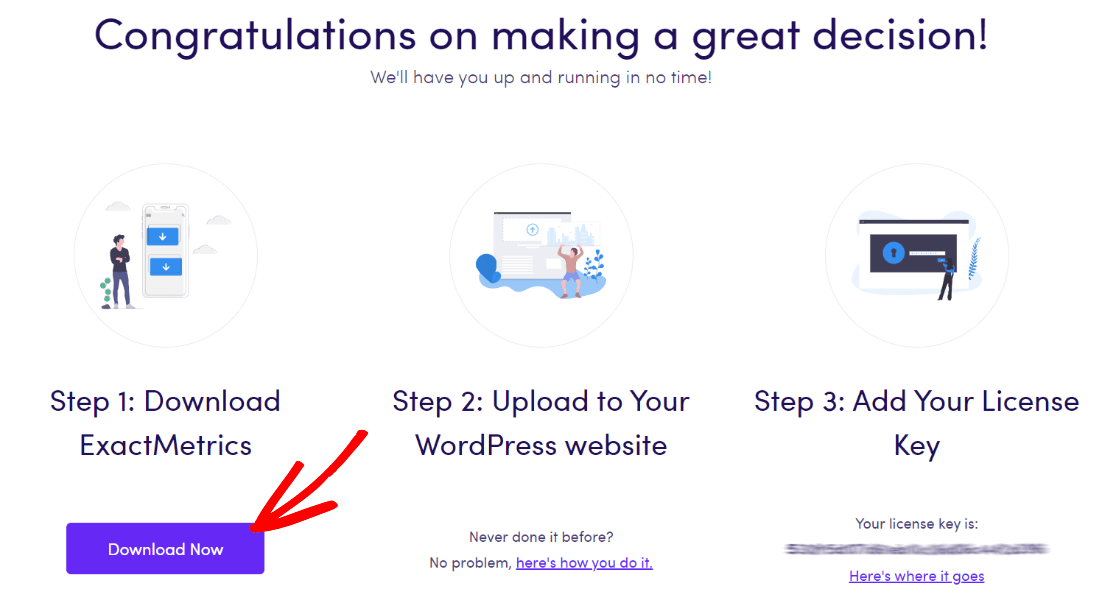
Next, upload it to your website.
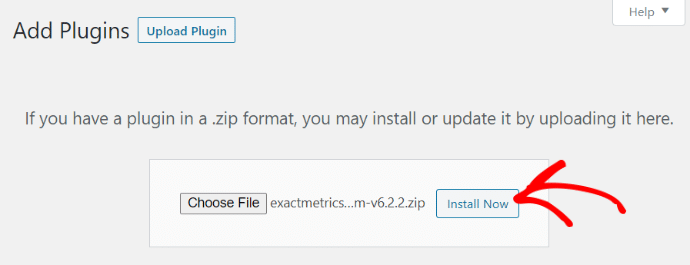
Step 2: Add Your License Key and Connect to Google Analytics
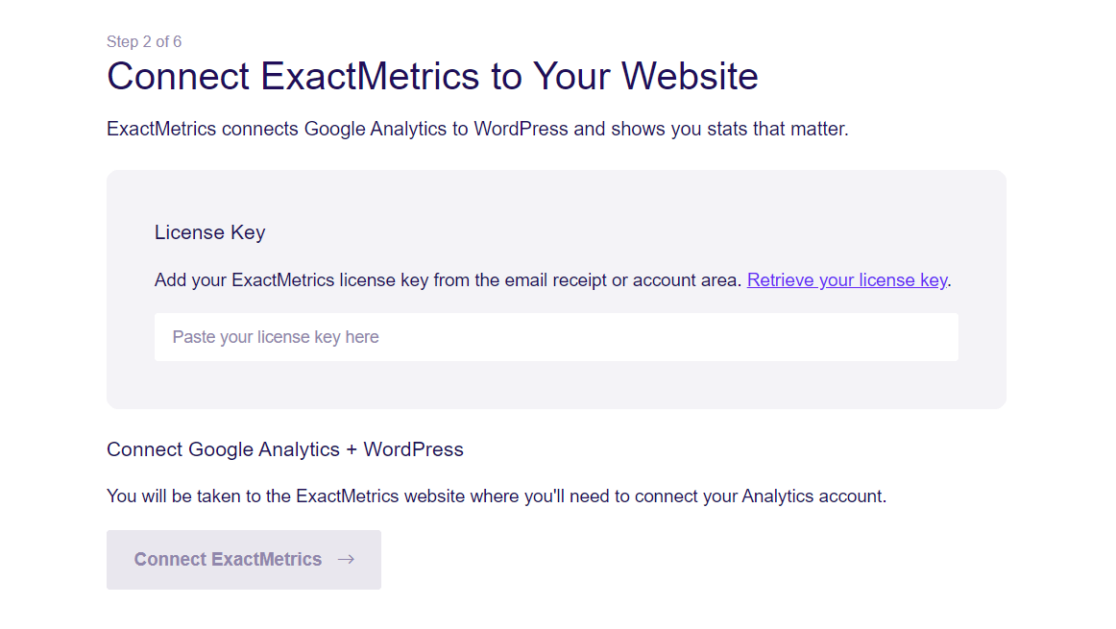
Now that you have ExactMetrics installed, you can add your license key and connect your Google Analytics account. To get set up, click on ExactMetrics under your WordPress Dashboard and click the big green Launch the wizard! button.
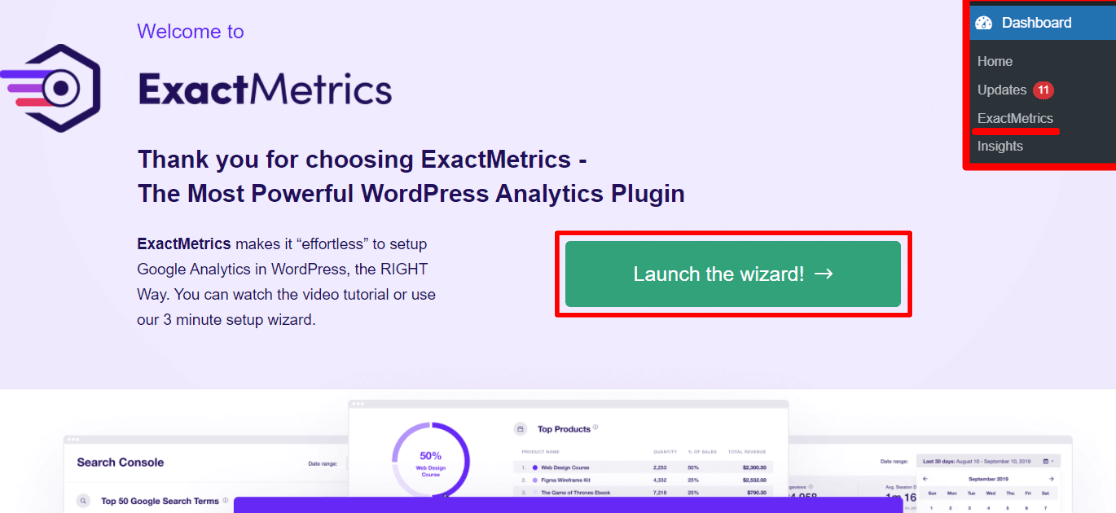
Once you’re in the wizard, you’ll get to this page where you can add your license key and connect with Google Analytics:
For more details on this step, check out our guide on how to properly add Google Analytics to your WordPress website.
Step 3: Turn on Automated Reports
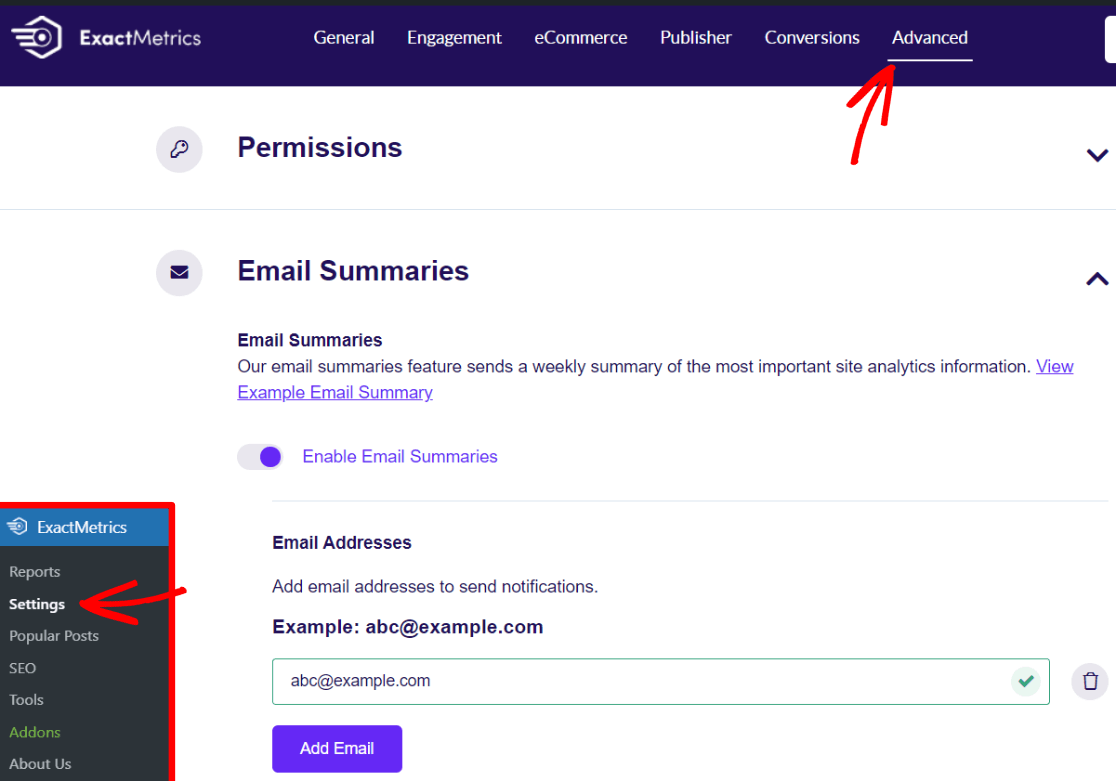
Head to ExactMetrics » Settings. Then, click on Advanced in the top navigation menu. Scroll down to Email Summaries and toggle Enable Email Summaries to turn on this option.
Step 4: Set up Email Summary Settings
Go ahead and add the email address(es) you want to send weekly Google Analytics summaries to. These do not need to be WordPress users. Virtually any email address will work. Just enter an email address and click the Add Email button. You can choose up to 5 email addresses.
Then, you can add a custom header if you’d like. This is a great option if you’d like to add a logo to your reports. Note that the image you upload (or select from the media library) should be 300 px by 100 px or smaller.

Step 5: Send a Test Email
Make sure your email will go through by clicking Send Test Email. If the email doesn’t come through now or you have issues in the future with email deliverability, we suggest using WP Mail SMTP to ensure users get emails from your WordPress website.
That’s it! You’ll now get a summary of your website’s traffic every week.
Manually Email Reports in Google Analytics
Again, Google Analytics 4 doesn’t support automated email reports, but if you’d like to manually email some specific reports, you can easily export them in PDF or CSV format.
First, log into the Google Analytics property with the report you want to export. Then, find the report you want.
In the top right, look for the tool icons and find the one to Share this report. When you click it, it’ll ask if you want to Share Link or Download File. To send the report in an email, click the Download File option. Then, choose if you’d like to export it as a PDF or CSV file.

That’s all there is to it. Now you can email your Google Analytics report the same way you would any other email attachment. It’s a handy tool if you need to share reports occasionally. But if you’re sending regular reports, you’ll definitely want to use ExactMetrics to save time and automate your Google Analytics email reports.
Want more Google Analytics tips? We think you might be interested in How to Track Keywords in Google Analytics (Step -by-Step).
Don’t forget to follow us on Twitter and Facebook to see all the latest Google Analytics tutorials.

