In-page analytics allows you to see where your website visitors are clicking on your page. If you’re wondering how to see in-page analytics, you’re in the right place.
In-page analytics is actually something you can do with Google Analytics, but it’s not really widely known, so most Google Analytics users probably don’t use it.
That’s a shame because it can help you take note of where your visitors are clicking and how they’re interacting with your website in order to make changes that’ll bring in more conversions.
Ready to find out how to set up this awesome feature? Let’s get started.
How to Set Up In-Page Analytics
We’re going to show you how to see page-by-page analytics in WordPress and how to use Google’s in-page analytics tool to see your link clicks.
- Download and Install ExactMetrics
- Turn on Enhanced Link Attribution in ExactMetrics
- Install the Page Analytics Extension in Google Chrome
- See Your In-Page Analytics
What Is Enhanced Link Attribution?
Enhanced link attribution is really a fancy way to describe being able to tell which link is which if you have two links to the same URL on a page or use anchor links for a one-page website.
For example, say you have a donate page where visitors can donate to your cause. You have a link to the page in your navigation, a callout on your home page, and a link in your footer to donate. Using the Google extension, you’ll be able to tell which one of those 3 links were clicked the most.
Step 1: Install ExactMetrics
The easiest way to turn on enhanced link attribution in WordPress is with ExactMetrics.
ExactMetrics is the best premium WordPress analytics plugin. With ExactMetrics, there’s a whole list of things you can set up and monitor in Google Analytics and your WordPress dashboard, plus a single-click enhanced link attribution switch.
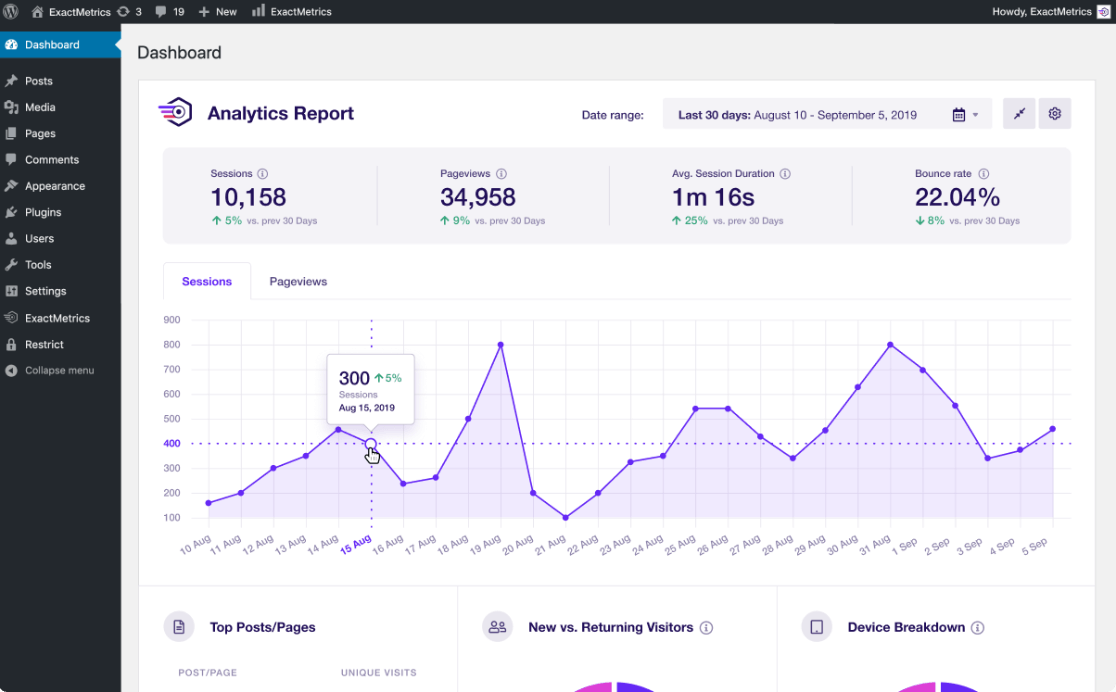
Our most popular features include:
- Easy ecommerce setup and tracking through WooCommerce
- Top outbound and top affiliate link clicks
- GDPR compliance
- Scroll tracking
- Form tracking
- Media tracking
- Popular posts or products widget
With ExactMetrics, all your most important metrics are right there in your WordPress dashboard.
To get started with ExactMetrics, head to the Pricing page. Once you complete checkout, download the plugin.
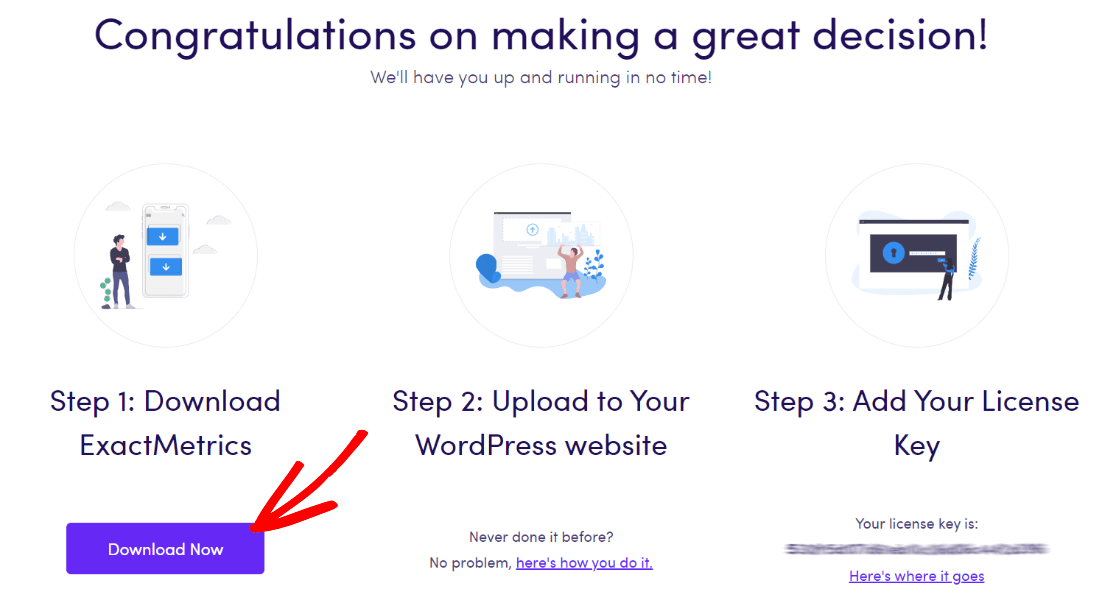
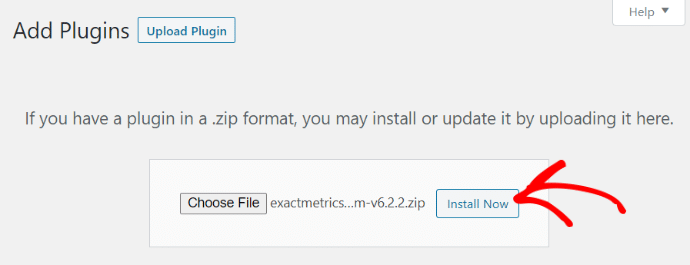
Next, upload it to your website.
Now that you have ExactMetrics installed, you can add your license key and connect your Google Analytics account. To get set up, click on ExactMetrics under your WordPress Dashboard and click the big green Launch the wizard! button.
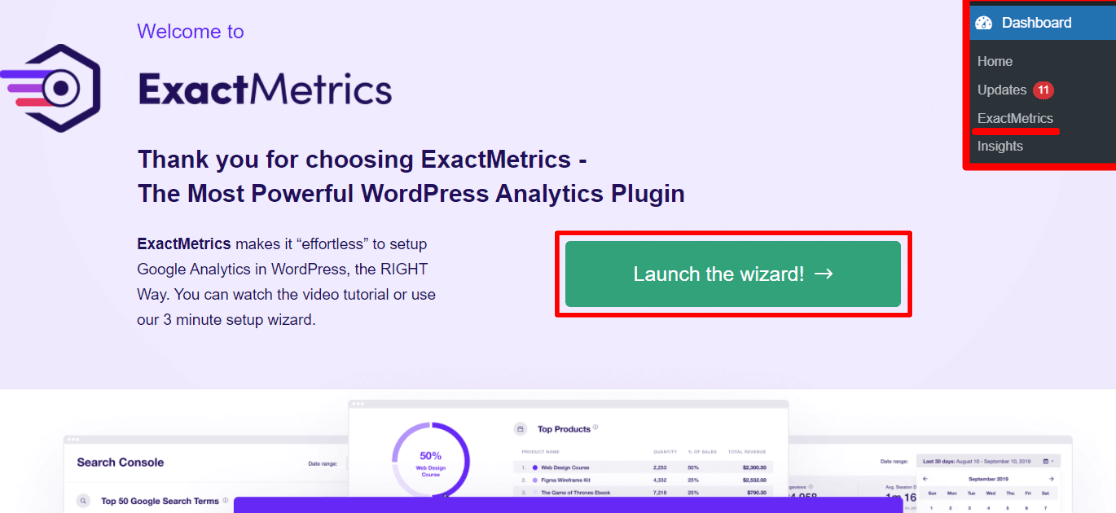
Once you’re in the wizard, you’ll get to this page where you can add your license key and connect with Google Analytics:
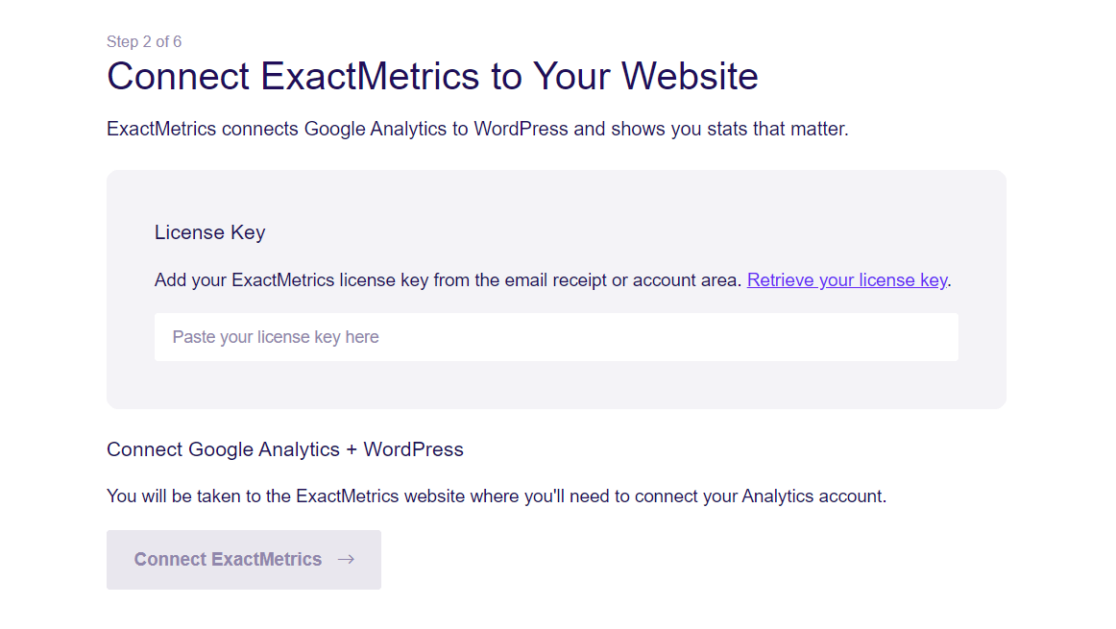
For more details on this step, check out our guide on How to Add Google Analytics to Your WordPress Site.
Step 2: Turn on Enhanced Link Attribution in ExactMetrics
Once you have ExactMetrics set up, head to Settings » Engagement, then make sure the Enable Enhanced Link Attribution toggle is set to the on position.
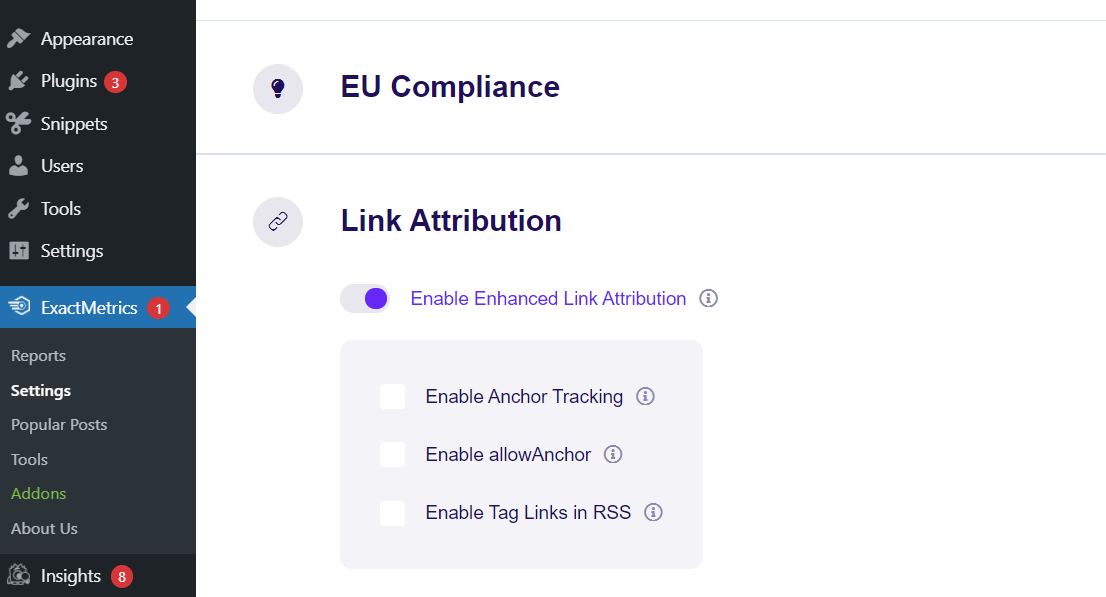
If you have anchor links on your site, you can turn on anchor tracking here, too.
That’s it! You’re ready to use the Page Analytics extension.
Step 3: Install the Page Analytics Extension in Google Chrome
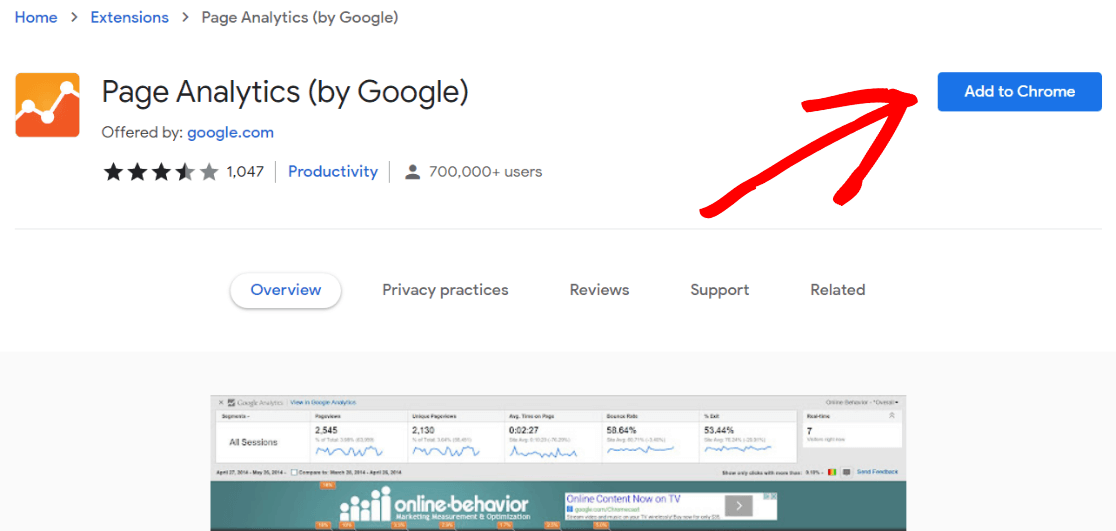
The Page Analytics extension was created by Google as a way for users to see their in-page analytics. It’s no longer supported by Google, but it still works well for most users so don’t let that deter you. Just click the blue Add to Chrome button to install it.
Next, let’s see how to view your in-page analytics using the tools we set up.
Step 4: See Your In-Page Analytics
To see analytics on one of your pages, navigate to the page on your website where you want to see the link clicks and open the extension:
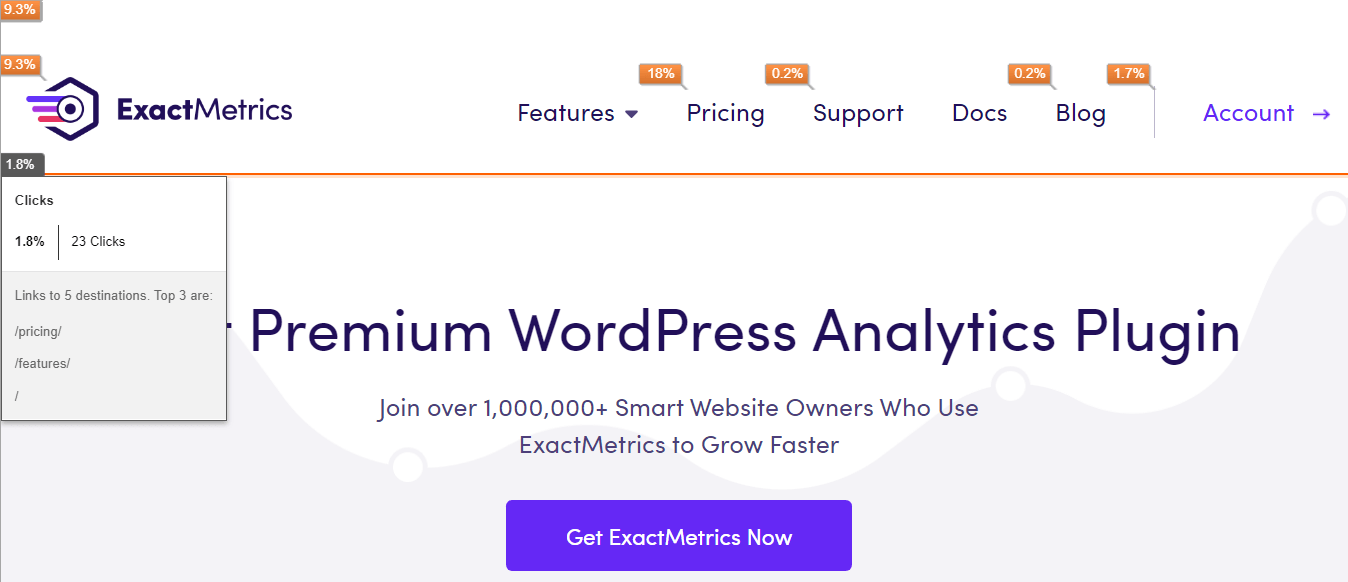
You’ll be able to easily see the percentage of clicks for each link on your page.
The extension will also show you sessions, bounce rate, and other metrics for the page you’re on. To see those metrics without the extension, make sure you’re logged into your site, navigate to the page you want to check, and click the ExactMetrics button in your toolbar:

You can quickly view the stats for any page on your website using this feature.
That’s the end! We hope you liked our tutorial on setting up in-page analytics and enhanced link attribution on your WordPress website.
Want to track clicks on certain links and buttons? Read How to Track Link Clicks in Google Analytics and WordPress.
Don’t forget to follow us on Twitter and Facebook to see all the latest Google Analytics tutorials.

