Did you know that web push notifications often have click-through rates that are better than email? It’s true! In a world where email inboxes are overflowing and overwhelming, you can actually reach your subscribers right on their desktops.
If you’re not taking advantage of web push notifications yet, we’re glad you’re here to find out how! It’s pretty easy to get set up. You’ll be up and running and collecting subscribers in no time!
In this article, we’ll walk step-by-step through how to set up web push notifications. Plus, we’ll provide some examples and ideas to get you started.
What is a web push notification?
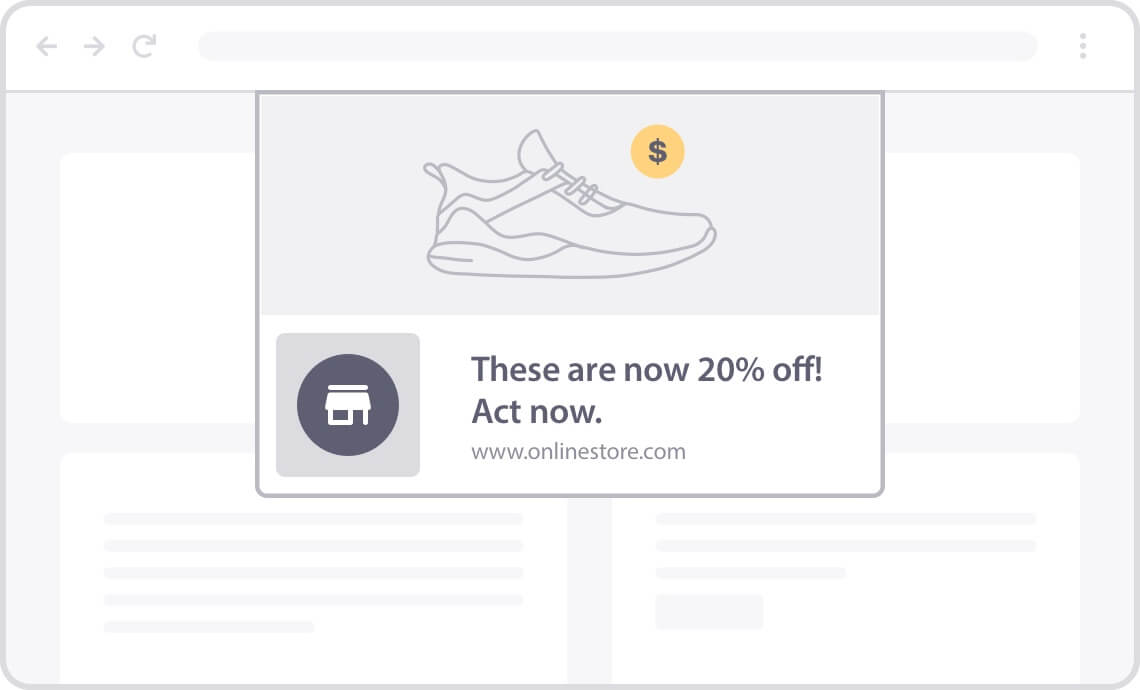
A web push notification is a pop-up message sent through a user’s browser that appears on their desktop or mobile device. It can include an image, a heading, a description, and a button or two. They usually appear in the bottom-right or upper-right corner of a desktop screen or as a browser notification on mobile.
These messages have to be opted into, just like email. To opt in, users will need to click an “allow notifications” popup in their browser.
Once a user has opted in to browser notifications, they’ll pop up on the user’s desktop or mobile device, even if they aren’t currently visiting your site. This makes them ideal for reaching your subscribers and grabbing their attention!
Why Use Web Push Notifications?
Like we mentioned at the beginning, web push notifications often have a better click-through rate than email. Of course, that doesn’t mean you should quit email marketing just because you set up push notifications! Use the two of them together to really supercharge your reach.
Web push notifications are super effective for a few different reasons:
- Users have to opt-in to your messages on your website, making the audience one that’s really interested in your messaging.
- You can reach users right on their desktops or in their mobile notifications, which can be more personable and less cluttered than email.
- You get more space to include text and a featured image to grab users’ attention.
- You can personalize and segment push notifications deeply, reaching the right users with the right content at the right time.
Convinced it’s time to try web push notifications? Great! Let’s jump into our step-by-step guide.
How to Set Up Push Notifications on Your Website
Setting up push notifications is super easy when you’ve got the right tool. That’s why we recommend PushEngage.
PushEngage is the best push notification software on the market. It has a ton of advanced features that make web push notifications not only easy to set up, but super effective for your website.
Some of their most popular features include:
- Customizable opt-ins
- Automatic new post notifications
- Cart abandonment reminders
- Personalization and segmentation
- Automatic drip campaigns
- eCommerce integrations
- Android &iOS app push notifications
Plus, you can use PushEngage on just about any website, from WordPress to Shopify, BigCommerce, Wix, and more.
Step 1: Get Started with PushEngage
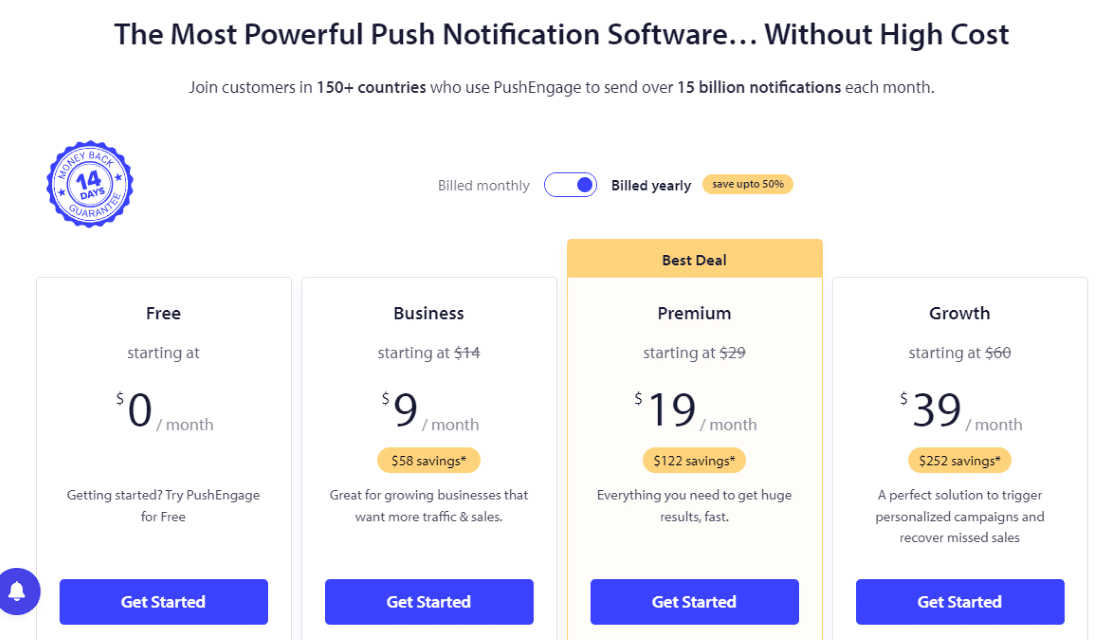
To get started, choose the plan that’s right for you and get signed up. You can even get started for free to try sending 30 campaigns before upgrading to unlimited campaigns:
Once you grab a license or start for free, you’ll need to set up your account:
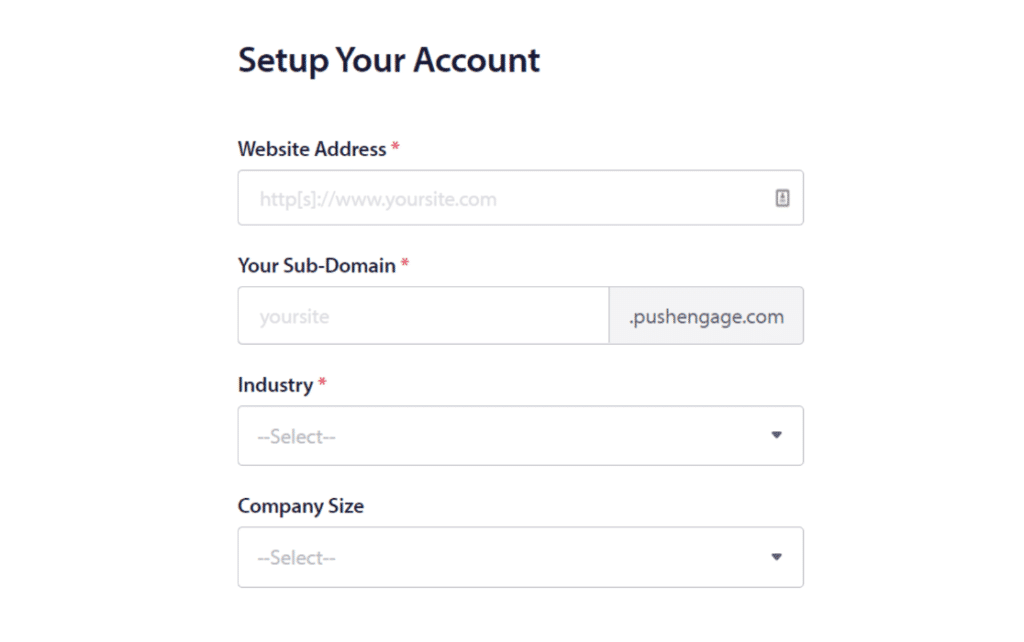
Step 2: Fill in Site Details
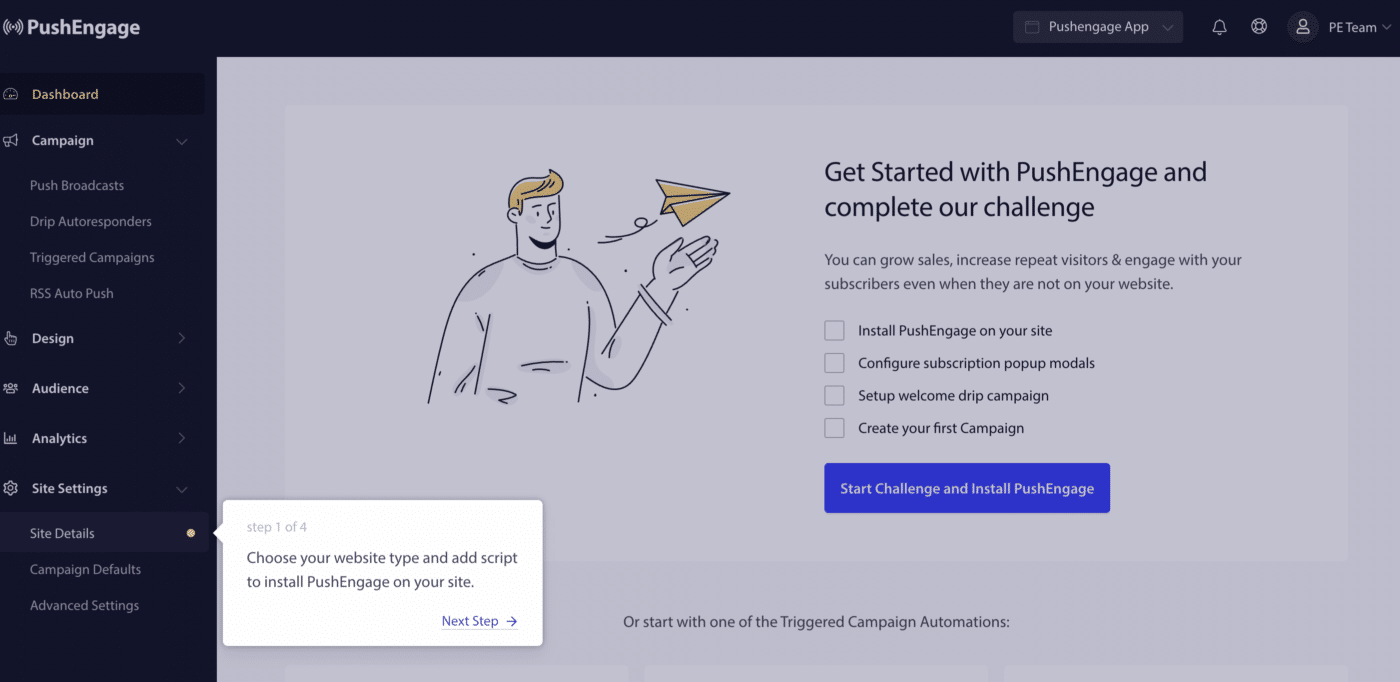
Once you’ve complete your initial setup, you’ll be taken to your new PushEngage dashboard. There, navigate to Site Settings » Site Details:
Here, you’ll add key details about your website, such as your site name, URL, and logo. It’s also where you’ll generate an API key, and complete a couple other settings:
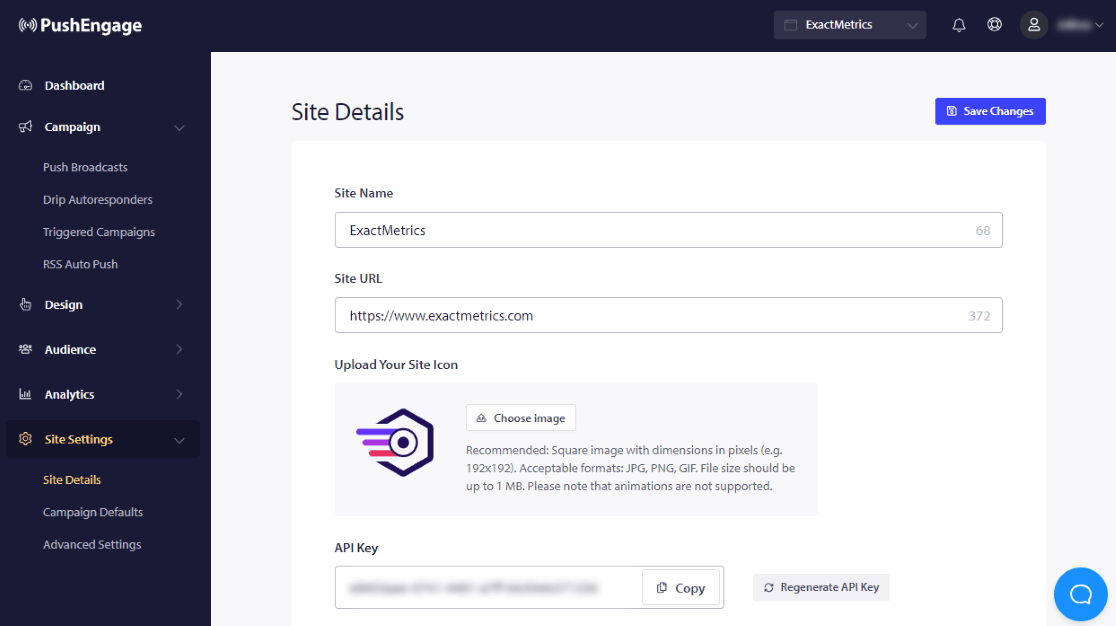
You’ll need the API key in the next step.
Step 3: Install PushEngage on Your Website
Instructions for installing PushEngage on your website will differ depending on which platform you use. WordPress users, you’ll install the PushEngage WordPress plugin. If you’re using another platform, you’ll likely need to install the code and upload a file to your root folder.
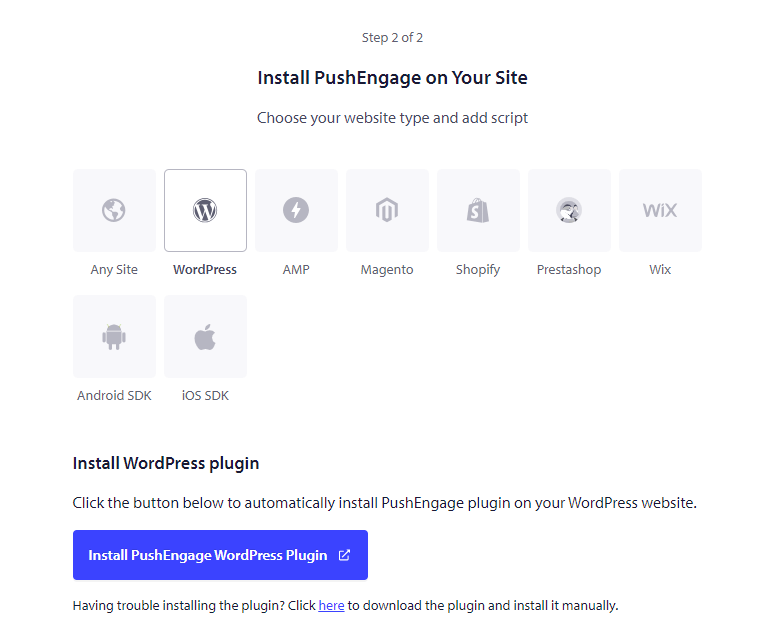
Just click on your platform and you’ll get specific instructions for installation.
Step 4: Configure Opt-in Popups
The next step is to configure your opt-in popups. There are quite a few different options! Head back to the dashboard and go to Design » Popup Modals. You’ll see the list of options for how your opt-ins look:
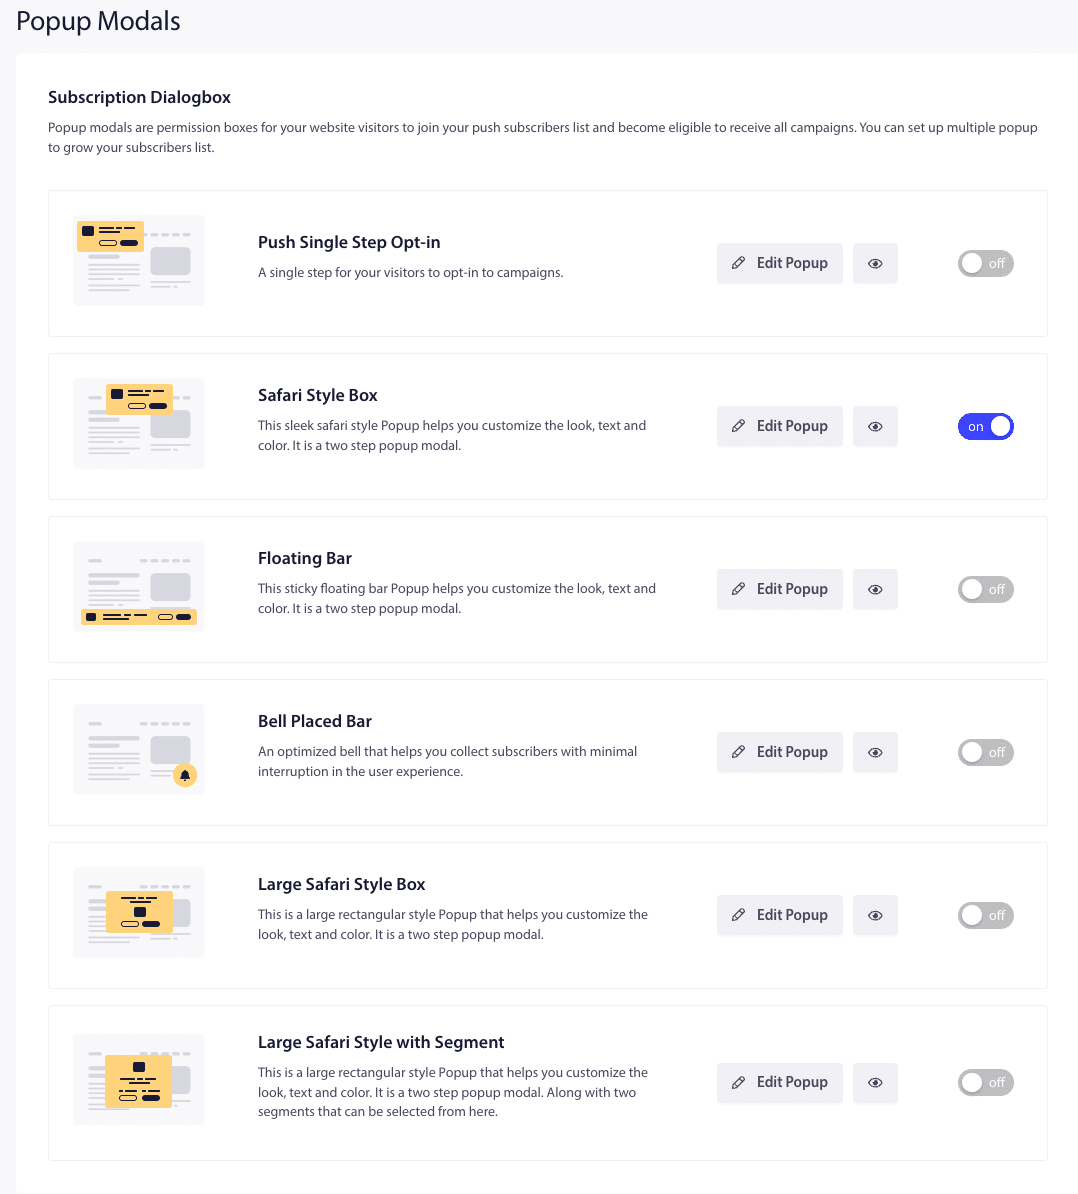
Once you choose your opt-in type, make sure to click the Edit Popup button to choose colors, text, and more:
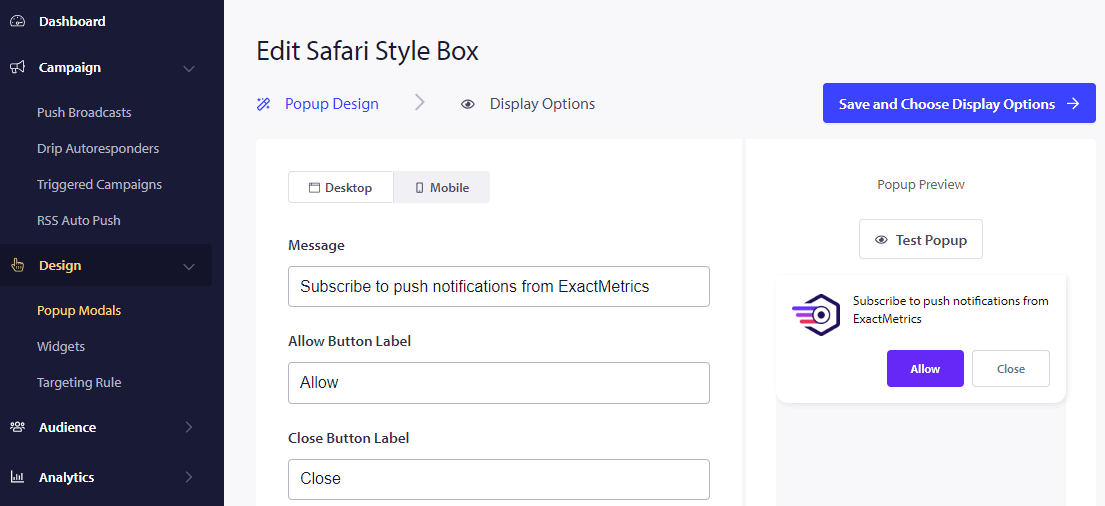
When you’re done, click the Save and Choose Display Options button. On this screen, you’ll decide when your opt-in popup should display, how long your cookie lasts, and more. When you’ve got those settings ready, go ahead and click the Save and Enable Popup button:
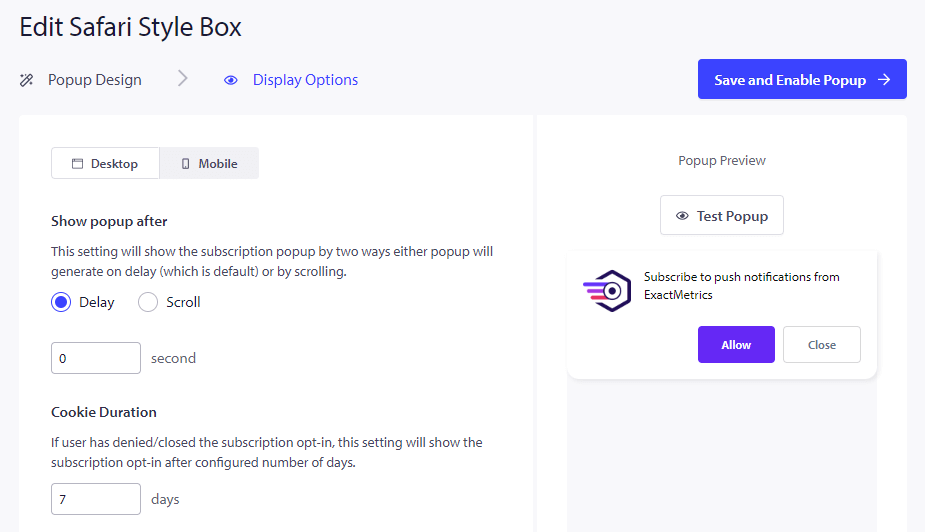
That’s it! You have PushEngage installed on your site and you’re collecting subscribers.
Once you’ve got some subscribers collected, you’ll want to start sending notifications. Depending on what kind of website you have, there are a few different kinds of notifications you might want to create.
To set up an automatic new post notification, head to Campaign » RSS Auto Push:
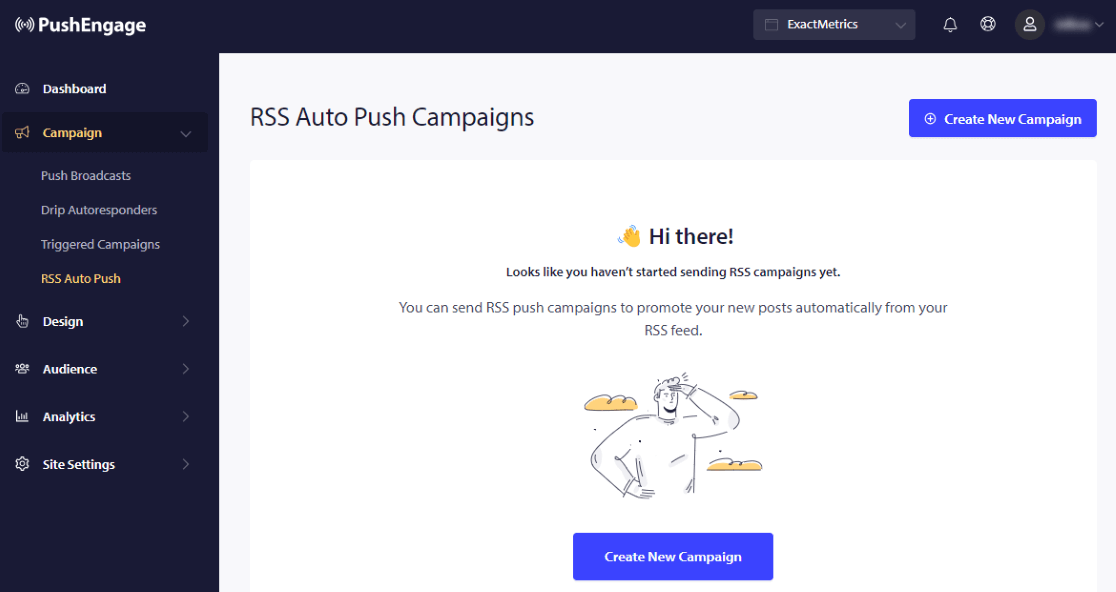
To set up an automated drip campaign, head to Drip Autoresponders. For a quick standalone broadcast, go to Push Broadcasts. To create campaigns that are triggered by different actions users can take on your site, check out Triggered Campaigns.
Want walkthroughs of all the different types of campaigns? Check out PushEngage’s Campaigns documentation.
How to Track Push Notification Traffic
While PushEngage has some great analytics, you might wonder how to track your push notification traffic inside Google Analytics.
To easily track push notification traffic, sales, and conversions, you’ll want to use Google Analytics campaigns.
Campaigns are tracked using UTM codes, which are just some extra words at the ends of the URLs you use in PushEngage. PushEngage makes it super easy to use them — just fill out their UTM Parameters box for each push notification:
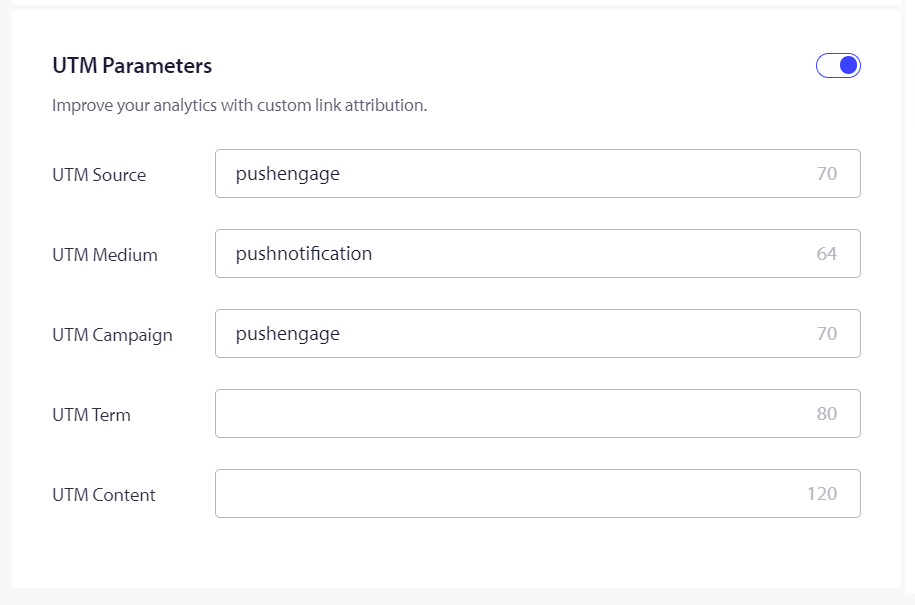
Then, you’ll be able to see really helpful data in Google Analytics about who’s clicking on your web push notifications and what they’re doing on your site.
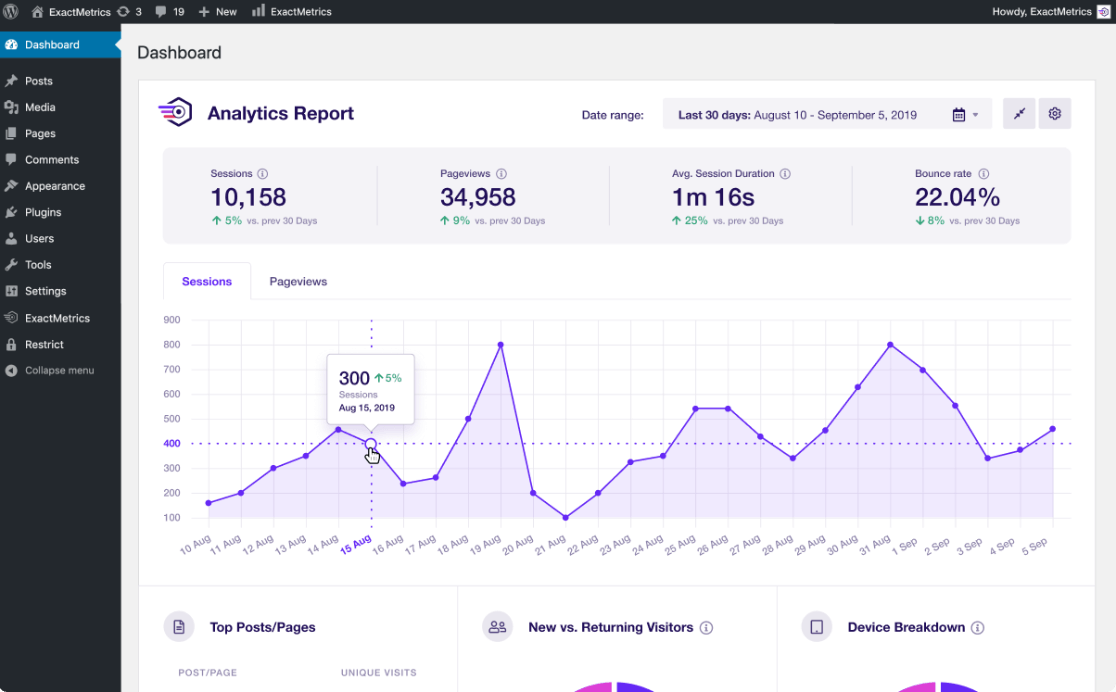
That said, finding campaign data in Google Analytics 4 can be challenging if you’re not a Google Analytics whiz. Thankfully, ExactMetrics can help.
ExactMetrics is the best premium WordPress analytics plugin. With ExactMetrics, there’s a whole list of things you can set up and monitor in Google Analytics and your WordPress dashboard, plus a Campaigns report for easy web push notification campaign tracking.
Our most popular features include:
- Easy eCommerce setup and tracking
- Top outbound and top affiliate link clicks
- GDPR compliance
- Scroll tracking
- Form tracking
- Popular posts or products widget
- And lots more!
To access the Campaigns report, you’ll need to grab ExactMetrics at the Plus level or above. For a full tutorial on setting up ExactMetrics, check out How to Add Google Analytics to WordPress (Step-by-Step Guide).
Once you have ExactMetrics all set up, you’ll be able to access the Campaigns report to see what kind of traffic you’re getting from PushEngage’s web push notifications.
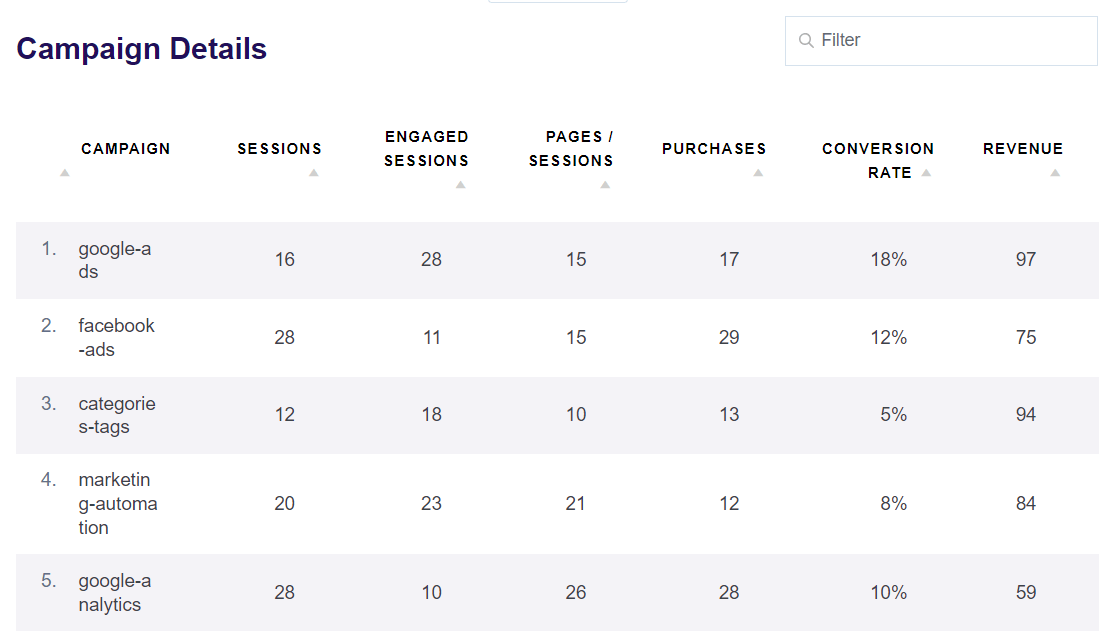
For more on tracking campaigns, check out Tracking Google Analytics Campaigns (How-To Guide).
Web Push Notifications FAQ
What is an example of a browser push notification?
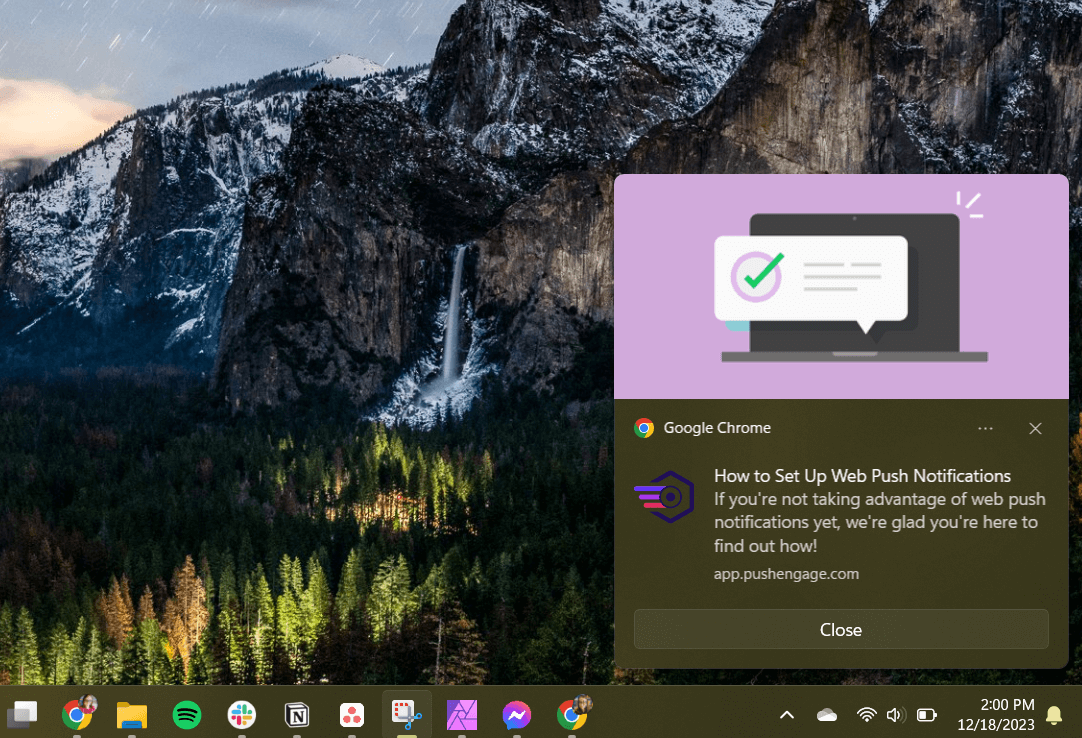
Push notifications can be new post notifications, sale announcements, triggered cart abandonment messages, and so much more. Here’s an example of what a new post notification would look like in Windows and Chrome:
What is the difference between web and app push notifications?
The difference between web and app push notifications is that web push notifications are sent through your browser and typically appear on your desktop or laptop computer, whereas app notifications come straight from your app and typically appear on your mobile device. Web push notifications are especially helpful for websites that don’t have apps, and therefore can’t send mobile push notifications.
Are web push notifications worth it?
Web push notifications are definitely worth it! They often have higher click-through rates than email and are really a fantastic way to reach another audience beyond email, your website, and social media channels.
What are web push notifications for all browsers?
We used Chrome for our web push notification example, but all of the most common and popular browsers will send push notifications to your subscribers’ desktops.
That’s it!
We hope you have a great idea now about what web push notifications are, how they work, and what you can do with them.
If you loved this guide, you might also like:
30 Epic Marketing Hacks for Explosive Traffic Growth
How to Create Opt-In Forms in WordPress (2 Easy Ways)
8 Types of Google Analytics Reports to Track (The Best Ones)
If you’re not using ExactMetrics yet, get started today!
Don’t forget to follow us on Twitter and Facebook to see all the latest Google Analytics tutorials.

