Do you want to set up Google Analytics eCommerce tracking for your online store? As a store owner, you need data to make informed decisions and grow your business.
By setting up eCommerce tracking in Google Analytics, you can see how people interact with your online store, what your top-selling products are, how much revenue your store generates, where your traffic is coming from, and lots more.
But, using Google Analytics can be overwhelming, especially for new users. That’s why, in this article, I’m going to show you the easy way to set up Google Analytics eCommerce tracking without using Google Tag Manager or any code!
What Is Google Analytics eCommerce Tracking?
eCommerce tracking is a feature of Google Analytics that lets you track your online store’s performance. You can track the number of orders, conversion rates and revenue, add-to-cart events, average order value, most popular products, and much more.
Why Should I Use Google Analytics to Track eCommerce?
The data you get from Google Analytics makes it easy to grow your business and better understand your customers. Here are some of eCommerce tracking’s key benefits:
- Find out which traffic sources lead to the most purchases
- Measure the number of transactions and revenue from your store
- Track the pageviews and performance of your products
- Track eCommerce events like add-to-cart, remove-from-cart, and cart abandonment.
- Identify which products customers purchase the most
- Track Key Performance Indicators (KPIs) like eCommerce conversion rate, average order value, cart-to-view rate
- Optimize your conversion funnel to get more sales
Now, are you ready to learn how to set up Google Analytics eCommerce tracking?
How to Set Up eCommerce Tracking (GA4)
Setting up eCommerce tracking in Google Analytics without a plugin requires you to manually add tracking code to your website, add and configure events, and other complicated steps.
This can be difficult for beginners, and adding code manually is risky since the smallest of errors can break your site.
The good news is that there’s an awesome solution that doesn’t require any coding or complicated setup. You can install Google Analytics tracking code and set up advanced eCommerce tracking in only a few clicks by using the ExactMetrics plugin.
Start Tracking Your eCommerce Store Today!
Just follow the steps below to start tracking your online store.
- Install ExactMetrics
- Activate eCommerce Addon
- How to Track eCommerce in WordPress
- How to Track eCommerce in Google Analytics
Install ExactMetrics
ExactMetrics is the best premium WordPress Analytics plugin, allowing you to easily set up Google Analytics without editing any code or using a complicated tool like Google Tag Manager. It offers 1-click eCommerce tracking with an extremely user-friendly interface and Google Analytics reports right inside your WordPress dashboard.
Plus, you’ll get access to tons of other advanced tracking features like form tracking, video tracking, conversion tracking for Google Ads, a widget to display your popular products or posts, eCommerce user journey reports, and lots more.
ExactMetrics does all the heavy lifting behind the scenes and delivers your important metrics to your WordPress dashboard. The plugin’s eCommerce features work with WordPress stores using WooCommerce, Easy Digital Downloads, MemberPress, LifterLMS, Restrict Content Pro, GiveWP, or MemberMouse.
Before you can enable eCommerce tracking, you’ll need to purchase ExactMetrics at the Pro level or higher.
After purchasing your license (must be Pro or above to access eCommerce tracking), go ahead and download the plugin.
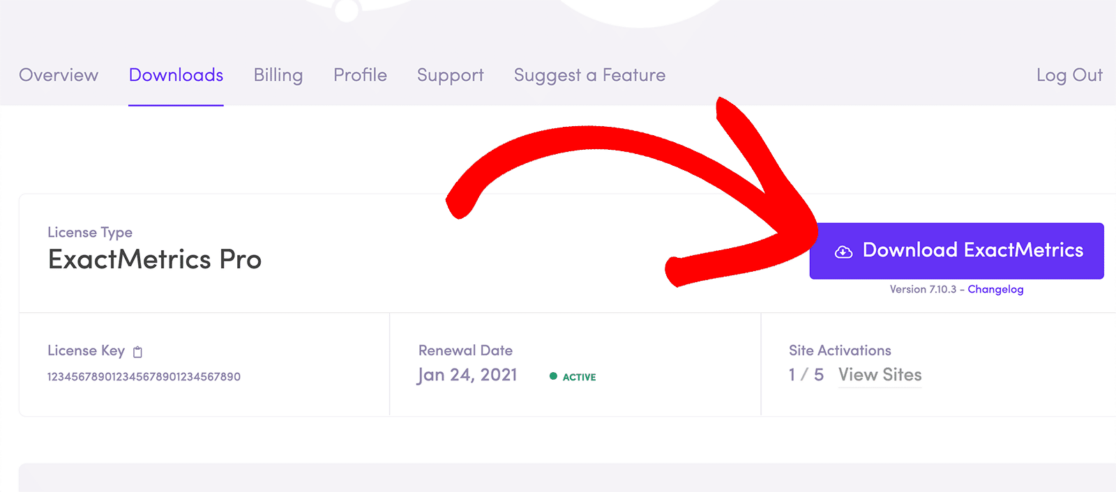
Now you’ll need to install and activate the plugin on your WordPress eCommerce site.

Once that’s done, click ExactMetrics from your WordPress dashboard and press the button that says Launch the wizard!
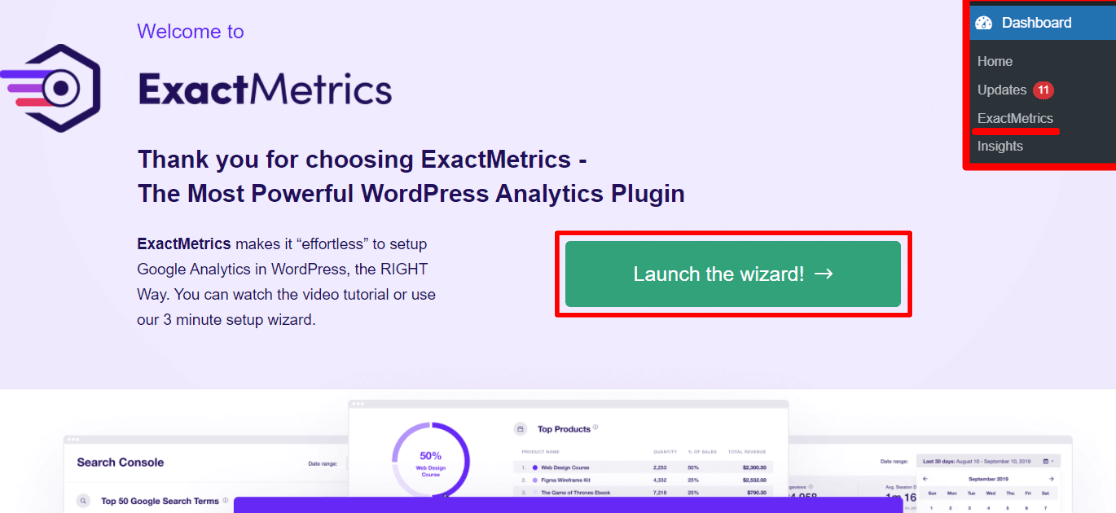
You’ll need to enter your license key, and the setup wizard will take you through the steps to connect your Google Analytics account. Just follow along, and the plugin will automatically add Google Analytics to your site.
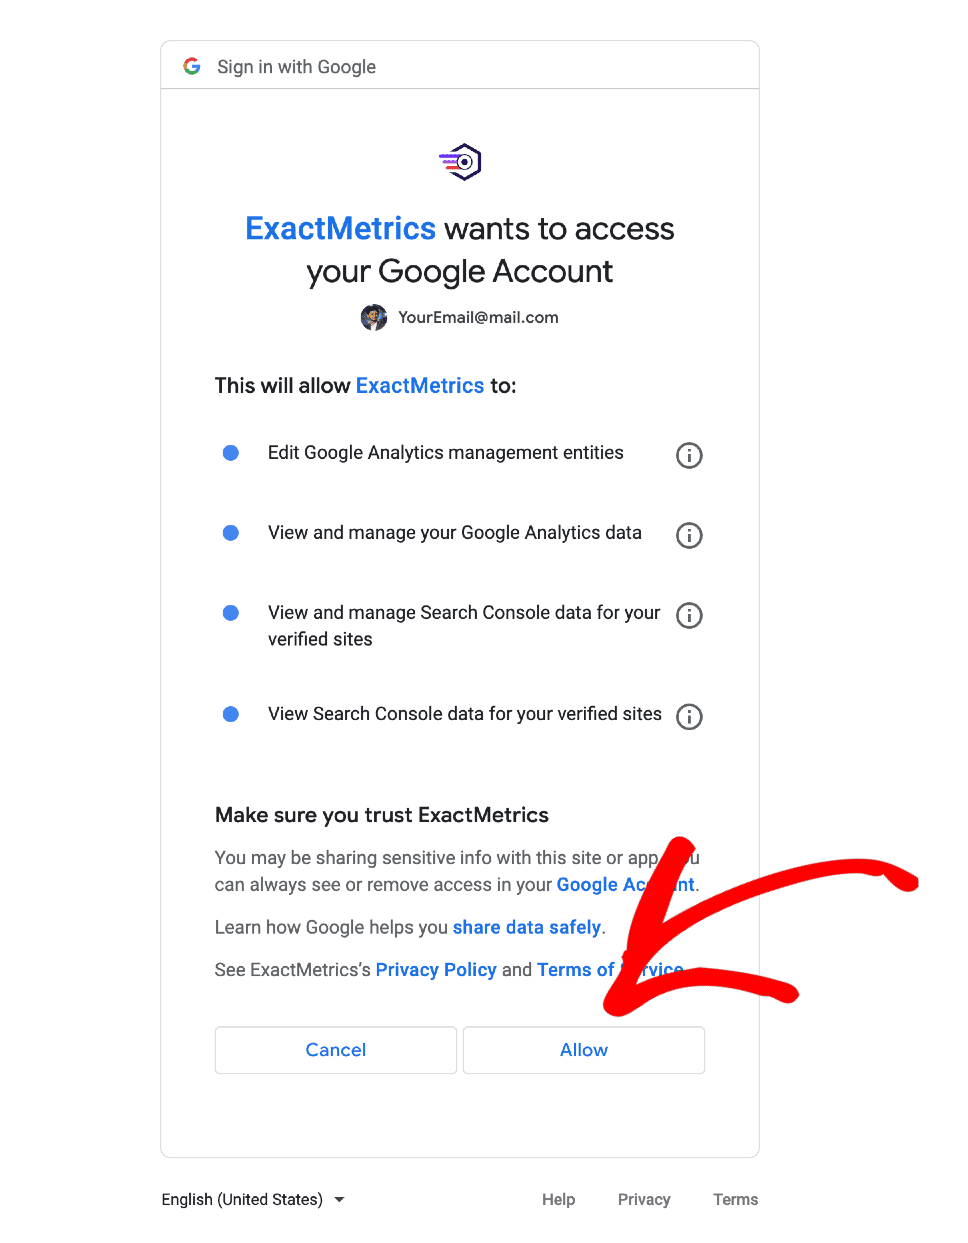
If you need additional help with creating a Google Analytics account and getting started with ExactMetrics, check out our step-by-step tutorial How to Add Google Analytics to Your WordPress Site.
Activate eCommerce Addon
Once you’ve finished the setup process and connected the plugin to your Google Analytics account, you need to install the eCommerce addon.
From your WordPress dashboard, navigate to ExactMetrics » Addons. Find the one titled eCommerce and click Install.
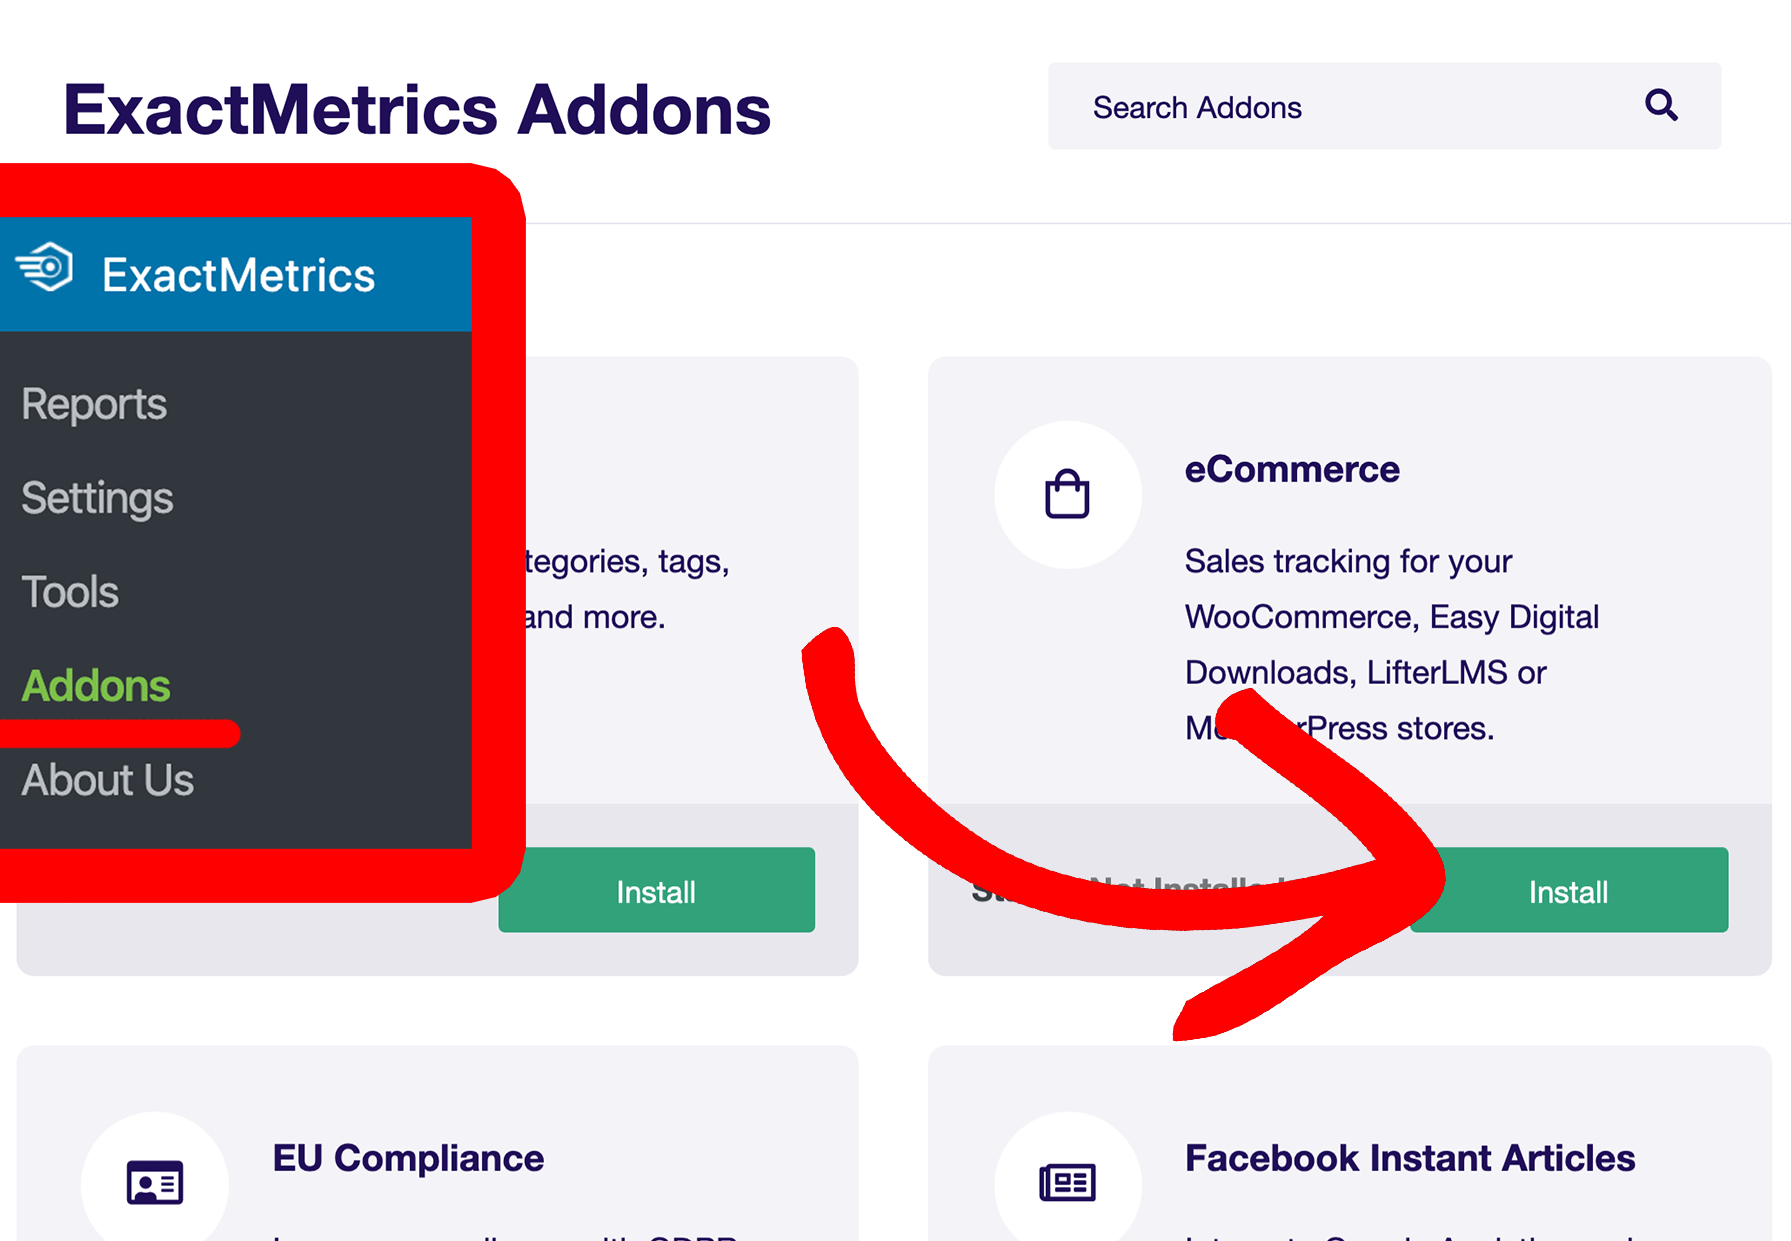
After you click the install button, wait for a few seconds, and the addon will automatically activate.
That’s it!
ExactMetrics will automatically detect your online store and start tracking. No additional setup is required!
Do note that it usually takes between 24 to 48 hours for Google Analytics to gather enough data to show in reports.
Speaking of reports, let’s look at how you can view them in your WordPress dashboard and in Analytics.
How to Track eCommerce in WordPress
With ExactMetrics, you can view eCommerce reports without having to leave your website or switch between tabs. It presents all your important data in clean, easy-to-understand reports inside your dashboard.
You can view them by navigating to ExactMetrics » Reports and then selecting the eCommerce tab at the top.

Go ahead and click Overview.
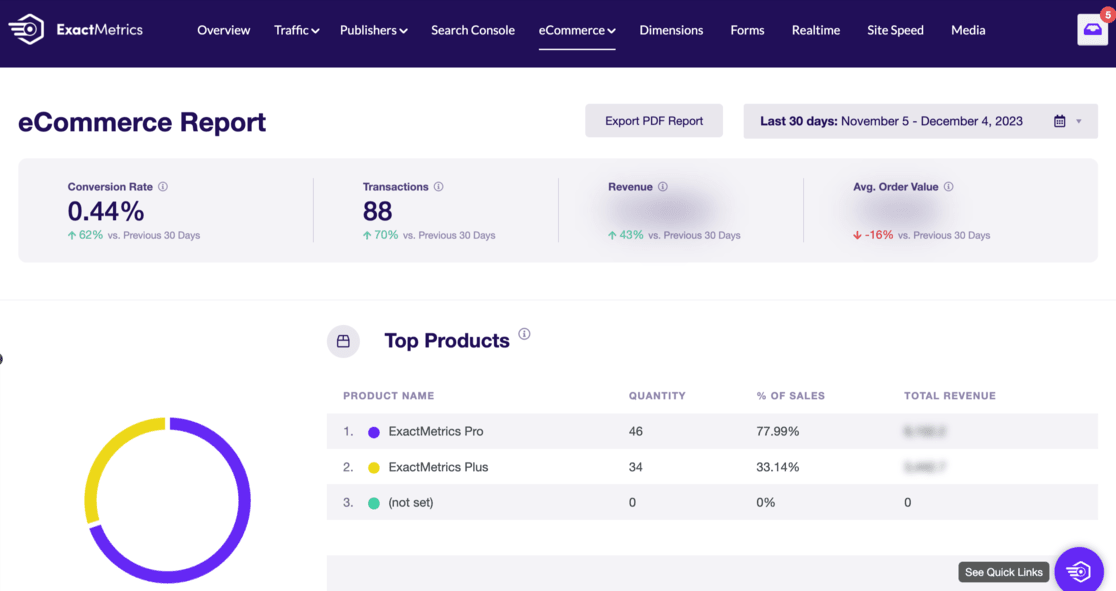
Here, it shows the Conversion Rate, number of Transactions, Revenue, and Average Order Value for your online store. Using the date picker in the top right, you can edit the date range. If you want to share the report with others, simply click the Export PDF Report button.
You’ll also see your Top Products report. This shows which items people purchase the most. For each product, you can see the quantity sold, its percentage of total sales, and the total revenue.
Now, if you scroll down, you can see how many add or remove-from-cart events took place, the percentage of first-time purchasers, and your abandoned checkout rate. 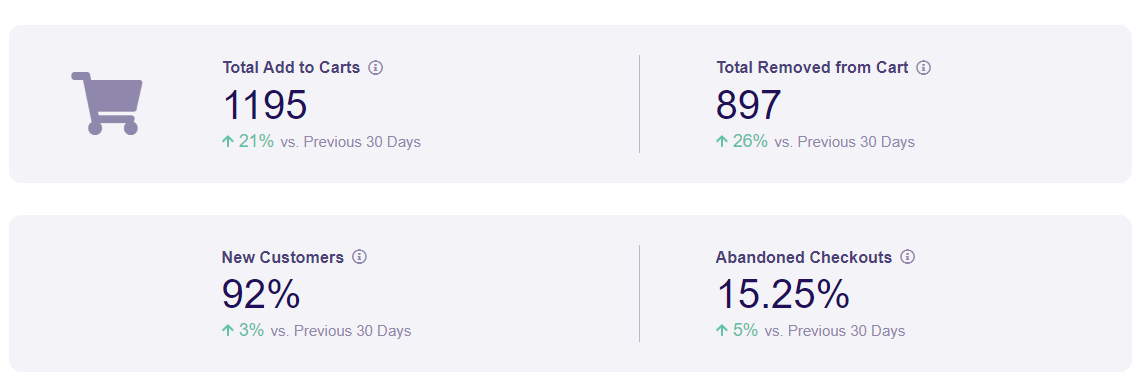
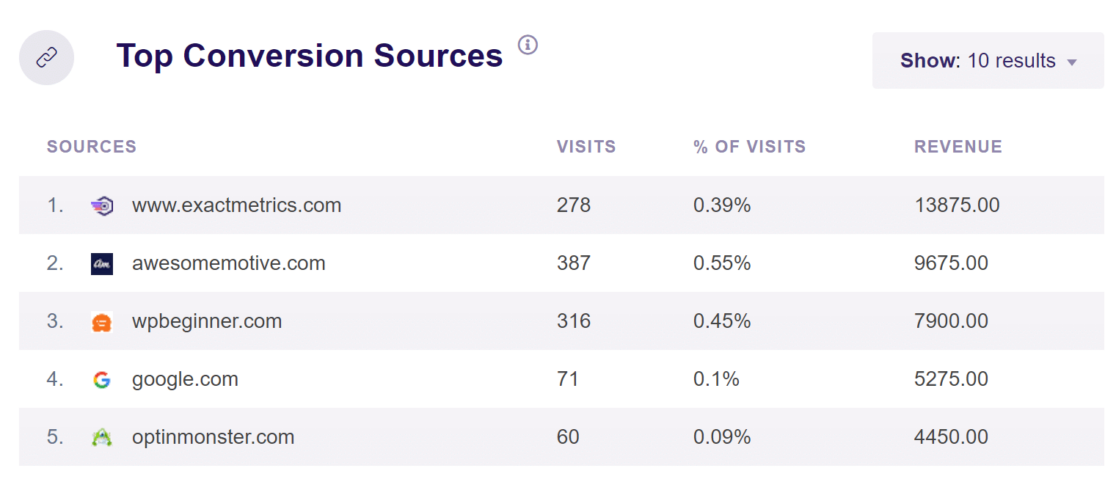
Below that, you have your Top Conversion Sources report. These are sources that send converting website traffic to your store.
Try using this data to create exclusive discounts for customers from these sources, or look at similar websites for promotion!
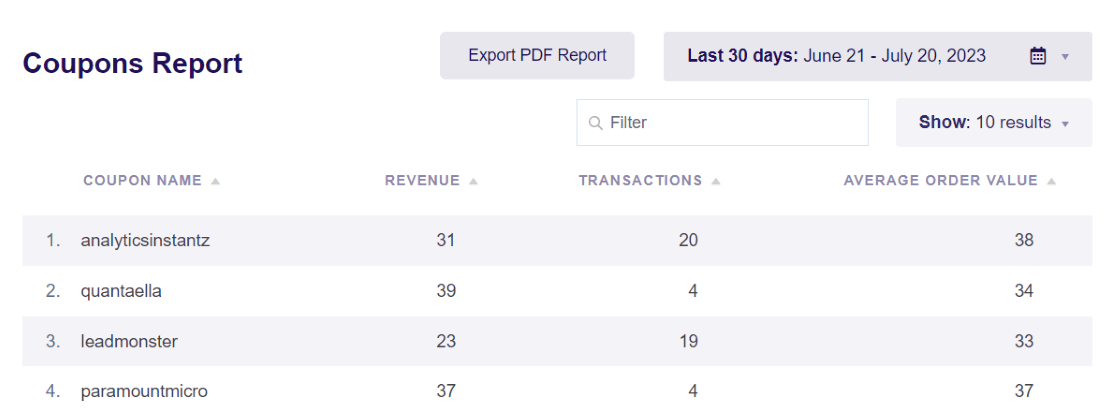
Do you use coupons for your eCommerce store? If so, you can easily track which coupon campaigns are performing well.
Click eCommerce » Coupons in ExactMetrics to view your coupons report.
You’ll see the top used coupon codes on your eCommerce site along with revenue, number of transactions, and average order value.
Want to know how many people are abandoning their carts and for which products? Just click eCommerce » Cart Abandonment to see exactly that:
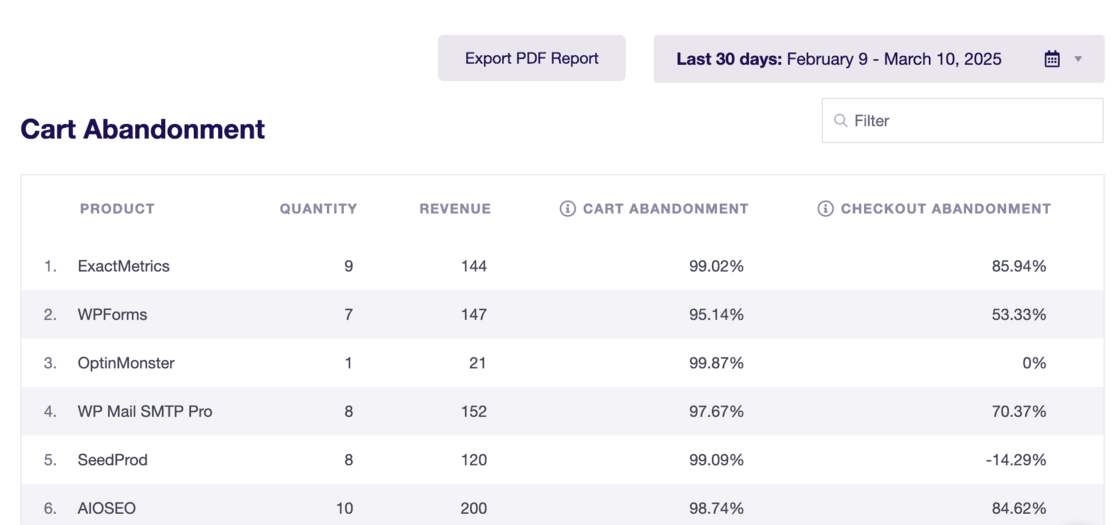
Use this report to:
- Spot products with issues
- Analyse lost revenue
- Make adjustments to boost sales
If you want to see more data for your eCommerce reports, just click the link on your eCommerce overview report that says View Full Top Products report.
This will take you to your Google Analytics property, where you can explore your reports.
How to Track eCommerce in Google Analytics
Now, let’s see how to view eCommerce tracking data from your Google Analytics account.
First, click Reports » Monetization » Overview.
In this report, you can see your revenue trend by day, purchases by day, purchases by item name, purchases by item list, and more.

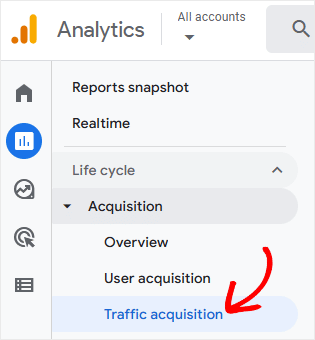
If you want to see Google Analytics eCommerce sales and purchase revenue organized by traffic channels, go to Acquisition » Traffic Acquisition.
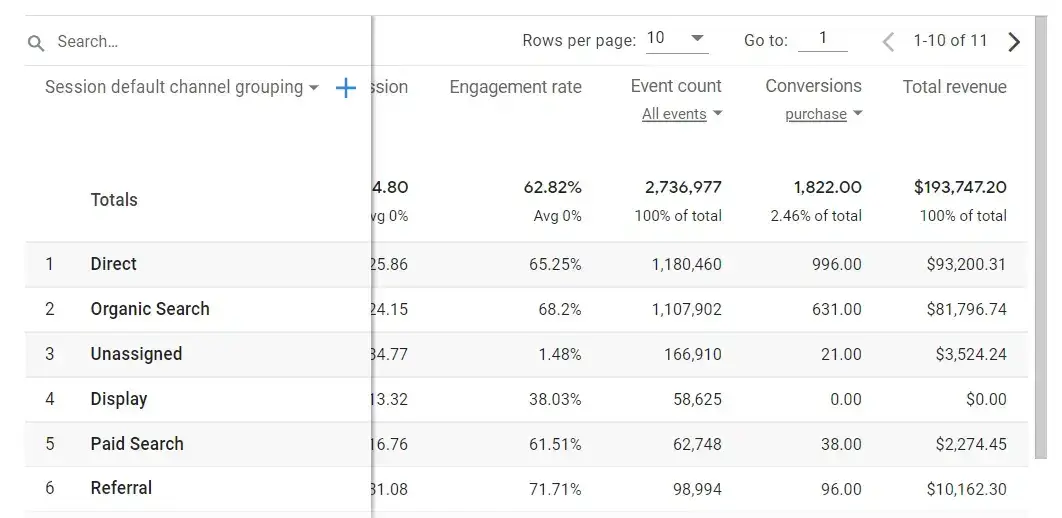
Scroll down to the table and then scroll sideways to find the column for Key events (formerly conversions). Click the All events link and select purchase.
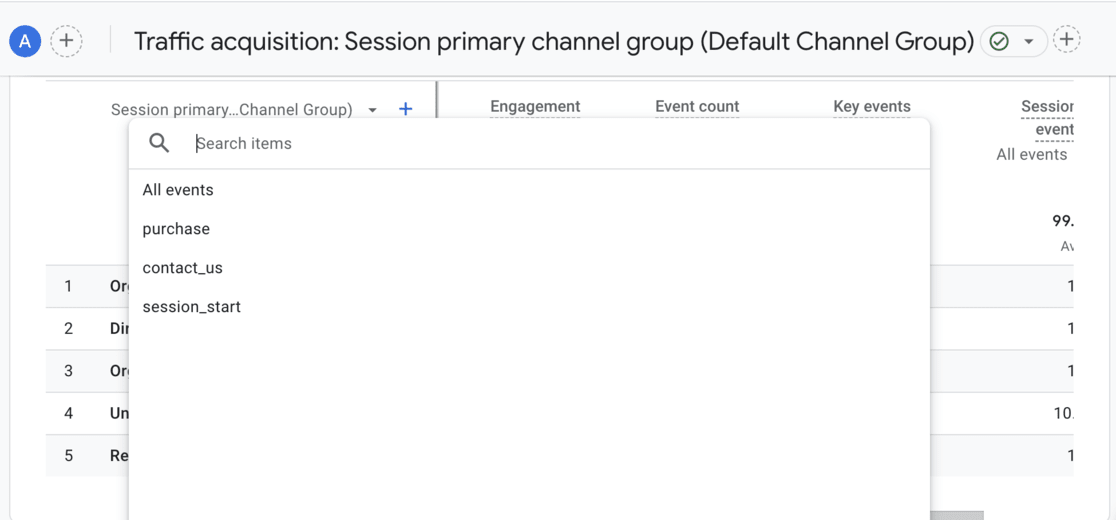
Your table will now display purchases and revenue by traffic channel.
For example, in the table below, I can see that referral traffic has contributed to 96 eCommerce sales and around $10k in revenue, and organic search traffic has brought in over 600 purchases.
However, paid search has only contributed to 38 purchases and a little over $2k in revenue.
With that, you’ve made it to the end of the tutorial!
With the help of ExactMetrics, you can start tracking your eCommerce store in a matter of minutes. Measure performance, optimize for conversions, and grow your online business faster when you have the metrics you need to make data-driven decisions.
Start Tracking Your eCommerce Store Today!
I hope you enjoyed learning how to set up Google Analytics eCommerce tracking for your WordPress store.
Want to learn how to track your Google Analytics marketing campaigns next? Check out Tracking Google Analytics Campaigns (How-To Guide).
Don’t forget to follow us on X and Facebook to see all the latest reviews, tips, and Google Analytics tutorials.


