Are you wondering how to find broken links in Google Analytics and how to fix them?
When people visit your website, they hope to find what they’re looking for without any hassle, and 404 errors lower the user experience and can harm your website’s SEO. The good news is that you can track down these 404 errors and broken links efficiently with Google Analytics.
In this guide, we’ll walk you through the steps to identify 404 errors and how to fix broken links easily.
Why Fixing 404 Errors and Broken Links Is Important
Keeping your website in top shape is crucial, and fixing broken links plays a big part. These errors can be more than just a minor annoyance since they can impact your website in several ways.
Let’s look at why it’s essential to fix these issues:
- Improves user experience: Visitors get frustrated when they encounter a 404 error. Fixing these ensures a smoother, more enjoyable user experience.
- Boosts search engine ranking: Search engines favor websites without broken links. By fixing 404 errors, you can improve your site’s search ranking.
- Maintains your site’s reputation: Broken links and errors can make your site look neglected and unprofessional to search engines and visitors.
- Helps keep visitors on your site: When users hit a dead end, they might leave your site. Fixing these errors keeps them engaged and exploring.
- Prevents potential loss of sales: For e-commerce sites, a 404 error can mean a lost sale. Ensuring all links work can help keep a smooth sales process.
- Aids in accurate analytics tracking: Broken links can mess with your website analytics, making it hard to understand user behavior accurately.
By addressing 404 errors and broken links, you’re fixing a technical glitch and enhancing your website’s overall quality, performance, and effectiveness.
How To Find 404 Errors in Google Analytics
Now that we understand why fixing 404 errors is essential, let’s learn how to find them in Google Analytics.
One of the simplest methods is by using ExactMetrics.
ExactMetrics is a game changer when it comes to monitoring broken links directly through Google Analytics, and the best part is that it doesn’t require any modifications to your website.
ExactMetrics stands out as the best premium Google Analytics plugin for WordPress users. It seamlessly integrates your WordPress site with Google Analytics, allowing you to access vital data right from your WordPress dashboard.
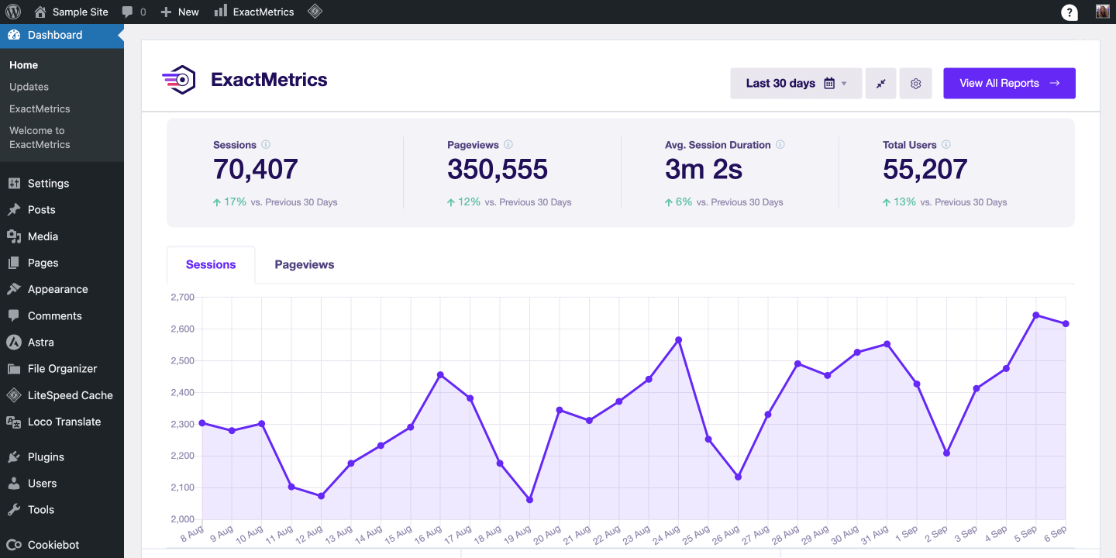
The ExactMetrics dashboard is user-friendly and offers a variety of advanced tracking features. With just a few clicks, you can enable event tracking, video play tracking, eCommerce tracking, and much more.
Furthermore, ExactMetrics enhances the information you receive about 404 errors in Google Analytics. This enriched data simplifies identifying and resolving these errors, ensuring your website runs smoothly and efficiently.
Let’s explore how to use ExactMetrics to keep your website link error-free and performing at its best.
Step 1: Install ExactMetrics
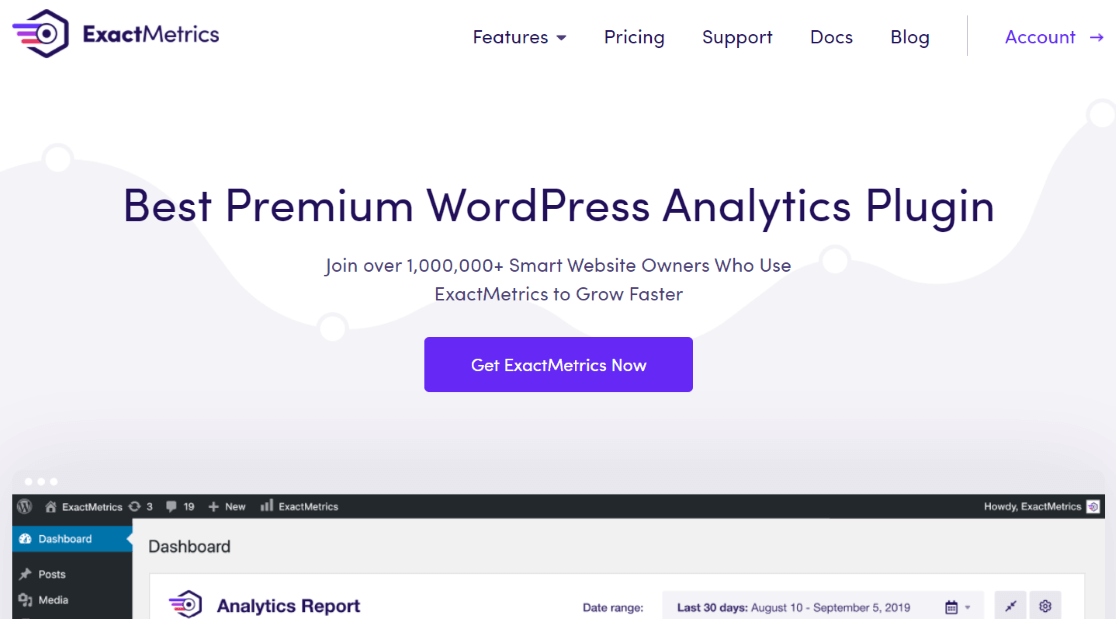
First, go to the pricing page of ExactMetrics and get the Pro level or above of the plugin.
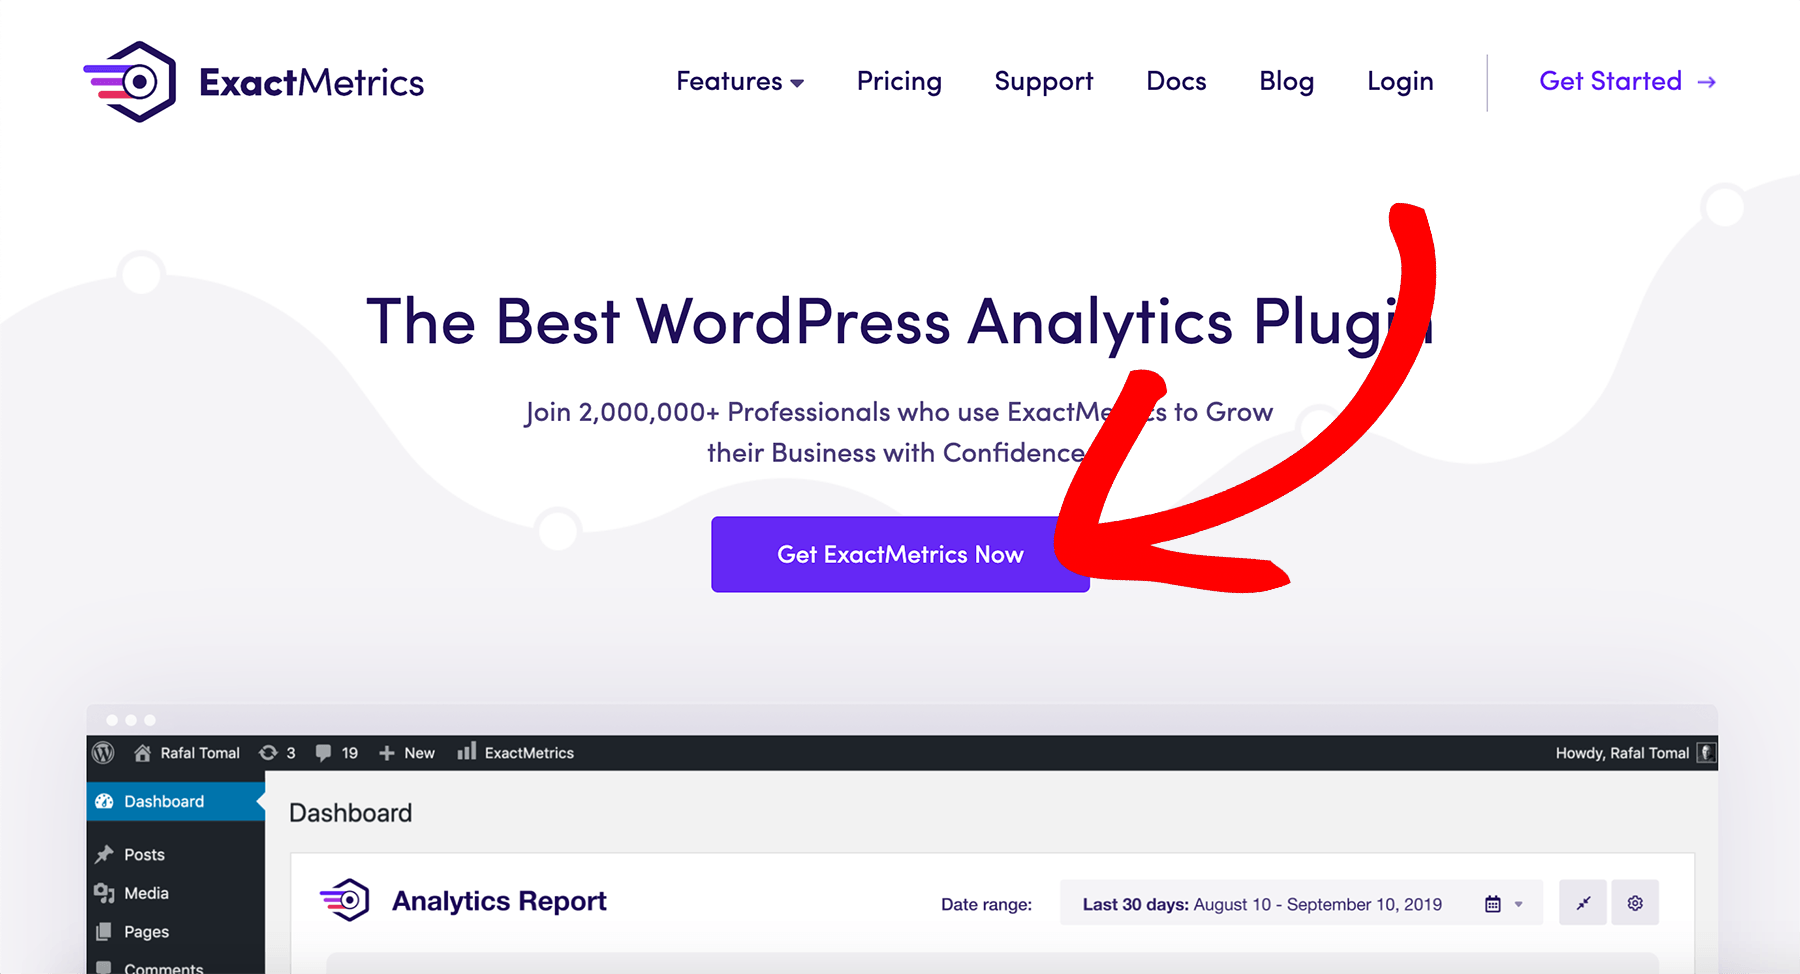
Once your purchase is complete, you can download the zip file from your account.
Now, you must upload and activate the plugin on your website to start using ExactMetrics.
Step 2: Connect Google Analytics to ExactMetrics
Next, connect Google Analytics to your website using ExactMetrics by following the setup wizard.
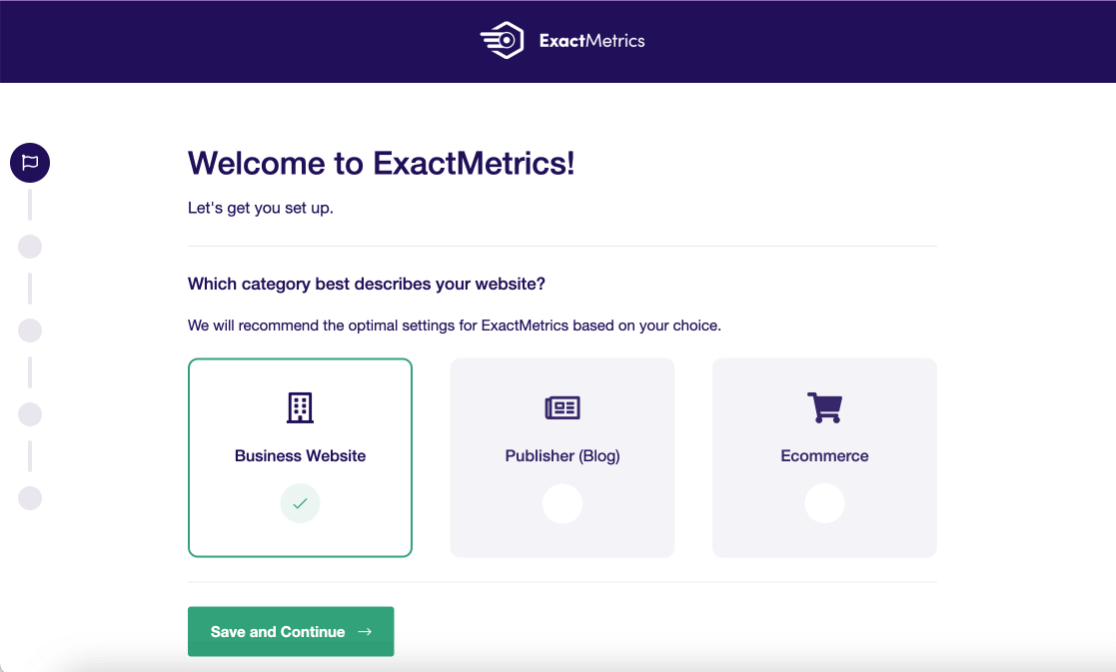
This offers a variety of conversion tracking options, and it also takes care of automatically embedding your Google Analytics code onto your website.
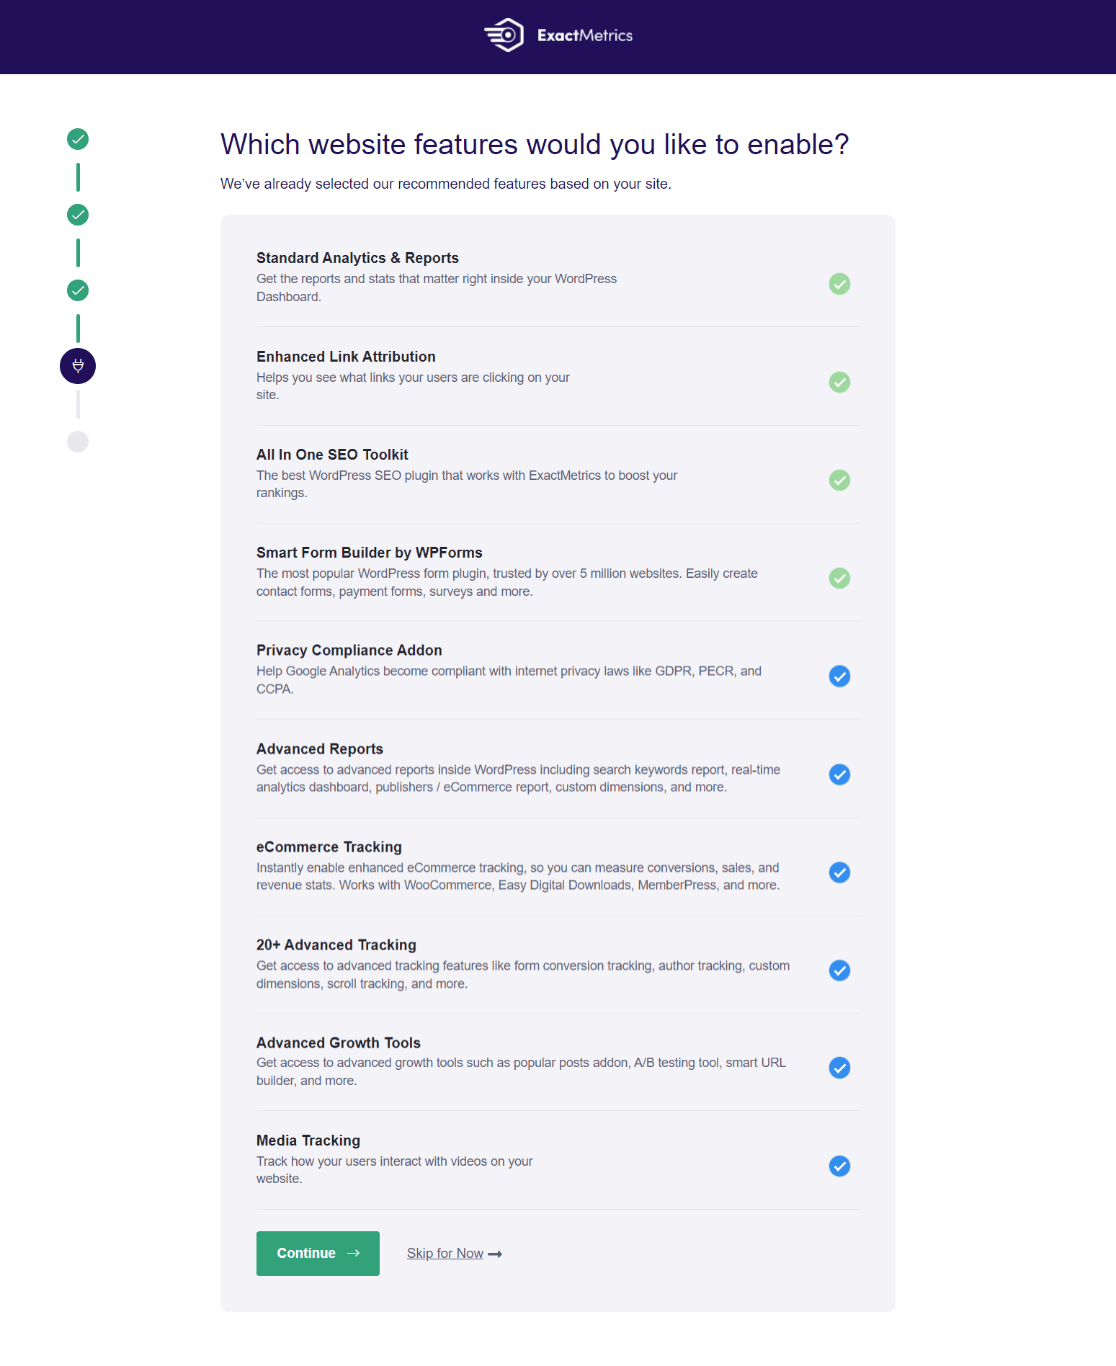
You’ll need to permit ExactMetrics to access your Google Analytics data.
Check out our guide on integrating Google Analytics with WordPress for a more detailed walkthrough.
Step 3: Create a 404 Error Report in Google Analytics
Locating 404 errors in Google Analytics involves setting up an Exploration report. While this might seem daunting initially, the good news is that once you create this report, it’s saved for future use, so you won’t have to set it up again.
First, navigate to the Explore tab and select a Blank report to begin:
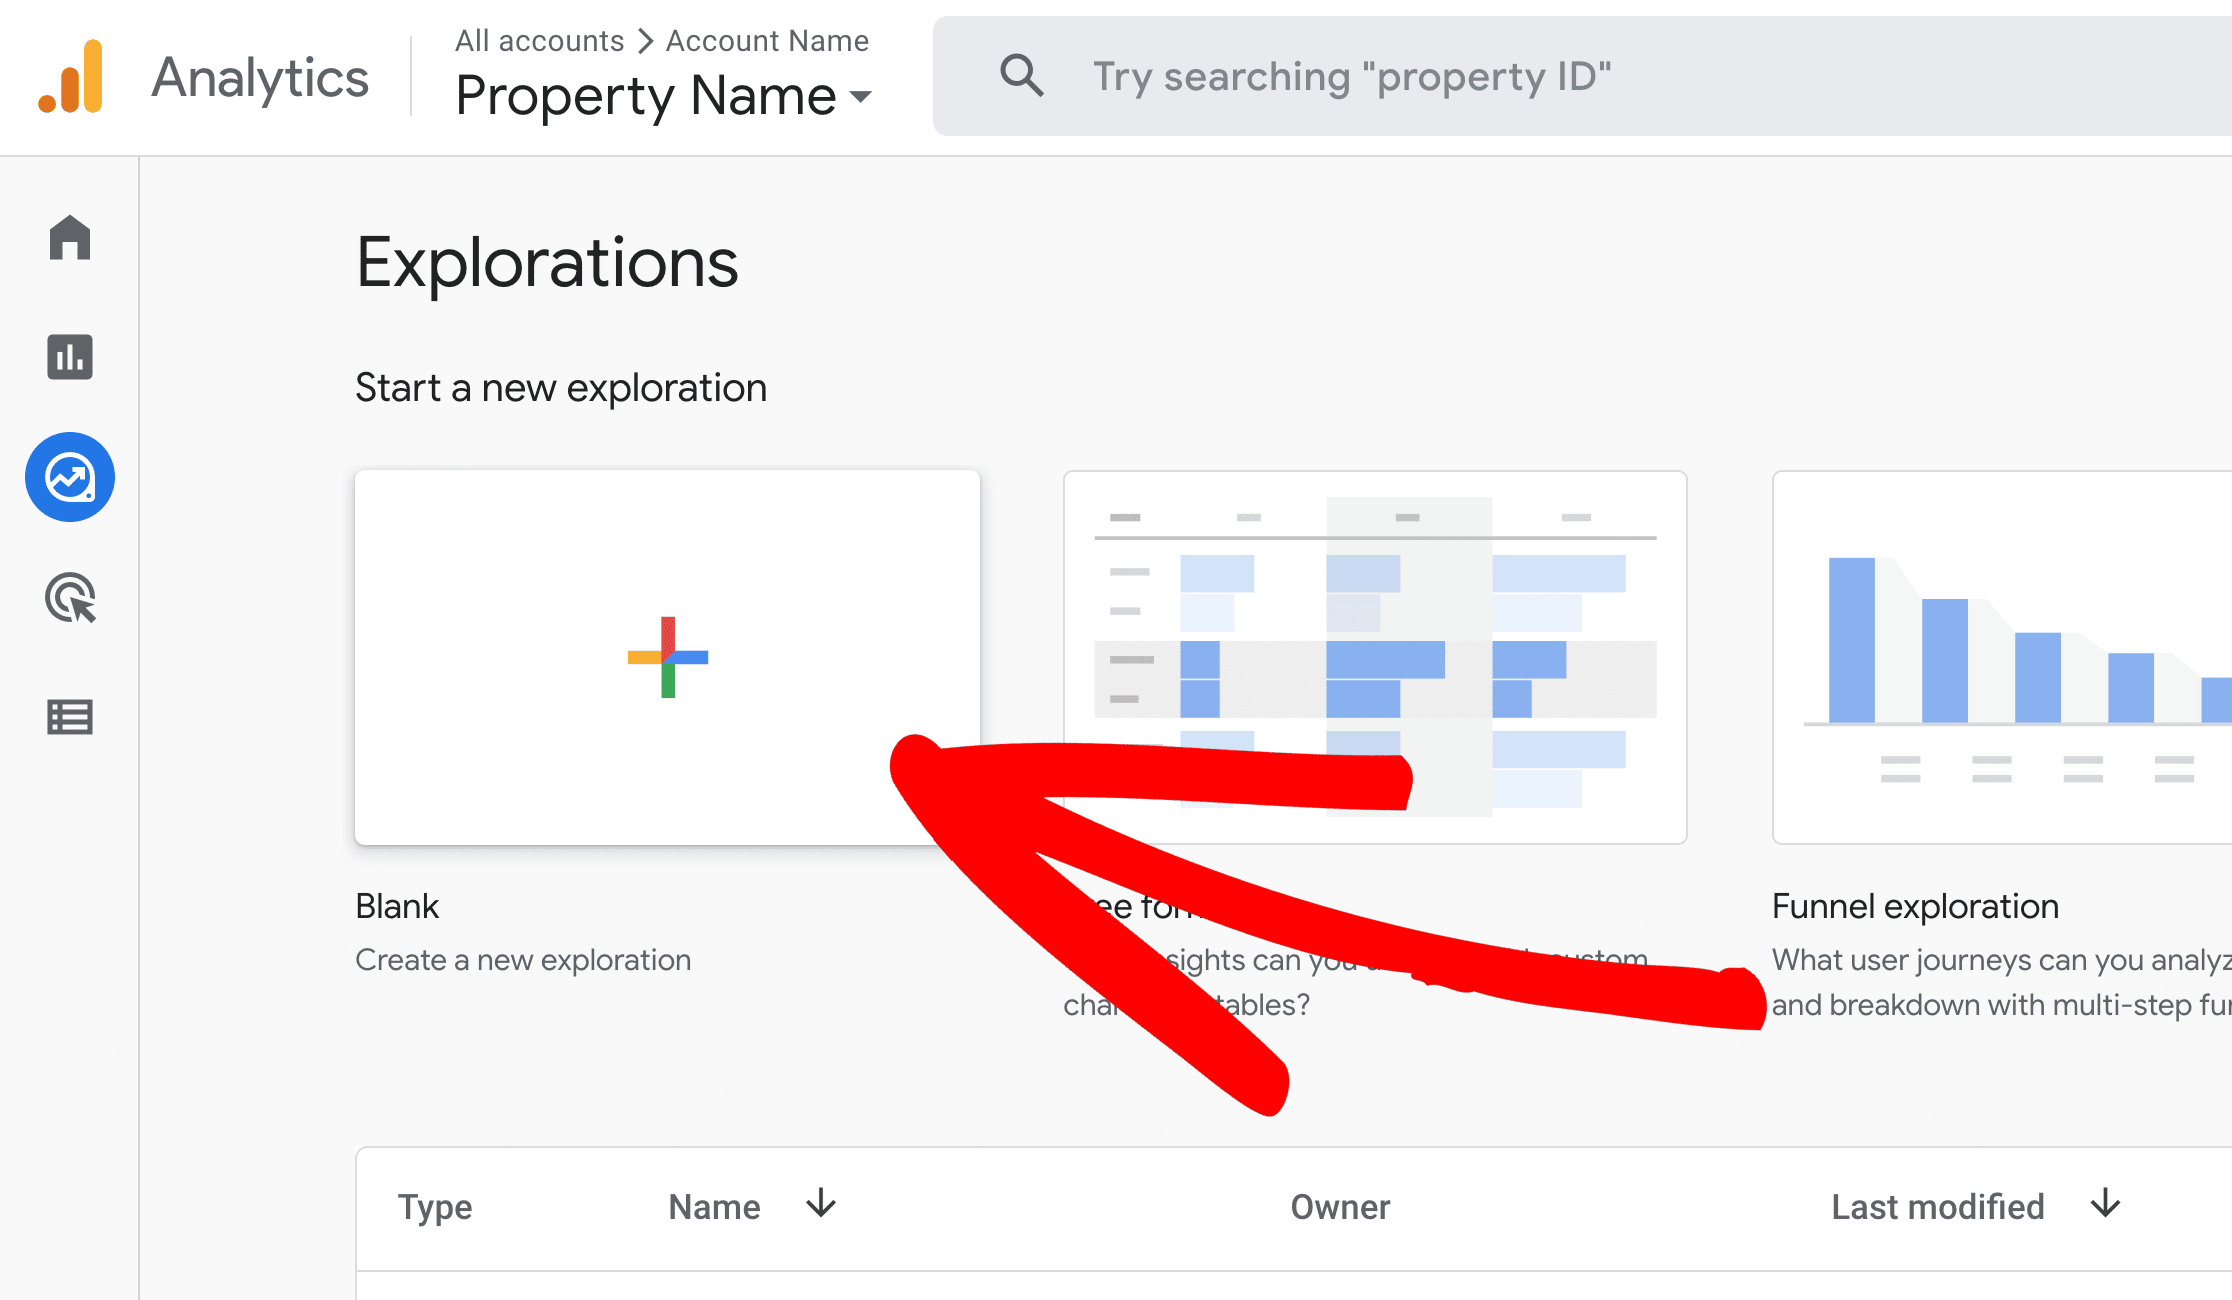
You can name your report something like ‘404 Error Report’ for easy identification.
Next, in the Dimensions box, click the plus sign to add new dimensions:
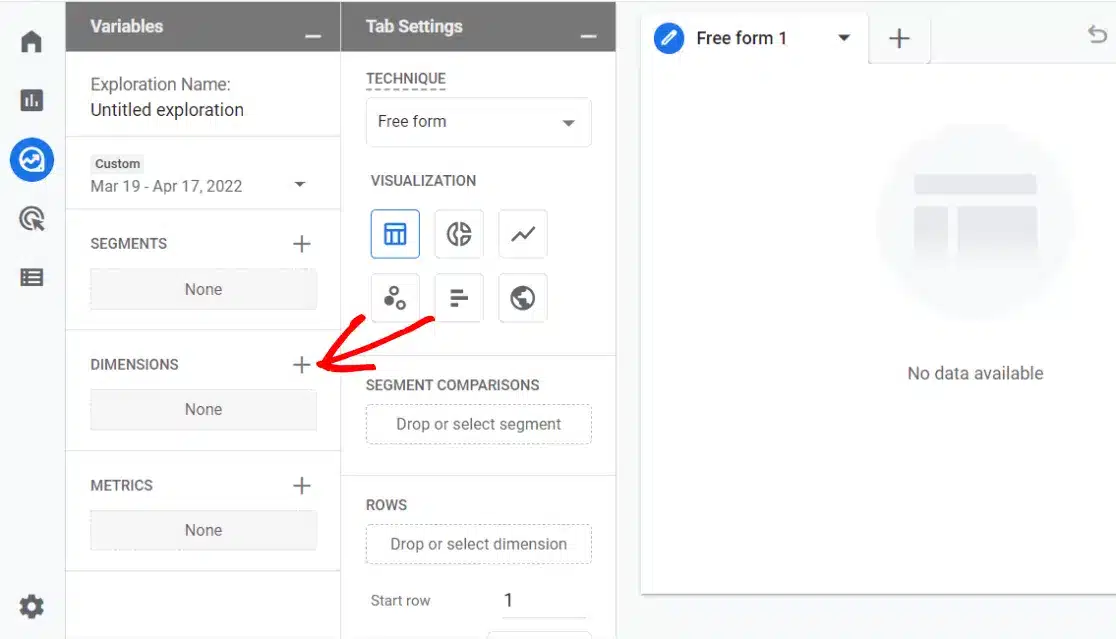
You want to find and add the Page Title and Page path + query string dimensions.

After that, move to the Metrics box and click the plus sign:
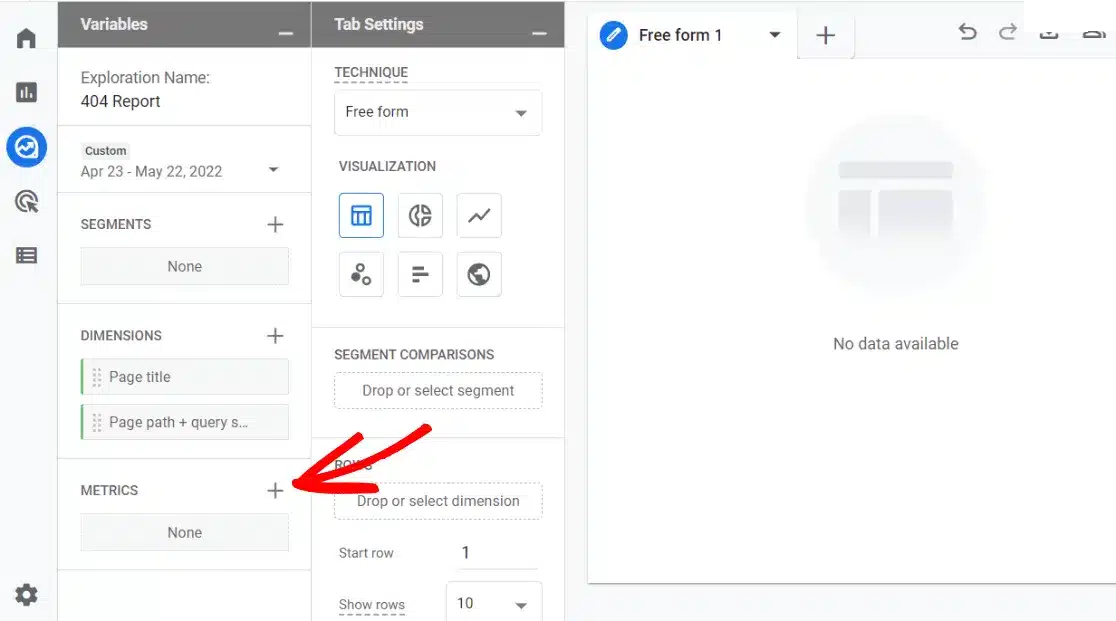
Look for the Sessions metric and add it to your report:
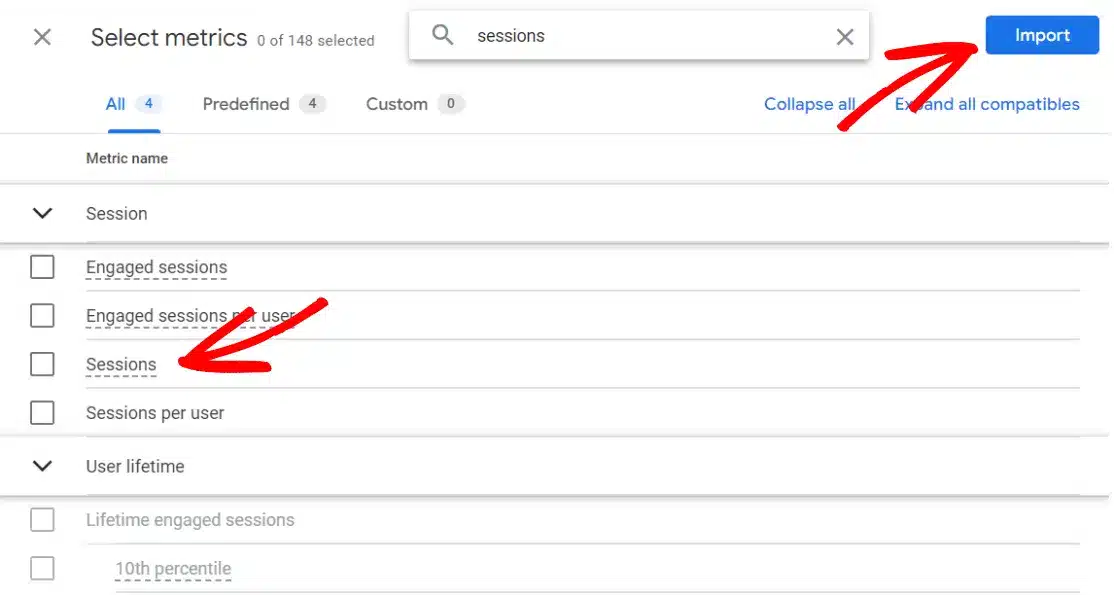
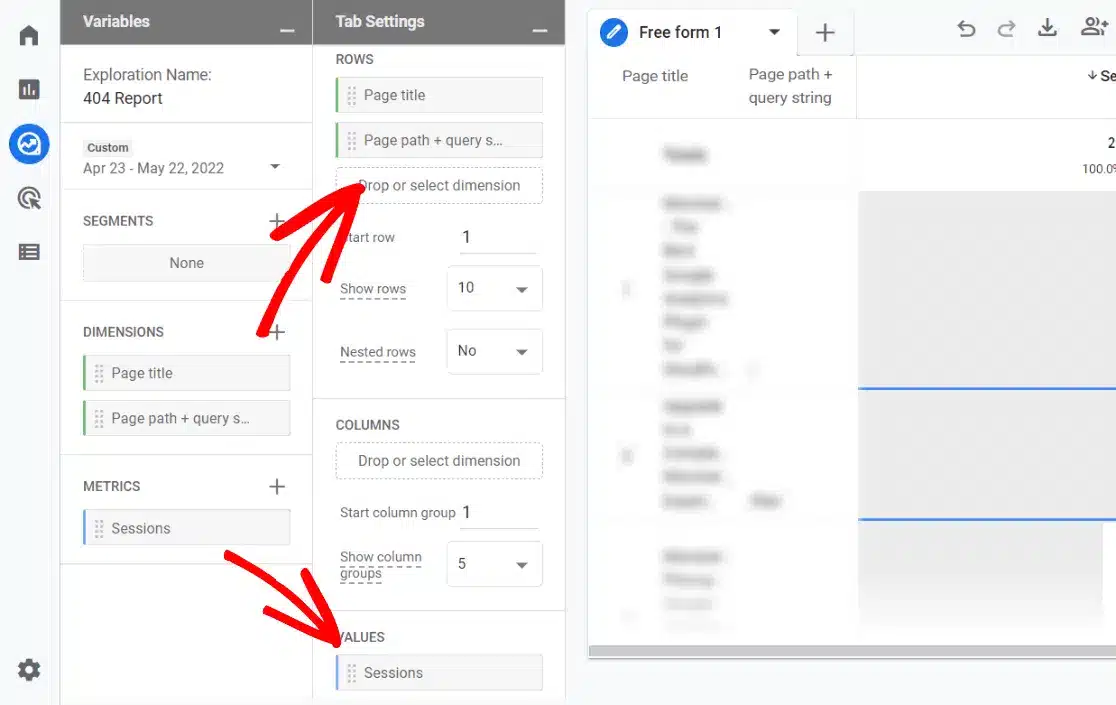
Then, drag both Dimensions you selected into the Rows box and place the Sessions metric into the Values box:
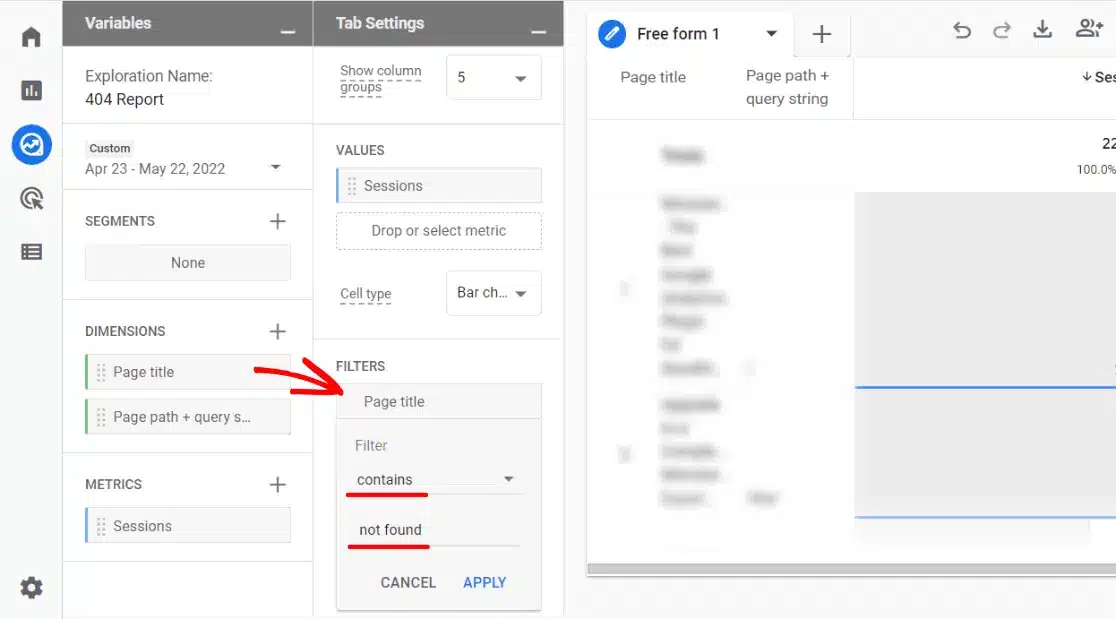
Now, drag the Page title metric from the Dimensions box into the Filters box. Set the filter to Contains and input the title of your site’s 404 page:
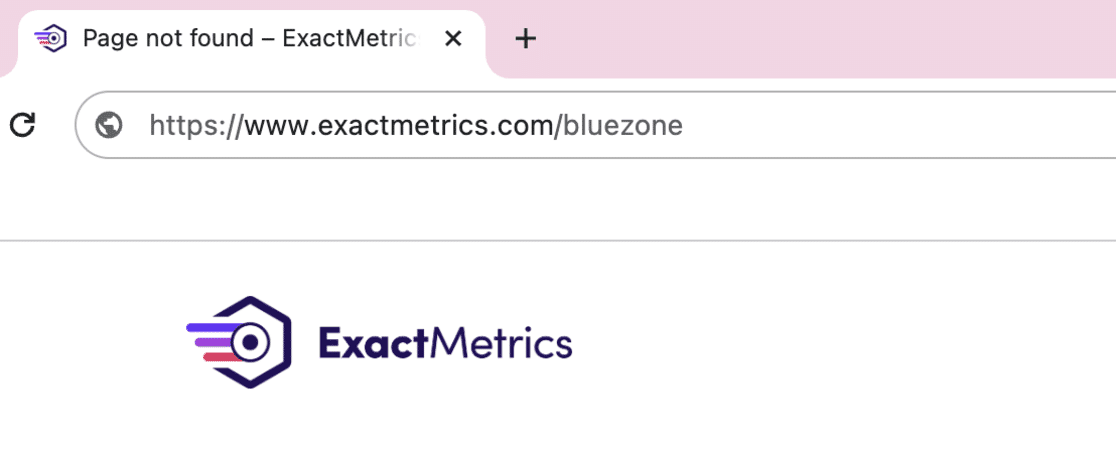
If you need clarification on your 404 page title, try entering a non-existent URL on your site (like www.yoursite.com/exampleword) and note the title in your browser tab. In our case, it’s ‘Page not found’:
Once you apply your filter, you’ll see a report of the 404 errors on your site within your selected timeframe.
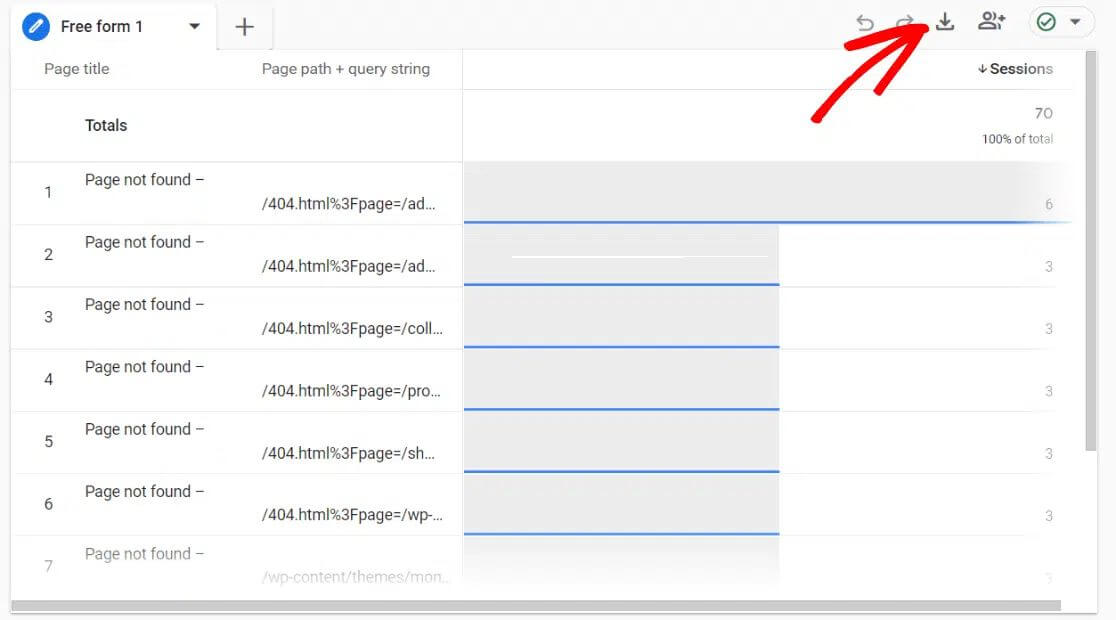
However, you might notice that the Page path + query string row is cut off. Download the report data by clicking the download icon to view complete URLs.
Typically, URLs in the report will look like this:
/404.html?page=/error-page-url-slug/&from=http://yoursite.com/page/
This structure helps you understand the 404 error and how to fix it:
The URL causing the 404 error appears after ‘?page=.’
- For instance, the error URL might be http://yoursite.com/error-page-url-slug/
The URL linking to the error page is shown after ‘&from=.’
- In the example, the error page is linked from http://yoursite.com/page/.
If there’s no URL after ‘&from=,’ the error likely came from a direct visit, like someone typing in the URL manually.
How to Fix Broken Links
Once you’ve used ExactMetrics and Google Analytics to find broken links on your site, the next step is fixing them.
The best way to do so is to redirect them using AIOSEO.

Redirecting a link means that when someone clicks on it, they’re automatically taken to a different page. This is particularly useful if the original page is permanently moved or deleted.
AIOSEO is a top-notch SEO plugin that helps you optimize your content for search engines, assists in SEO audits, enhances your internal link strategy, allows you to redirect and fix broken links and much more quickly.
Step 1: Install AIOSEO
First, visit the pricing page and get whatever plan suits your needs. You’ll need the Pro plan or above for the Redirection Manager.
Next, you must download the zip file and install and activate the plugin on your WordPress site.
If you need help with how to do that, read this guide on installing a WordPress plugin.
After you’ve installed the AIOSEO plugin, the setup wizard will take you through a step-by-step guide to connect it to your account.
If you have trouble, check out this article on setting up AIOSEO correctly.
Step 2: Redirect Your Broken Links
Now that you’ve set up AIOSEO, you’ll see a tab for the plugin in your WordPress dashboard.
Click on it, navigate to Redirects, and activate redirects by clicking the button.
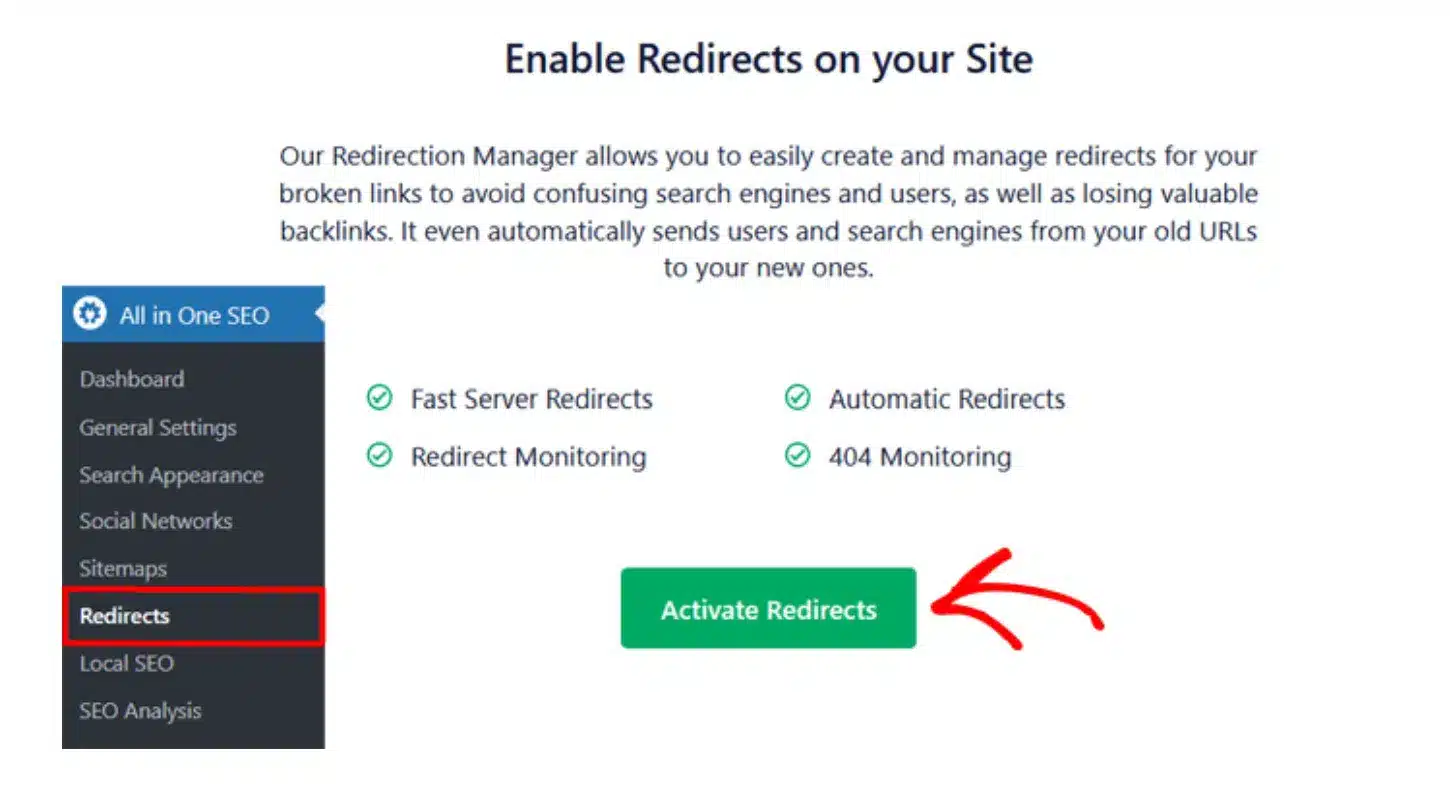
Now, you have the Redirects tab available.
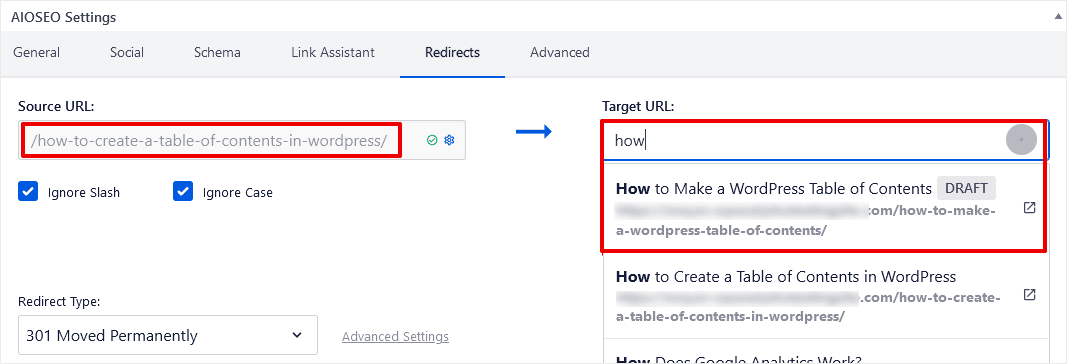
In the Source URL field, you should put the broken link. In the Target URL field, set the URL of the page you would like to redirect to.
Remember to click the Add Redirect button to save your changes.
Go through each broken link you found using ExactMetrics and Google Analytics, and redirect them to the right page or a new page entirely.
For instance, maybe a page was moved or deleted. In this case, you should redirect the URL to another page so visitors don’t hit a dead end.
Or maybe you had a typo in your URL and fixed it. In such a case, the old URL should be redirected to the updated one.
And that’s it! You have now successfully redirected and fixed broken links on your website.
Bonus: Another excellent tool by AIOSEO is its Broken Link Checker plugin, designed specifically for WordPress users.
The Broken Link Checker plugin scans your site for 404 errors and broken links and lets you easily fix them.
After you’ve downloaded and successfully installed the plugin, you’ll be able to see broken links, redirects, and dismissed links in your dashboard.
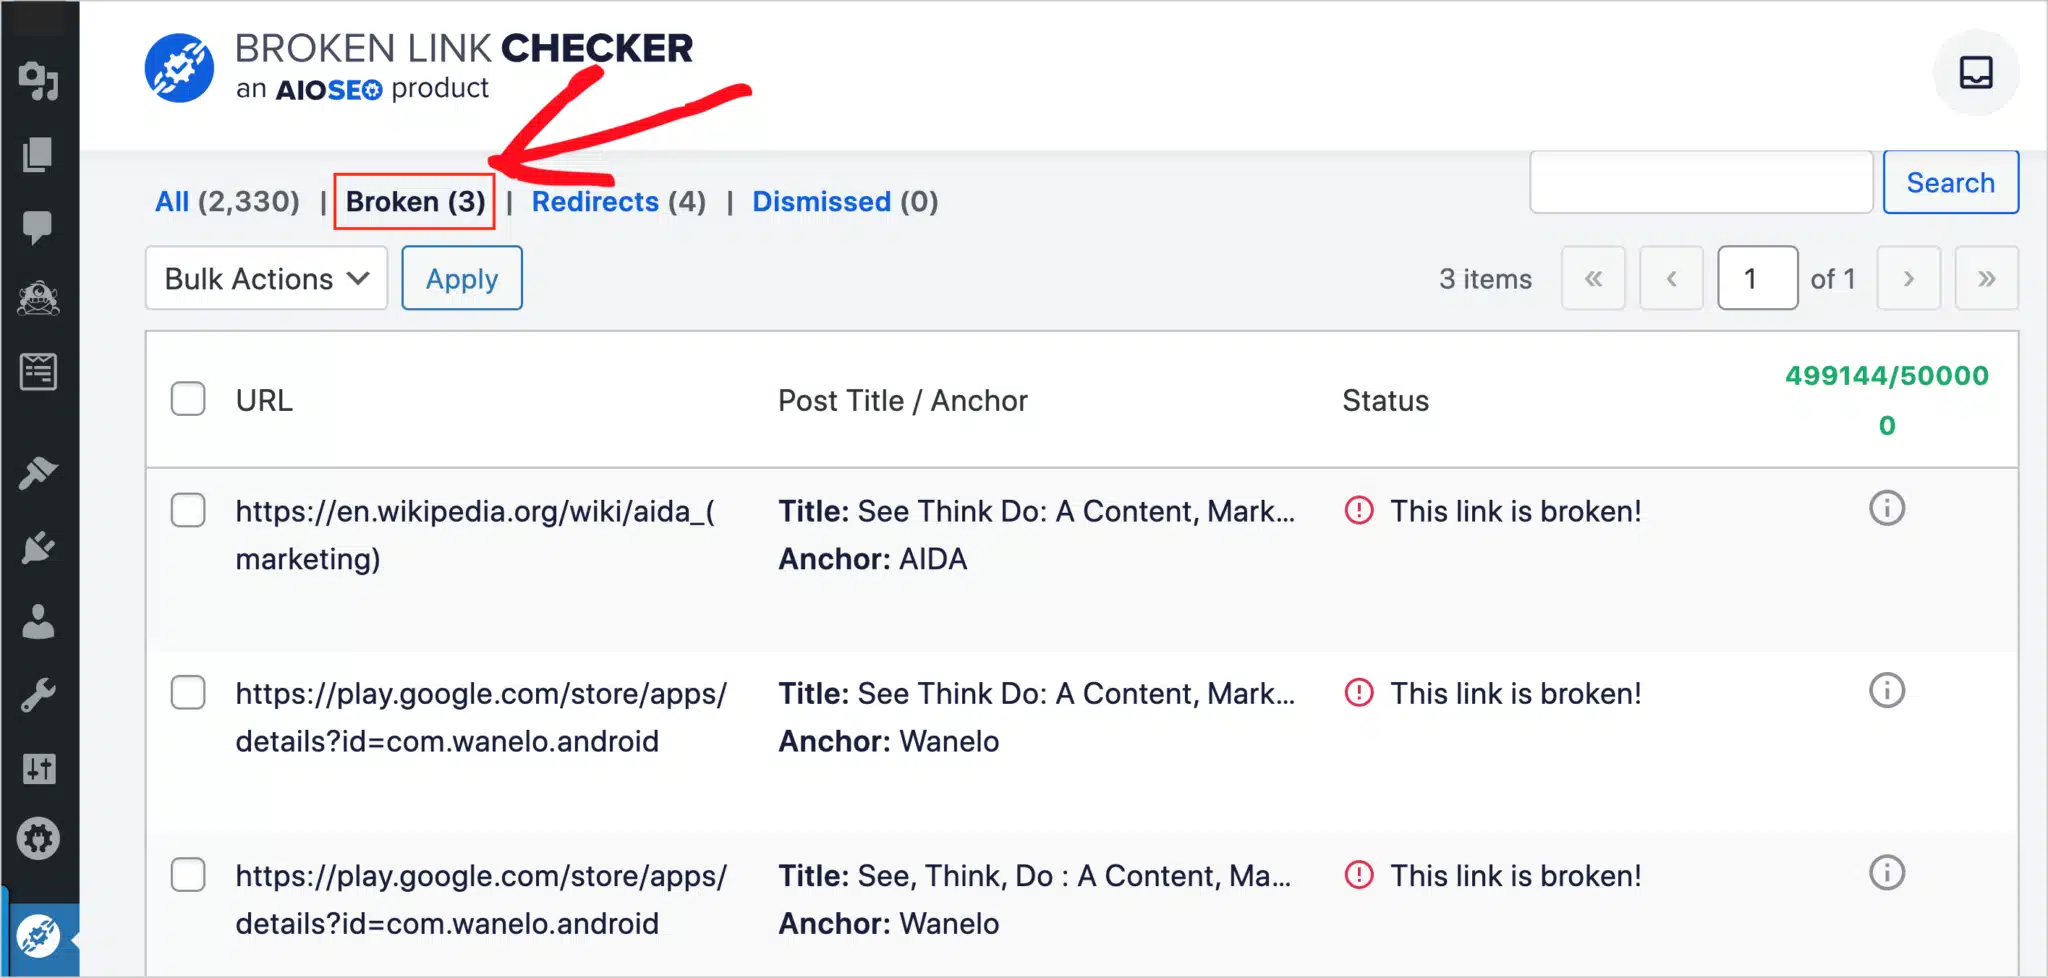
From there, you can easily edit broken links and update them to new working ones. The plugin also lets you unlink broken links in a few easy clicks.
The Broken Link Checker plugin is a good option for anyone looking to update broken links within their domain quickly.
However, note that the plugin, compared to using Google Analytics and ExactMetrics, only finds broken links within your website and does not detect links from outside domains linking to you.
To learn more, read this guide on using Broken Link Checker.
We hope you liked this article on how to find 404 errors and fix broken links in Google Analytics. If you enjoyed reading this, maybe you’ll also want to read:
- How to Set Up Custom Google Analytics Alerts in GA4
- 6 Best Free Website Traffic Checker Tools to Track Any Site
- 12 Key Google Analytics Metrics Every Business Should Track
And don’t forget to follow us on Twitter and Facebook for the latest Google Analytics tutorials.


