Do you accept donations on your website? If so, you’ll definitely want to set up donation tracking with Google Analytics to get a better idea of what drives donations and what you can do to increase them.
Tracking donations in Google Analytics can give you lots of valuable insights into how your donation campaigns are going what you need to do to improve your donation rate. It ultimately helps you meet fundraising goals faster and grow your nonprofit or online business.
In this article, we’ll show you the easy way to set up donation tracking for WordPress and get analytics for your nonprofit, charity, or fundraising website in only a few steps.
Why Track Donations in WordPress?
When you set up donation tracking for your website with Google Analytics, you can gain insights into your traffic and overall donations that will give you ideas for how to improve your campaigns. With donation tracking set up, you’ll be able to see:
- Average donation amount
- Conversion rate
- Top conversion sources (what sites visitors are referred from when they donate, like Facebook)
- Time to purchase and sessions to purchase (how many times did a person visit your site before donating?)
- Which forms worked best and brought in the most donations
- … And lots more
Best Donation Plugin for WordPress
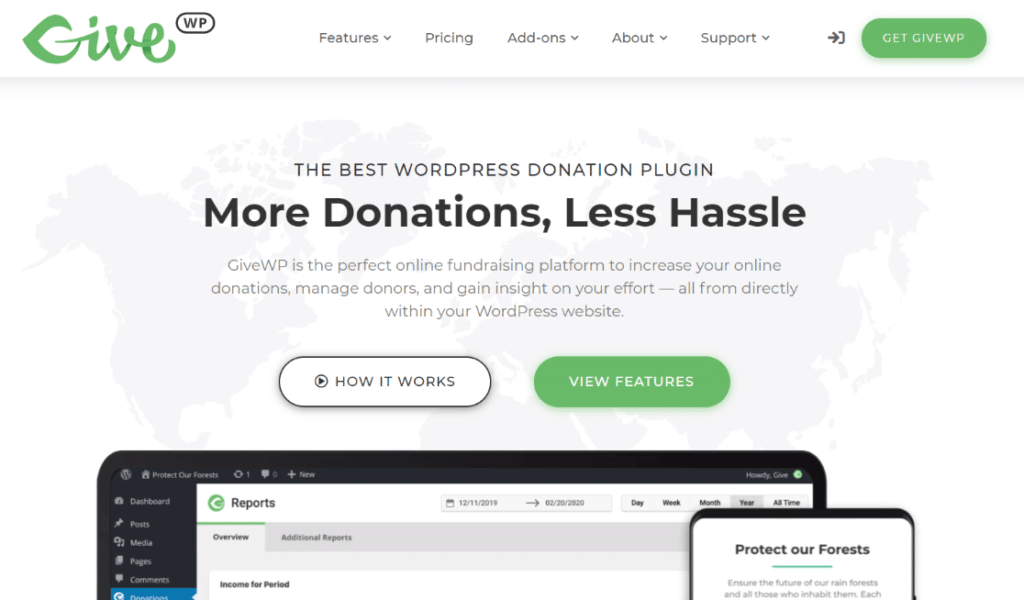
If you don’t yet have a plugin for gathering and managing your donations with WordPress, we highly recommend GiveWP.
Not only does ExactMetrics integrate with GiveWP, but the plugin also has 100,000+ active installs and over 400 5-star reviews. It’s clearly a winner!
Depending on the license level you’re running, you’ll get different features. All licenses include Stripe and PayPal donations, donor management, reporting, and support.
ExactMetrics will integrate with any version of GiveWP, so you can connect any of them to Google Analytics and WordPress.
How to Track Donations in WordPress
We’ll show you how to set up Google Analytics to track donations on your WordPress site in 4 easy steps.
- Step 1: Install ExactMetrics
- Step 2: Connect to Google Analytics
- Step 3: Enable the eCommerce Addon
- Step 4: View Donation Reports
This method works for sites using GiveWP or other eCommerce plugins (WooCommerce, Easy Digital Downloads, Restrict Content Pro, MemberPress, LifterLMS, and MemberMouse).
If you already have ExactMetrics installed, skip to step 3.
Step 1: Install ExactMetrics
ExactMetrics is the most powerful Google Analytics plugin for WordPress, without the high costs. In addition to the donation tracking we’re going to be setting up here, you’ll get a whole list of features that will help you grow your business with the help of analytics.
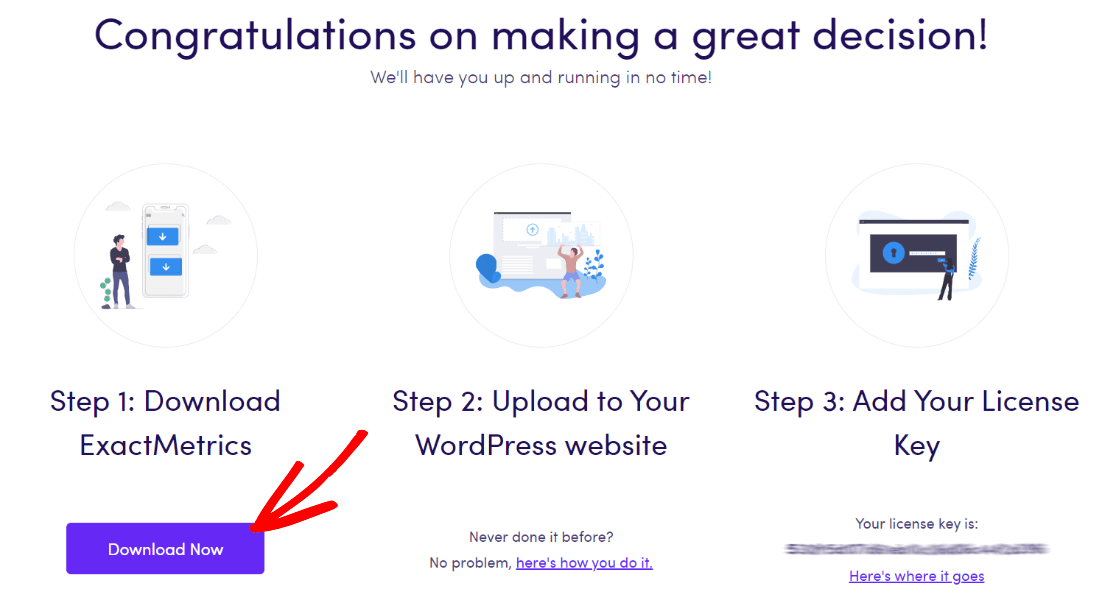
So to start, head to the Pricing page and get started with ExactMetrics at the Pro level. Once you complete checkout, download the plugin.
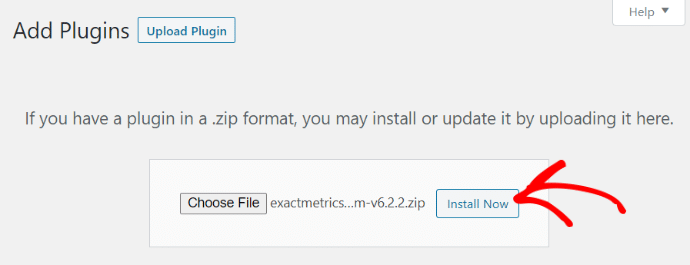
Next, upload it to your website.
Step 2: Connect to Google Analytics
Now that you have ExactMetrics installed, you can add your license key and connect your Google Analytics account. To get set up, click on ExactMetrics under your WordPress Dashboard and click the big green Launch the wizard! button.
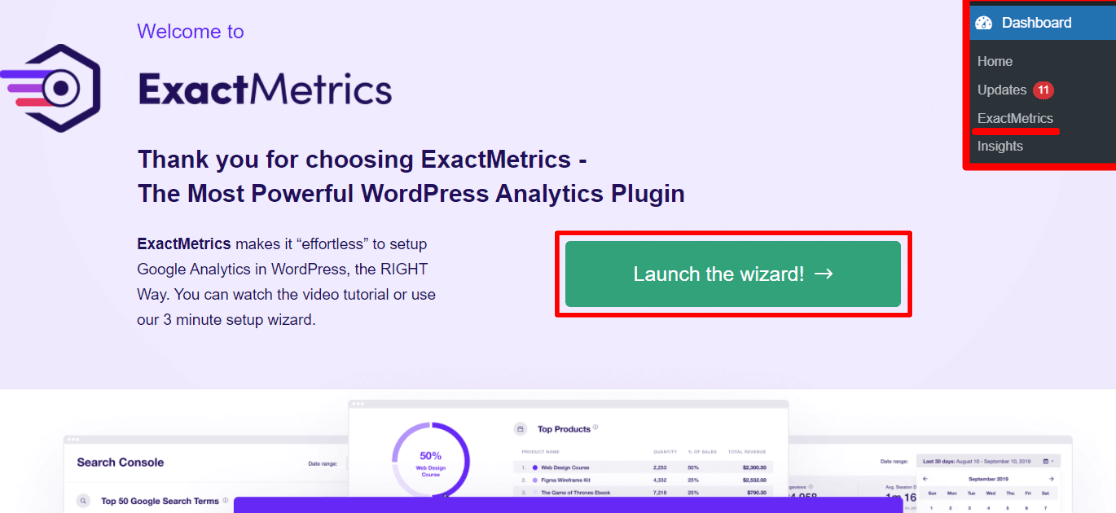
Once you’re in the wizard, you’ll get to this page where you can add your license key and connect with Google Analytics:
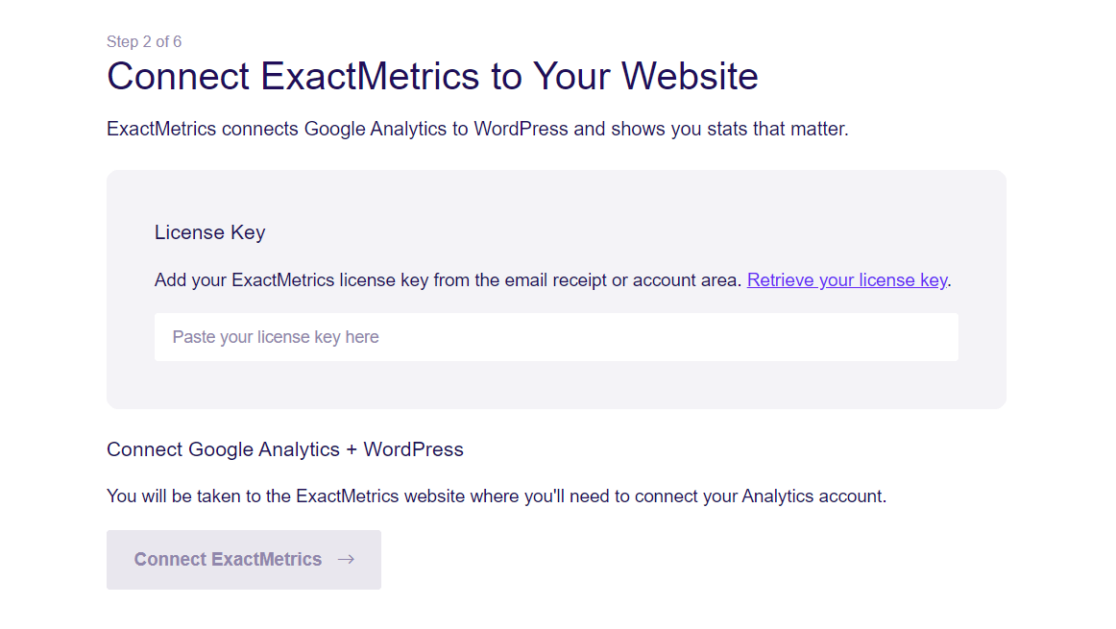
After that, just keep following the setup prompts, answering questions about your business, until setup is complete. If you don’t have a Google Analytics account yet or need more help with this step, head to our step-by-step tutorial on How to Add Google Analytics to WordPress.
Step 3: Enable the eCommerce Addon
ExactMetrics makes it really easy to setup eCommerce tracking for nonprofits or any website that accepts donations or payments. You won’t need to use a complicated tool like Google Tag Manager or touch a single line of code.
Just head to ExactMetrics » Addons in WordPress and install the eCommerce addon.
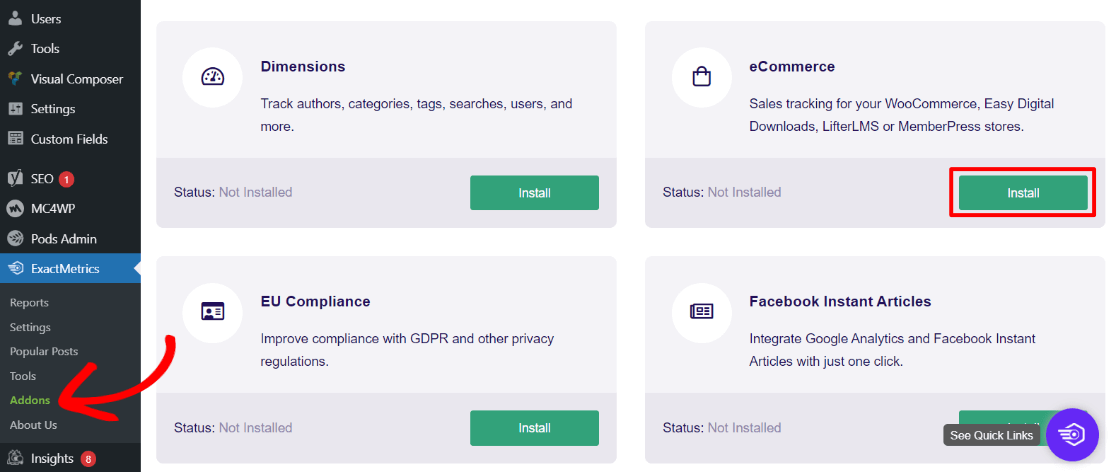
The addon will automatically activate on your site when it finishes installing. While you’re here, we also recommend installing the User Journey addon which will let you see every step a visitor took on your site before making a donation.
If you go to ExactMetrics » Settings » eCommerce, you can see that GiveWP or whichever plugin you use for donations has been automatically detected.
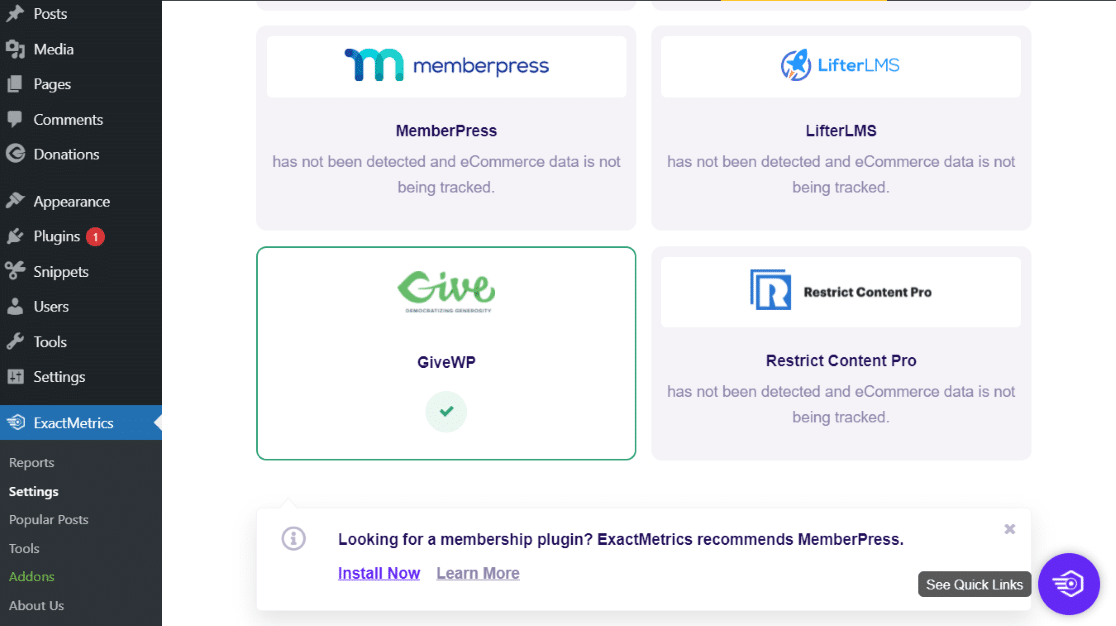
That’s it! You now have eCommerce (donation) reports enabled in both Google Analytics and ExactMetrics. You’re ready to get started with donation reporting.
Donation Tracking Reports in WordPress
Let’s take a quick look at the reports you’ll now have access to after connecting ExactMetrics and Google Analytics eCommerce reporting.
Head to ExactMetrics » Reports. At the top of your eCommerce report, you’ll see your conversion rate, number of donations, (transactions), total donated amount (revenue), and average donation amount (avg. order value):

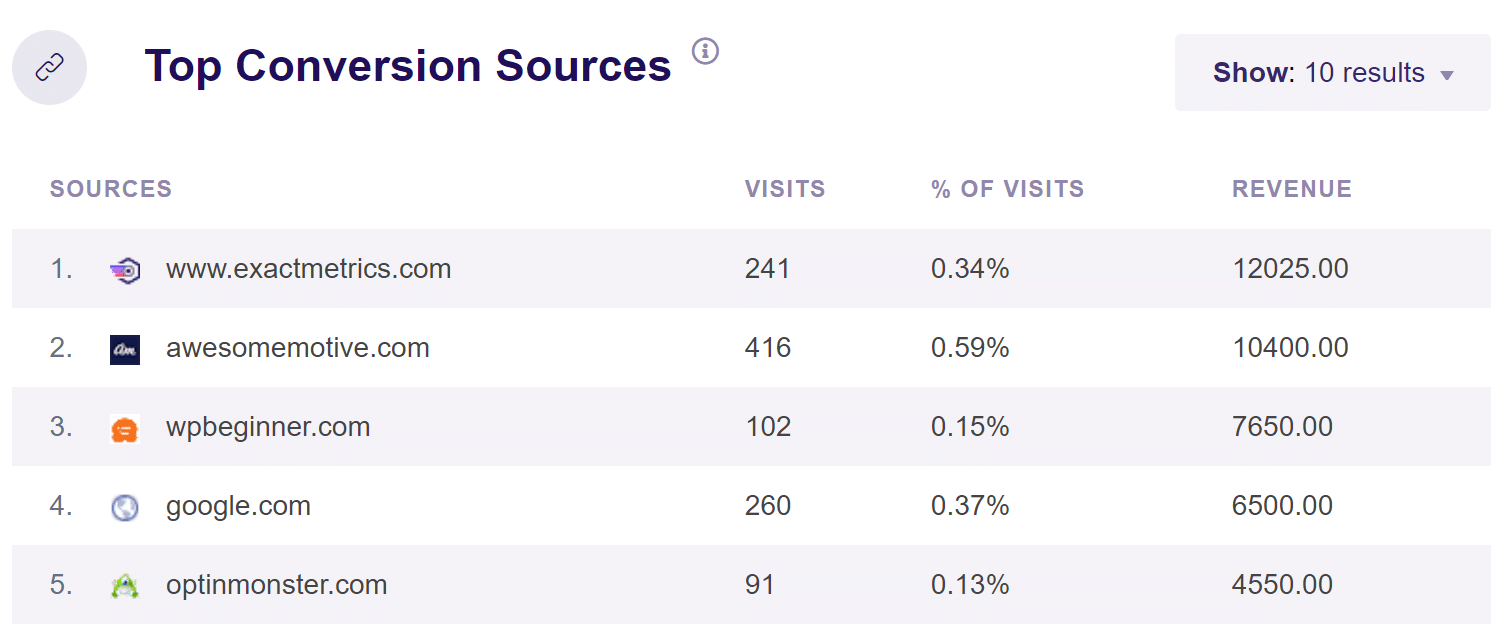
Scroll down to find the Top Conversion Sources report. This report is sorted by revenue (donation amount). You can quickly and easily see if there’s a certain referral source that’s sending you a lot of donors (converting traffic), or one that’s underperforming:
Do you use UTM parameters to track your email and marketing campaigns? If so, navigate to Traffic » Campaigns.
Here, you can see how many potential donors each campaign is bringing to your site (sessions), the number of donations attributed to each campagin (purchases), how much money each campaign raised in total (revenue), which campaign is driving visitors to donate (conversion rate), and more.
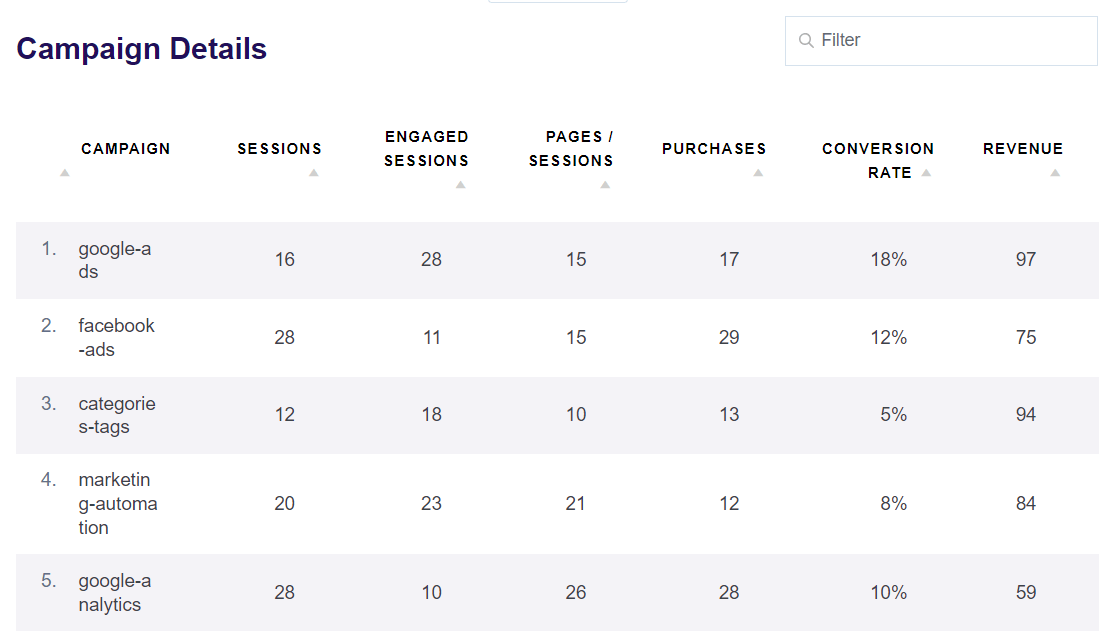
You can use other reports under Traffic to see more about where your donor are coming. For example, use the Traffic Overview report to see which channels are bringing or donors to your site (social media, organic search etc.).
Now, in the ExactMetrics Forms report, you’ll be able to see which of your forms are taking in the most donations.
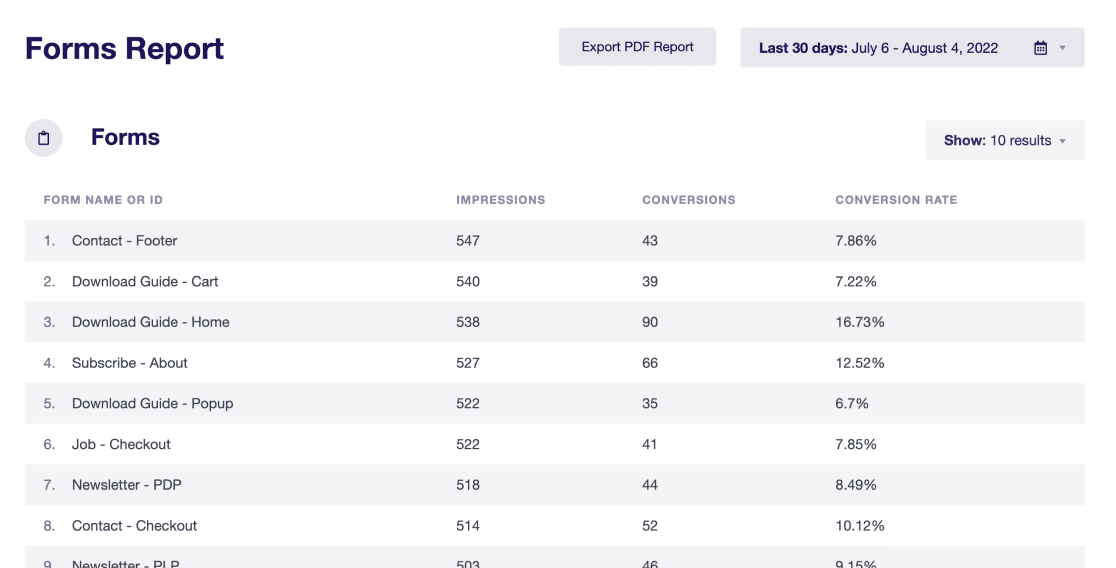
If you activated the User Journey addon in the previous step, you can click Exactmetrics » User Journey to see breakdowns of every donation including the campaign and donation amount.
Click any Transaction ID to view every step a visitor took on your site before donating and how long each step took.

To learn more about all the ExactMetrics reports and what you can do with them, read 18 Simple Ways to Grow Your Business with Google Analytics.
That’s it for now! We hope you found our tutorial on setting up Google Analytics donation tracking in WordPress helpful.
Not using ExactMetrics yet? What are you waiting for?
Don’t forget to follow us on Twitter and Facebook to see all the latest reviews, tips, and Google Analytics tutorials.


