Are you wondering what Google Analytics exit pages are? Or more importantly, how do you find and use your own website’s exit pages in Google Analytics to understand your visitors better?
As a marketer, keeping track of exit pages is crucial for boosting conversions and enhancing the customer journey. In this article, we’ll walk you step-by-step through how to find exit pages in Google Analytics. Then, you can leverage this data to optimize your site and grow your business.
Before we get started…
What Is an Exit Page in Google Analytics?
An exit page refers to the last pages visitors view before leaving your website. For example, let’s say a visitor lands on your website homepage, goes to the blog section, reads an article, and then exits your website. In this situation, the exit page is the blog post they read before leaving your site.
Why Track Exit Pages with Google Analytics?
By understanding which pages have the most exits, you gain valuable information about your visitors’ behavior. For instance, let’s say you run an eCommerce store, if your purchase confirmation page has a high exit rate, that makes sense and it’s nothing to worry about. But, what if your checkout page or a product page has a high exit rate? That indicates potential issues that you should investigate such as cart abandonment.
Using Google Analytics, you can identify where visitors drop off in the customer journey, analyze their browsing patterns, and optimize your website accordingly. Employing exit intent strategies, like offering discounts or exclusive deals, can significantly improve conversions and reduce drop-offs at crucial stages of the sales funnel.
Now, let’s see how to find Google Analytics exit pages.
How to Track Exit Pages (GA4)
While Google Analytics 4 is a powerful tool, it can be overwhelming, especially if you’re new to using it. Luckily, we’ll show you step-by-step how to find your exit pages in Google Analytics.
- How to Set Up Google Analytics for WordPress
- Step 1: Install ExactMetrics
- Step 2: Connect Google Analytics
- How to Find Exit Pages in Google Analytics
- Step 1: Create a New Custom Exploration
- Step 2: Import Dimensions and Metrics
- Step 3: View Your Custom Exit Page Report
Set Up Google Analytics for WordPress
ExactMetrics is the best premium WordPress Analytics plugin, allowing you to easily set up Google Analytics without editing any code or needing a complicated tool like Google Tag Manager.
Already have Google Analytics set up? Jump down to the Google Analytics tutorial.

With ExactMetrics, you get advanced tracking right out of the box, with an extremely user-friendly interface and Google Analytics reports, right inside your WordPress dashboard.
Plus, you gain access to tons of additional Google Analytics features and advanced tracking capabilities with just a few simple clicks.
Here are some of ExactMetrics’ most popular features:
- Custom event tracking and custom dimensions
- 1-click eCommerce tracking
- Conversion tracking for Google Ads, Microsoft (Bing) Ads, and Meta (Facebook) Ads
- Advanced form tracking and integration with the most popular form builders
- Display your most popular posts or products
- Affiliate and outbound link tracking
- Social media tracking
- Media and video play tracking
- And much more…
Head to the pricing page and grab the license that works for you to start tracking your website and exit pages with Google Analytics.
Step 1: Install ExactMetrics
After purchasing a license, you’ll need to install ExactMetrics on your WordPress website.
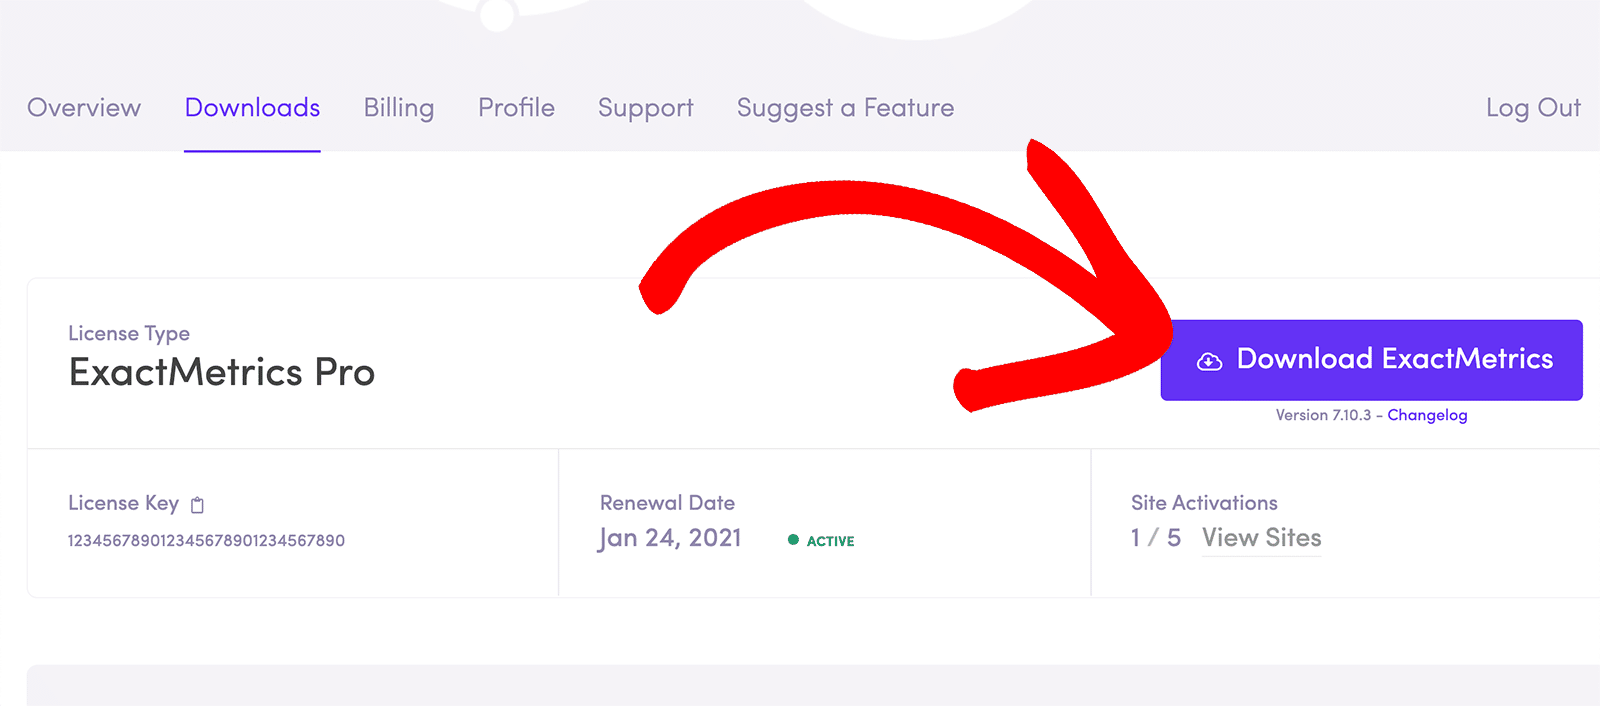
You can download the setup files from your account area.
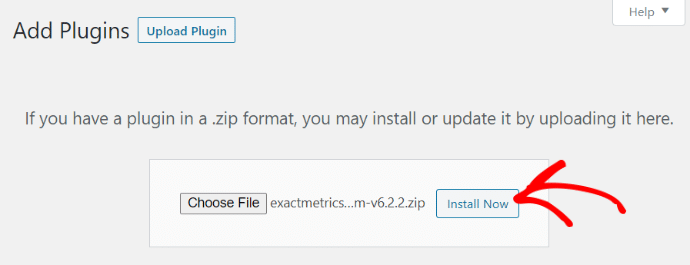
After that, upload the ZIP files to your WordPress website by going to Plugins » Add New » Upload Plugin and clicking the Install Now button.
Once the plugin is installed, press Activate Plugin.
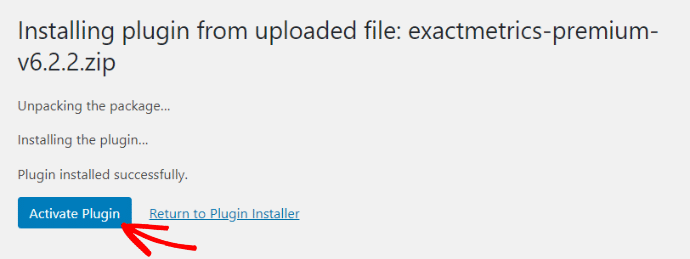
ExactMetrics will now be ready for use on your website.
Step 2: Connect Google Analytics
The next step is to connect Google Analytics with ExactMetrics. Usually, you’d need to add tracking code to your website’s core files, but with ExactMetrics, it’s all taken care of for you.
All you have to do is press the button to Launch the wizard!
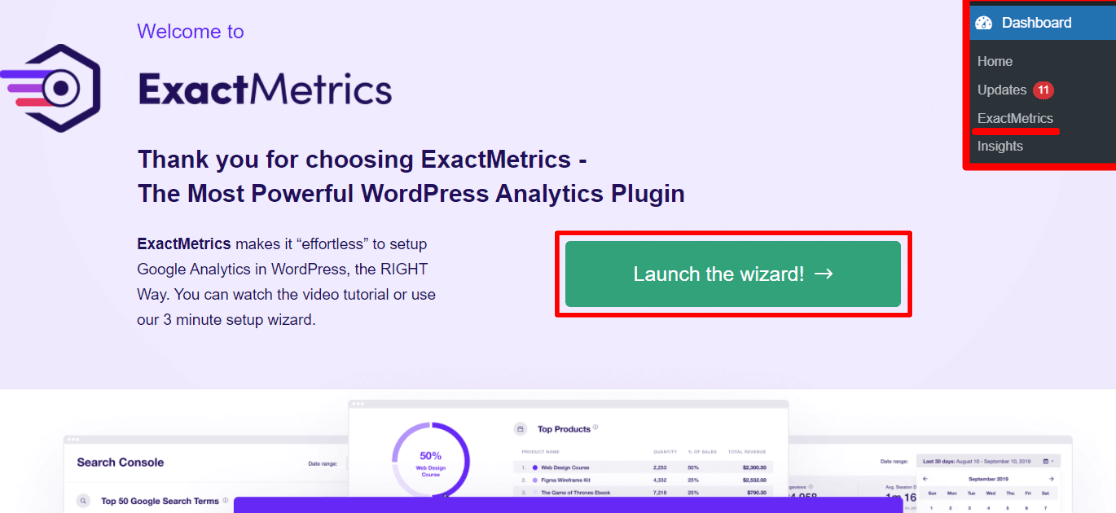
Next, just follow the simple instructions in the setup wizard
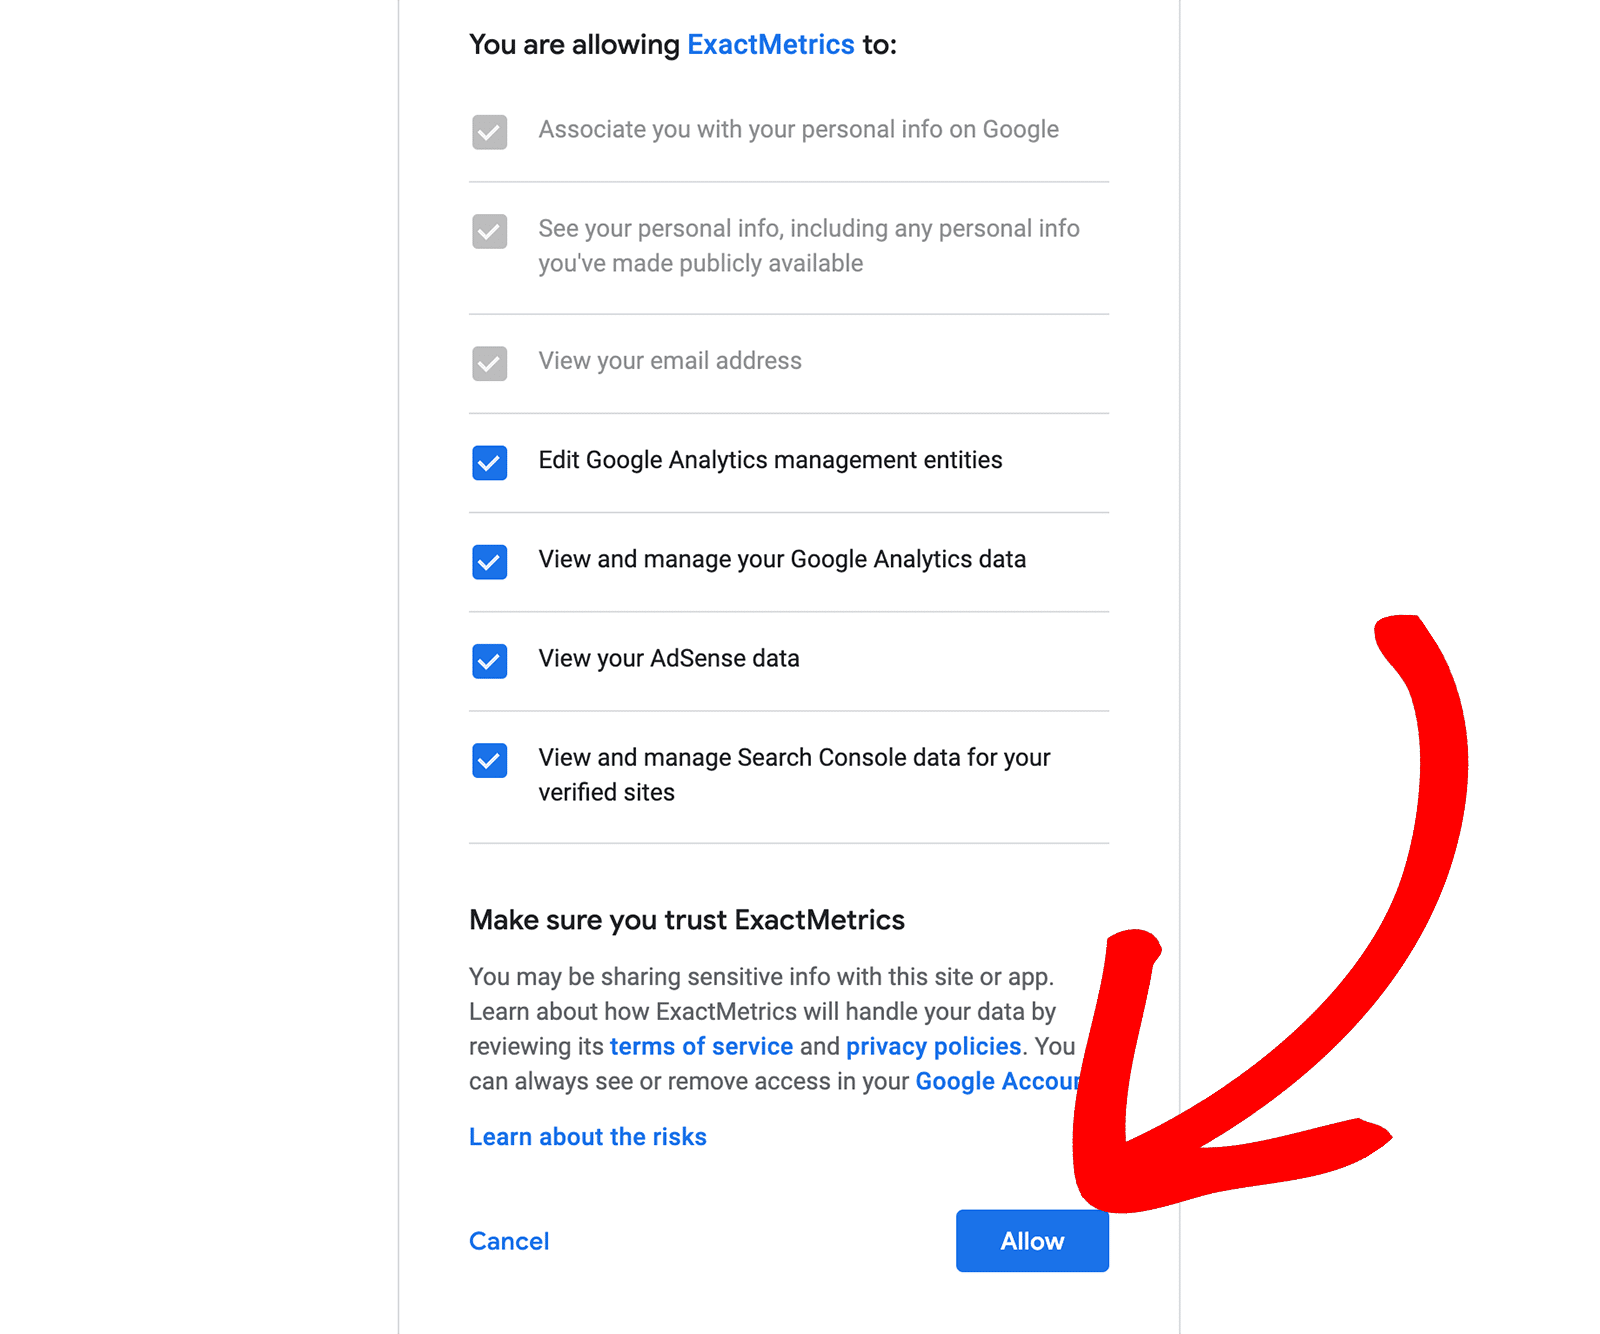
You can refer to our guide on how to add Google Analytics to your WordPress website for a detailed tutorial on getting set up with ExactMetrics.
How to Find Exit Pages in Google Analytics
In the previous version of Google Analytics, exit pages were pretty easy to find in your regular reports. However, in the new version of Google Analytics, we’ll need to set up a custom report to find them.
Step 1: Create a New Custom Exploration
From your Google Analytics account, click the Explore tab and then click to create a Blank custom report.
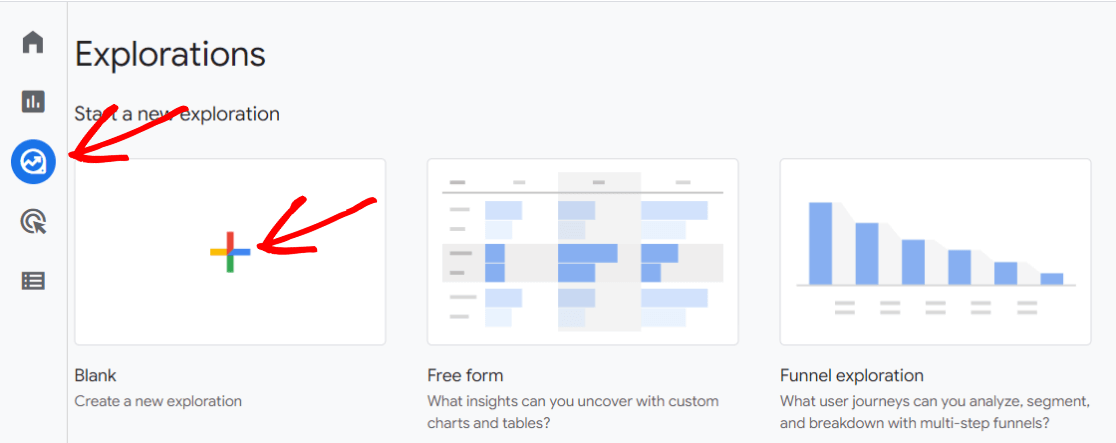
Now, you’ll see a blank report with two columns on the left.
Step 2: Import Dimensions and Metrics
First, go ahead and give your report a name so you can easily find it later. Next, we need to add dimensions and metrics to our custom exploration report.
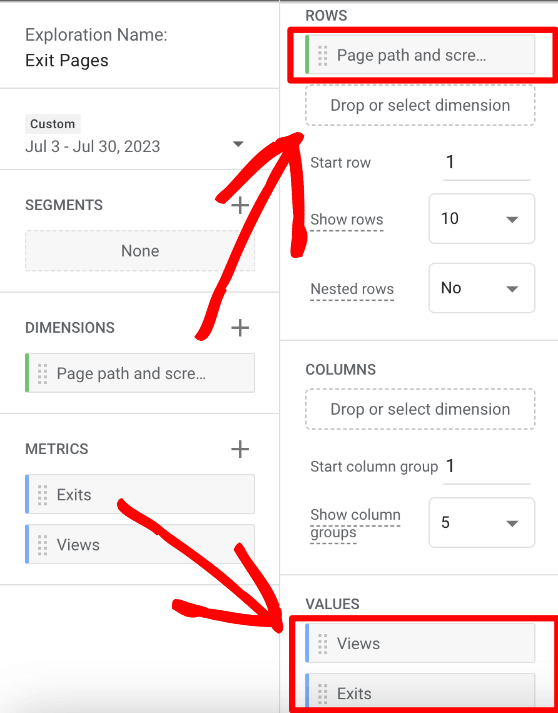
Click the + sign next to Dimensions. In the popup that appears, type Page path and screen class. When you see it, click the checkmark box and then press Import.
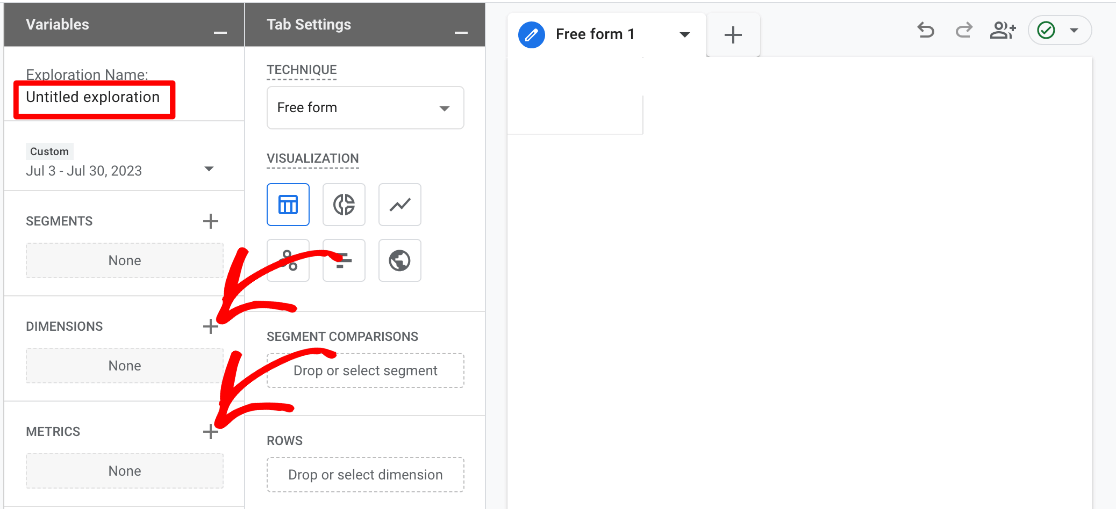
Now, do the same thing with the + sign next to Metrics. Use the checkbox to include Exits and Views, and then press Import in the popup.
Your columns should now look like this:
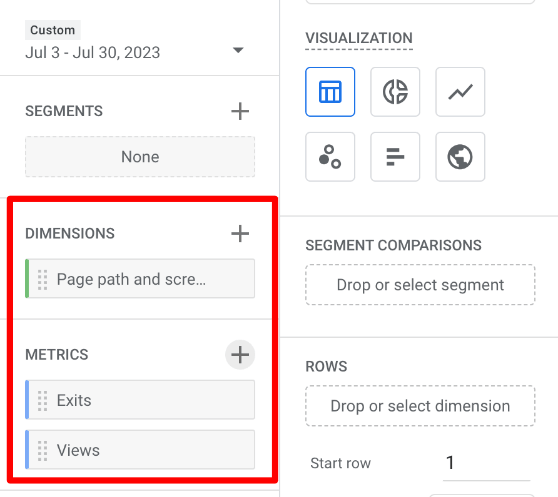
Next, you need to drag Page path and screen class from Dimensions to the right column under Rows.
Then, drag Exits and Views from Metrics to the right column under Values.
Step 3: View Your Custom Exit Page Report
After dragging your dimensions and metrics to the proper section, your custom report will automatically populate for the date range you’ve selected.
You can click the top of the Exits column to sort the pages by the number of exits.
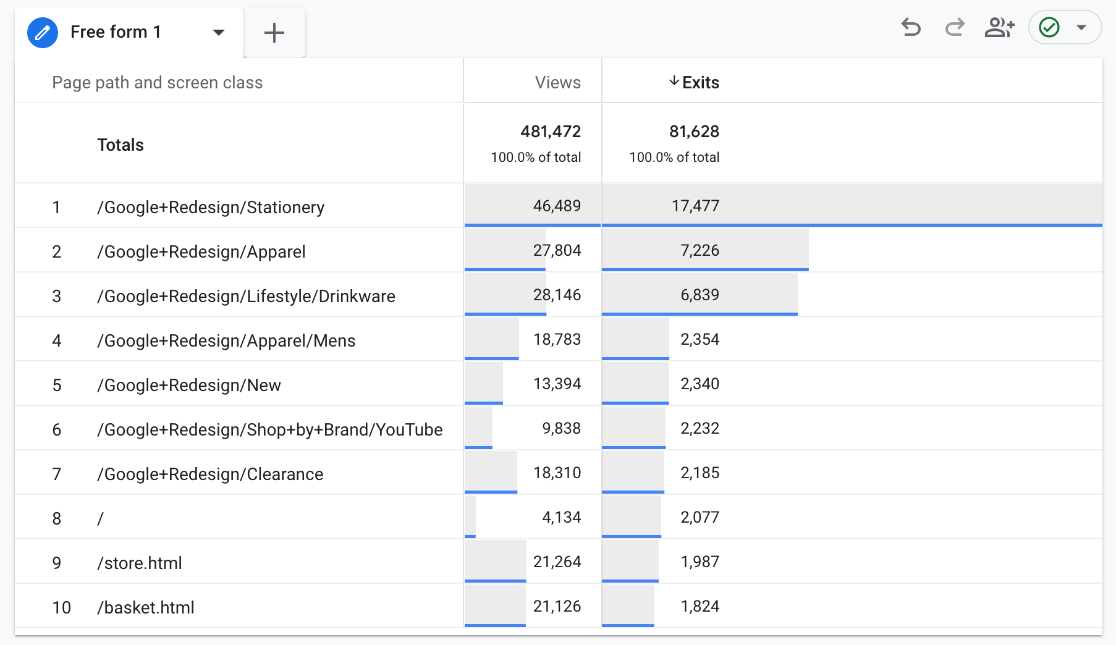
As you can see, this report now shows your pages, the number of views, and the number of exits. You can quickly see your top exit pages to determine any red flags or add more dimensions and metrics to dig deeper.
How to Calculate Exit Rate in Google Analytics?
Unfortunately, Google Analytics won’t automatically calculate the exit rate (at least not yet). However, you can find the exit rate for your pages by taking the number of visitors who left your site (Exits) divided by the number of pageviews (Views) to arrive at a percentage.
The easiest way to do this for an entire report would be to use Google’s Looker Studio, which is a data visualization tool. Otherwise, you can always export the report in CSV format and use it in a tool like Excel or Google Sheets.
Is Exit Rate the Same as Bounce Rate?
Bounce rate and exit rate both measure the percentage of people leaving a page after viewing, but they’re not the same. Bounce rate measures the percentage of visitors who don’t interact with your webpage before leaving.
On the other hand, the exit rate measures how often a page is the last one in a session, regardless of how many pages visitors viewed or interacted with beforehand.
And that’s it!
You now know what Google Analytics exit pages are and how to find them by creating a custom report.
If you enjoyed this article, you’ll definitely want to check out How to Track Link Clicks in Google Analytics and WordPress.
Not using MonsterInsights yet? What are you waiting for?
Don’t forget to follow us on Twitter, Facebook, and Youtube for the best WordPress tutorials and Google Analytics updates.

